Dmytro Spilka
In this quick tutorial, we are explaining how to create a subdomain using CPanel and then install WordPress. Subdomain functions separately from the main root domain, and can be used to set-up a whole new website. Subdomains have the following format: test.yourwebsite.com. For example, if you wish to start a forum on your existing website, subdomain can de a good option to go with, as it may require a different technology or a theme.
In this tutorial, we’ll be using CPanel.
1. Creating a Subdomain with CPanel
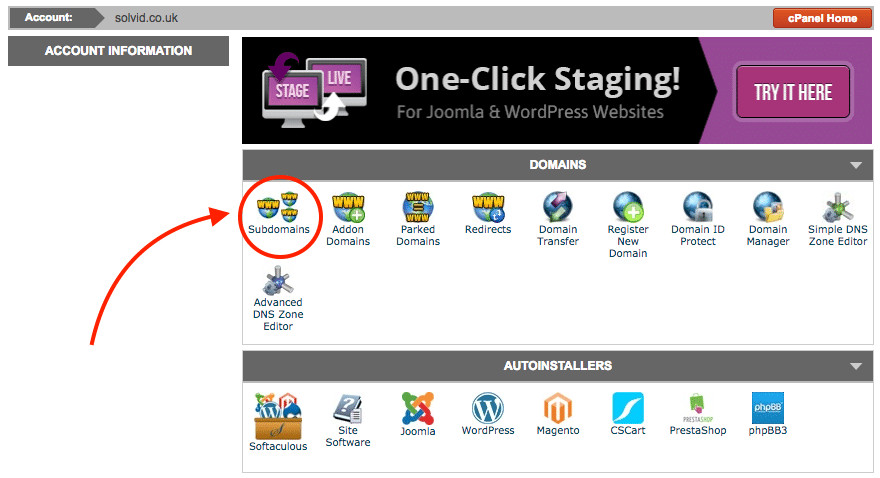
Step 1: Login to your CPanel (most hosting providers use CPanel and should have given you the access). When logged in, navigate to the dashboard and locate “Subdomains” button under “Domains” section.
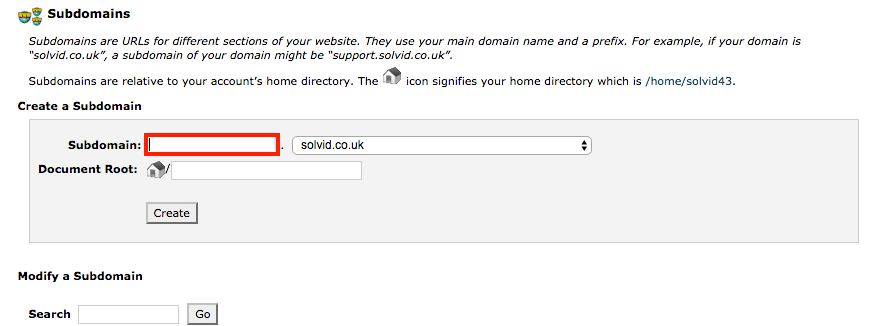
Step 2: Type in your preferred name for a subdomain and select domain to create it under. This will automatically create a document root.
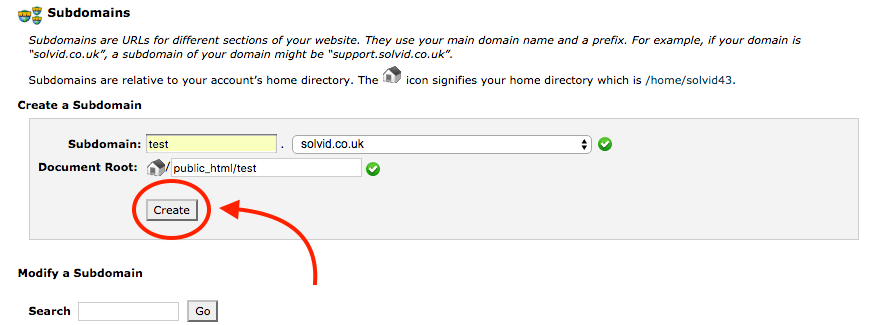
Step 3: Here is an example. Ensure that your subdomain name is correct and then hit “Create”.
2. Installing Wordpress on a Subdomain
Step 1: After you’ve created a subdomain, it’s time to go and install WordPress (or any other preferred CMS) on a new subdomain. Go back to the CPanel dashboard and locate “WordPress Installer” under “WordPress Tools” section.
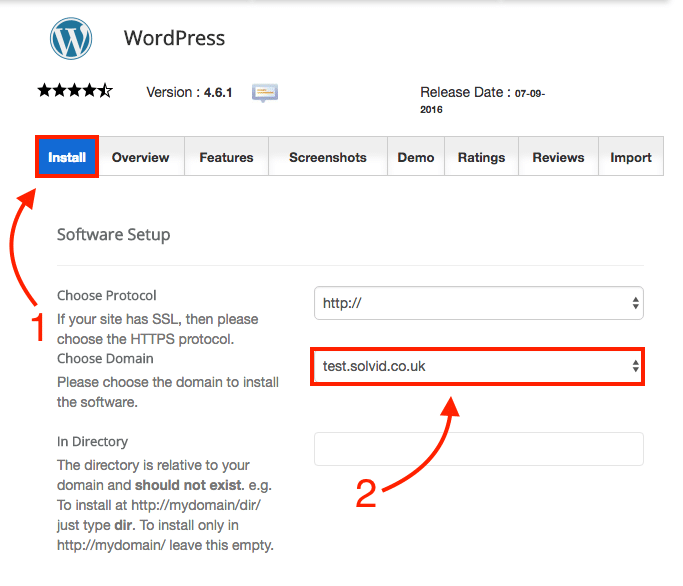
Step 2: Click on the install tab and choose the domain to install WordPress on (in this case it’s a subdomain we’ve just created “test.solvid.co.uk”). After that, scroll down and click “Install” button at the bottom of the page.
That’s it, we’ve just created a new subdomain and installed WordPress on it. Subdomains can be useful for forums, blogs or when creating a staging environment for a new website or project. Some brands use subdomains to separate different segments of the business.

Dmytro Spilka
Head Wizard
