
Dmytro Spilka
Robots.txt is a text file on the web server of the website that allows to control search engine bots and the way they interact with the site. Robots.txt is the first file that search bots access when attempting to crawl the website.
1. Creating Robots.txt
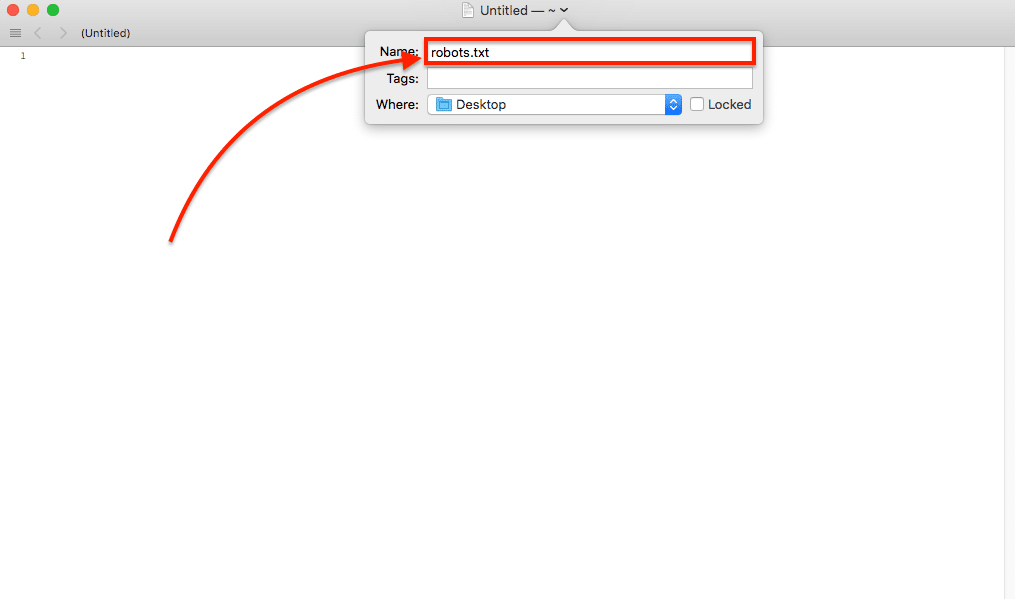
Step 1: Open a simple text editor, such as TextEditor or Notepad. Name the file robots.txt and select the location where you want the file to be saved.
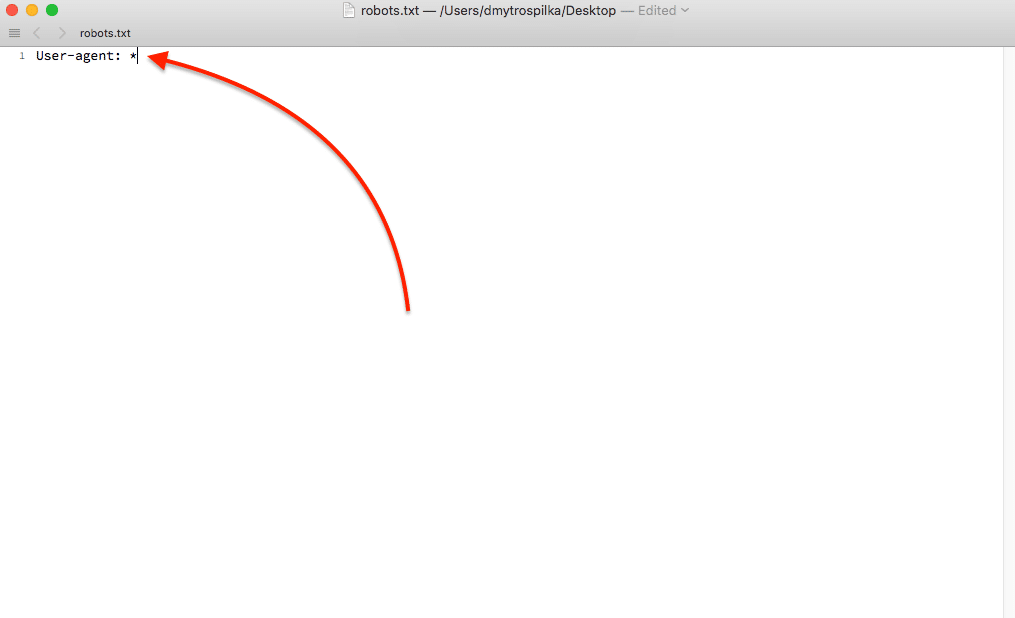
Step 2: Start the file with the first line. User-agent line specifies directions to all or a specific search bot.
- When “*” is added after the User-agent line, the rule will apply to all search engine bots.
- If you want the rule to only apply to a specific search bot, replace “*” with the name of the bot, for example Googlebot.
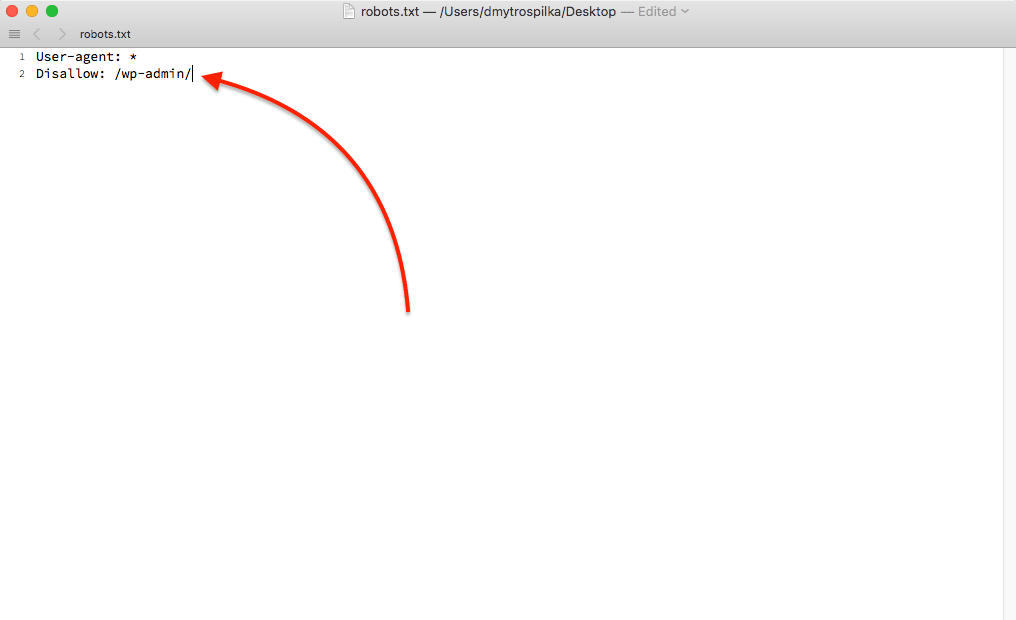
Step 3: Decide what folders and files you don’t want to get indexed.
- If you don’t want to block any of the folder or files, add the following line: Disallow:
- If you want to block the whole folder from being indexed, add this line: Disallow: /myfolder/
- If you want to block a specific file, add this line: Disallow: /myfile
- In the example above, /wp-admin/ folder has been blocked from indexing by all search bots.
2. Installing Robots.txt with CPanel
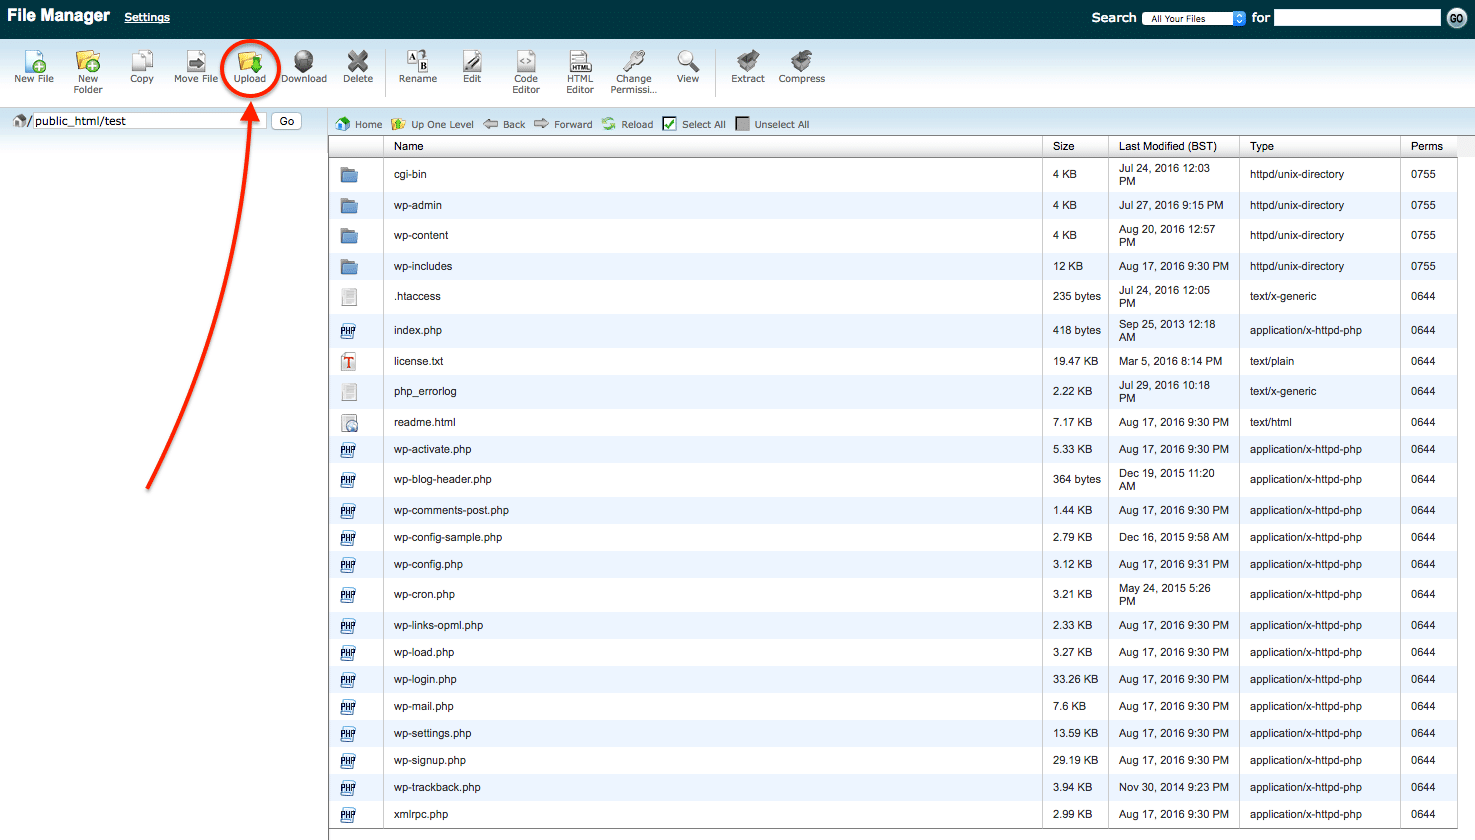
Step 1: Access your cPanel File Manager and choose the main site directory. Then, simply click on “Upload” button and upload your robots.txt file.
- Alternatively, create a new robots.txt file within the cPanel File Manager by clicking on the “New File” button.
Step 2: Go back to the cPanel File Manager. Go back to the main site directory and you will notice that your robots.txt file has been uploaded.
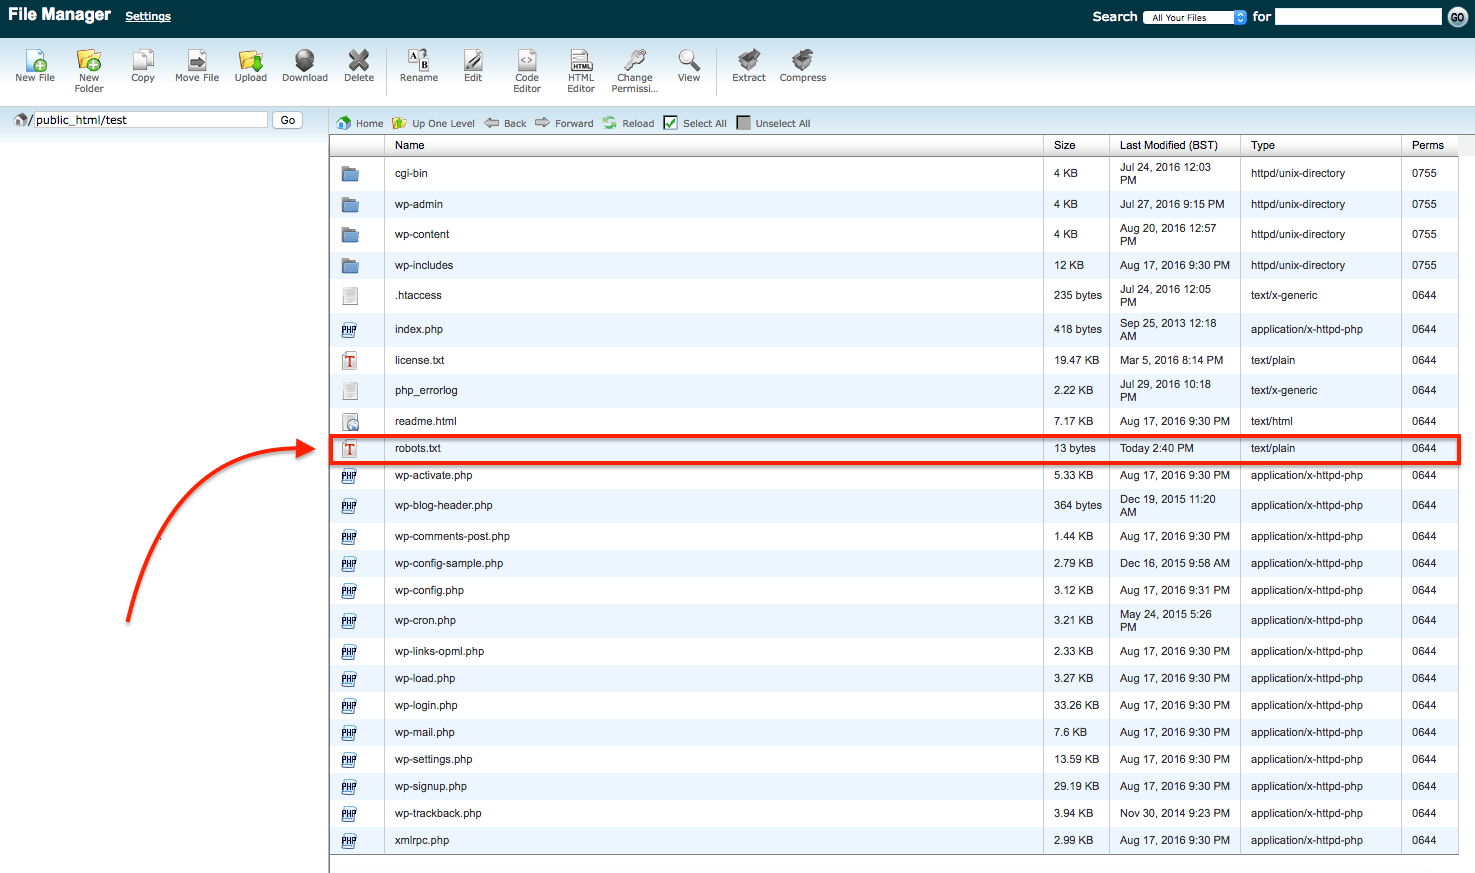
3. Alternative Installation with FTP
Step 1: Connect to the FTP. Connect to your website server using an FTP (File Transfer Protocol), such as FileZilla.
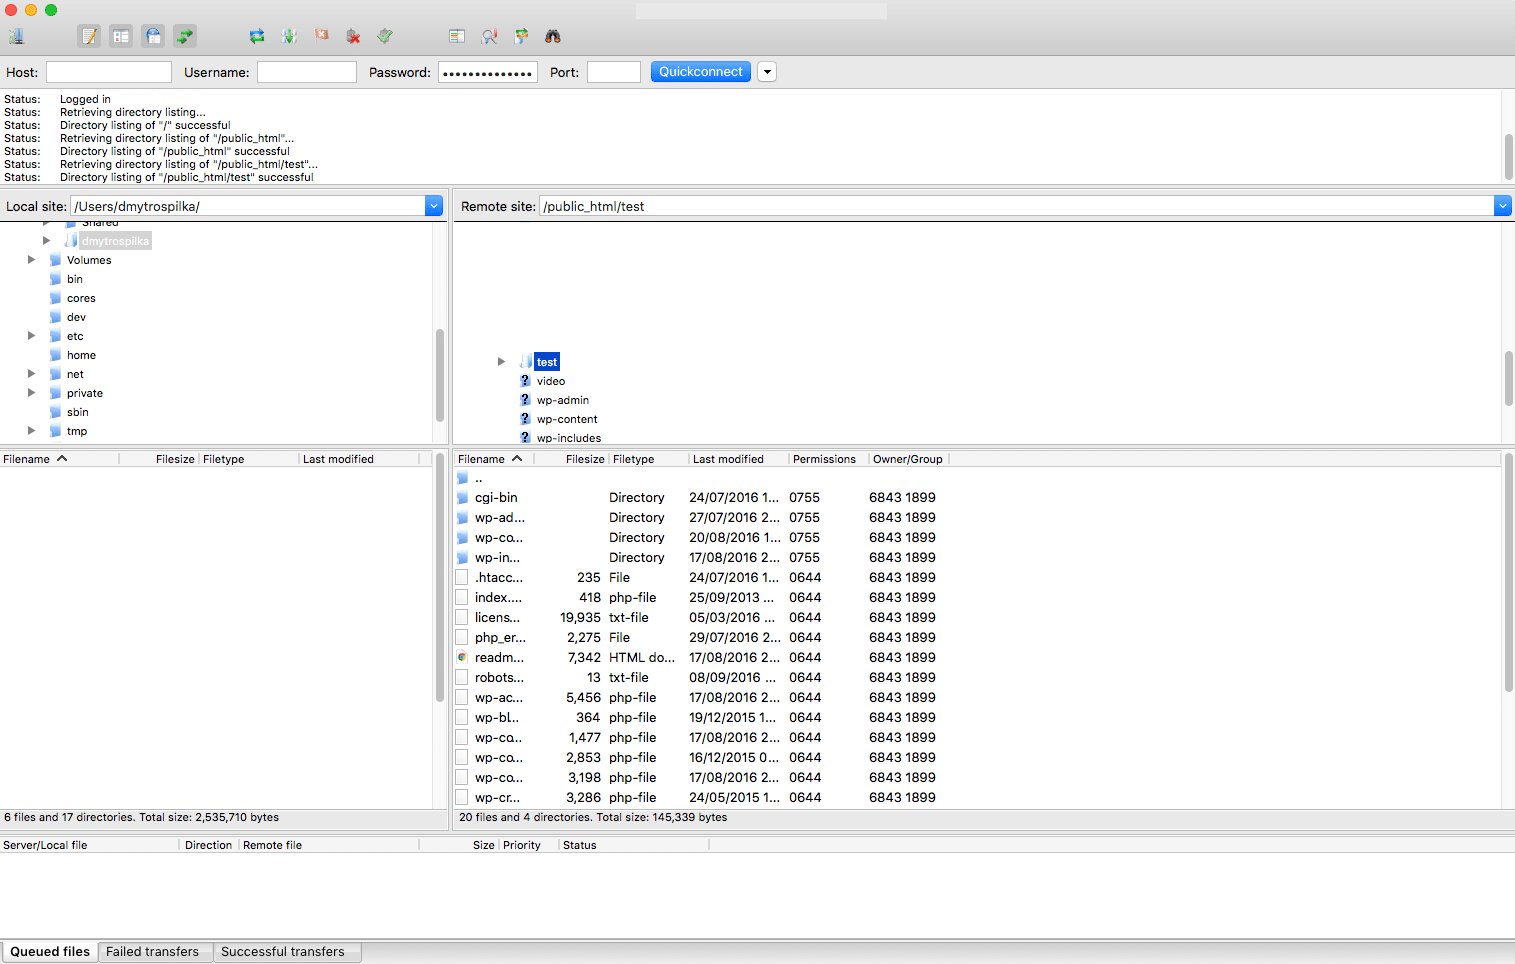
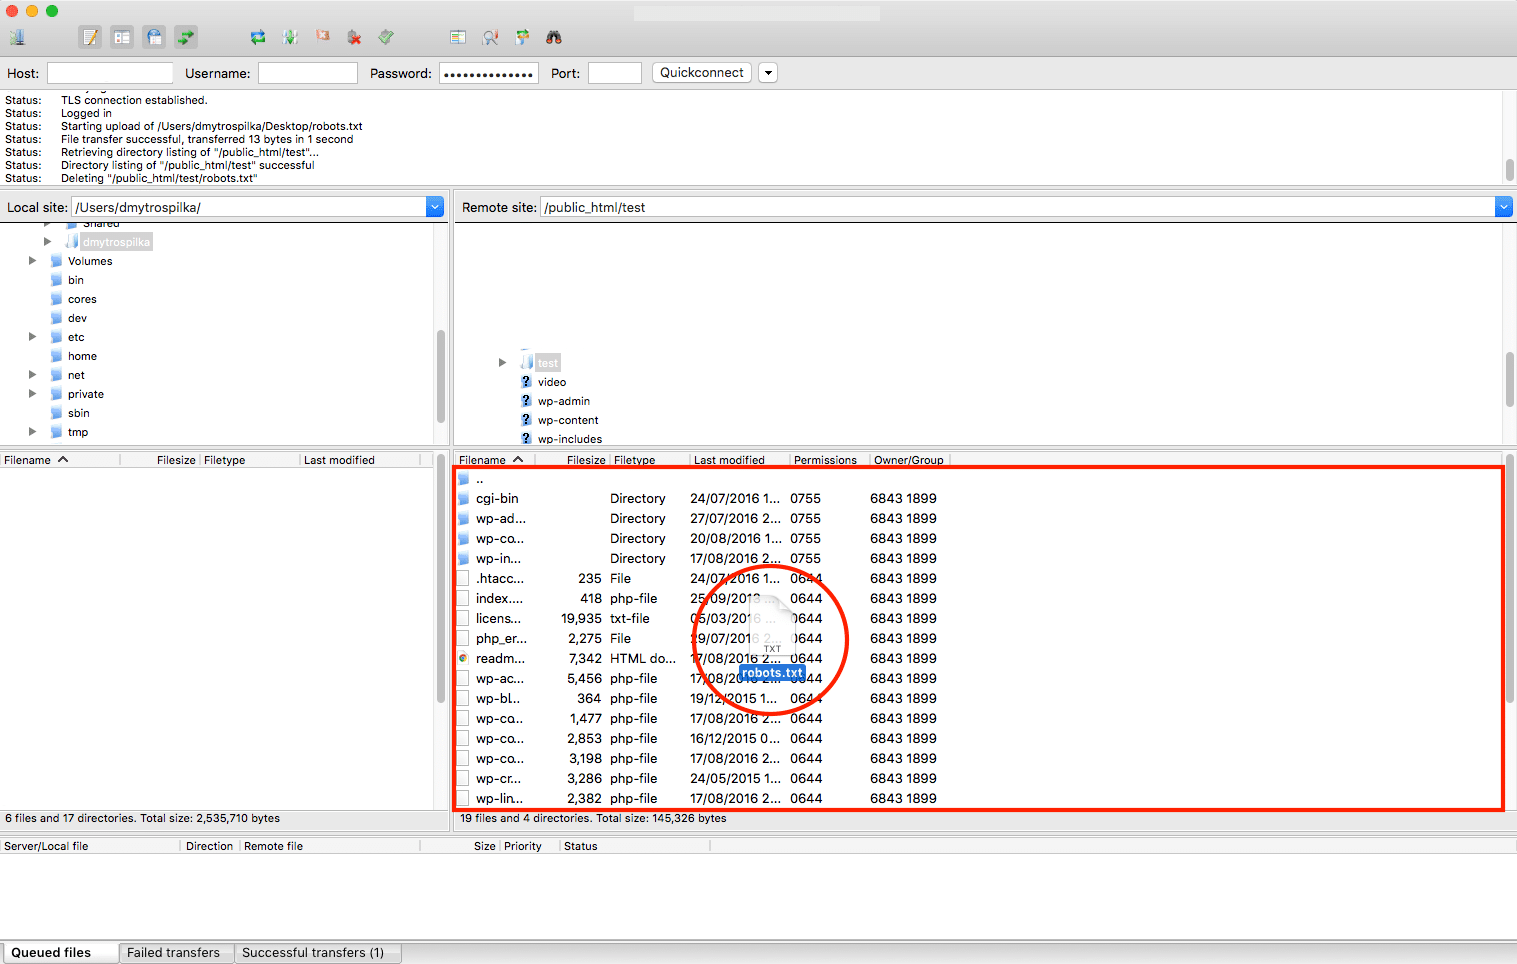
Step 2: Locate the main directory and upload. Navigate to the main website directory and simply drag and drop your robots.txt file.
For more information and rules about robots.txt, please read our Beginners Guide to Robots.txt.

Dmytro Spilka
Head Wizard

