In the past decade, WordPress has grown from a simple blogging application into a powerful content management system. It is now used to power some of the world’s largest websites — including TechCrunch, The New Yorker, and BBC America.
One of the main reasons for the incredible popularity of WordPress is its ability to install plugins that improve its functionality and appearance.
When building a blog or a website, it’s absolutely essential to think about the ways of promoting your blog and making it available to the public. One of the ways to do that is through SEO (Search Engine Optimisation) – a technique to improve website’s organic search engine visibility. To learn more about SEO and how it can help your website, blog or business, head over to this guide by Moz.
For this guide, I’ll assume that you’re somewhat familiar with the basics of On-Page (Internal & Technical) Search Engine Optimisation. Although SEO has a lot of components, fortunately for us, there is a tonne of plugins available at our disposal.
Currently, the most popular SEO plugin for WordPress is the Yoast SEO Plugin — a very powerful plugin that improves the search engine optimisation of WordPress. This plugin can dramatically improve your website’s search engine rankings and increase the number of visitors reaching your website.
This guide to Yoast SEO for WordPress will walk you through the process of downloading, installing and configuring this incredible plugin. Let’s get started!
Table of Contents
- What is Yoast SEO for WordPress?
- Installing Yoast SEO for WordPress
- Configuring Yoast SEO for WordPress
- Using Yoast SEO for WordPress
What is Yoast SEO for WordPress?
Yoast SEO for WordPress was created in 2010 by a small Dutch development company named Yoast. The company was founded by Joost de Valk in 2006 and now employs almost 50 staff. The company is primarily known for its SEO plugin, but they have also released eCommerce plugins, Drupal modules and Video SEO plugins.
Yoast SEO for WordPress is most popular WordPress SEO plugin available and is currently used by more than 4 million websites. It is a feature-packed plugin that has all of the tools necessary for a professional SEO specialist to optimise a WordPress website.
Installing Yoast SEO for WordPress
The installation process is similar to that of other WordPress plugins.
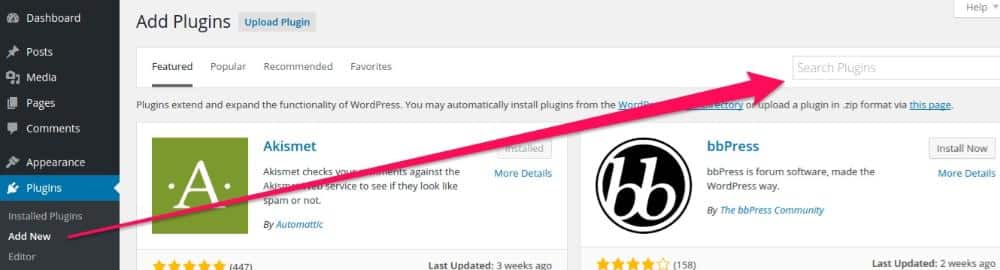
1. Log into the administration section of your WordPress installation
2. Click the “Plugins” on the left-hand menu
3. Click “Add New” on the Plugins submenu
4. On the right-hand side, you will see a search box. Search for “Yoast SEO” to find the plugin
5. WordPress will show you plugins that match the search term. “Yoast SEO” should be the first result. Click “Install Now” on the right-hand side of its listing.
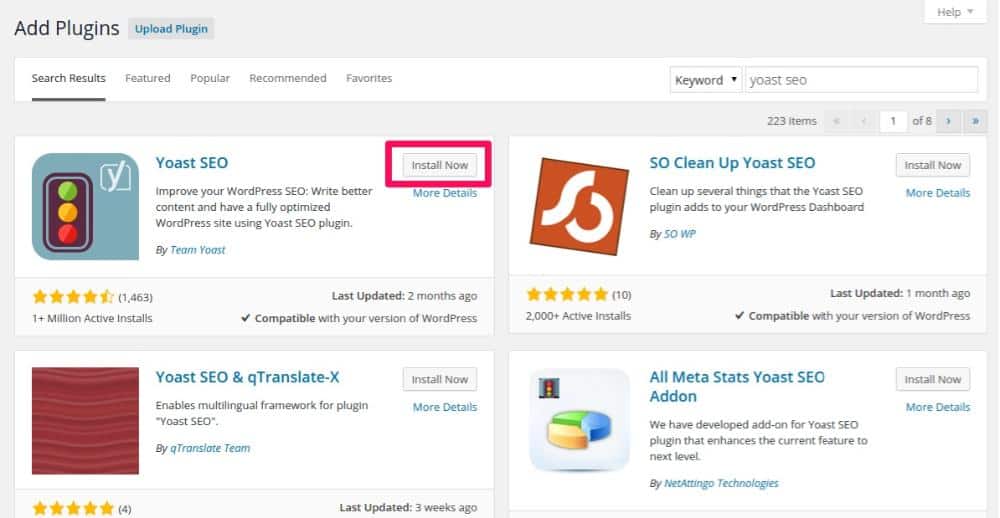
6. You will receive a pop-up asking if you want to proceed. Click “Ok”
7. Once the plugin is installed, click the “Activate Plugin” link. Congratulations! The plugin is installed.
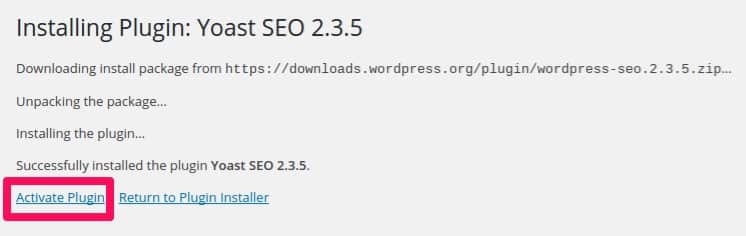
8. The options for Yoast SEO will be listed on the left-hand menu, underneath “Settings”.
Configuring Yoast SEO Plugin for WordPress
Installing the Yoast plugin was very easy! Configuring it is another matter. Because this is such a powerful plugin, there are various menu items and options available. Don’t be too daunted though — the plugin options are arranged very logically and once you learn the basic configuration options you will quickly grow to become comfortable using it. Here are few initial steps you should take when configuring the Yoast SEO Plugin.
Step 1 – Take a quick look at the menu items
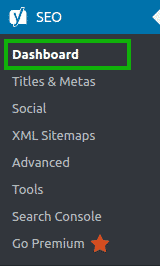
Below is a short summary of what each menu item represents. If you don’t see all of these menu items, you may have to enable Advanced Settings in Yoast. You can do this by clicking on the Yoast Dashboard, clicking on the Features Tab and toggling the Advanced Settings Switch.
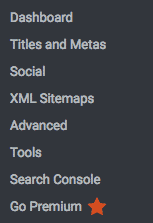
- Dashboard: This section contains a useful introduction tour and allows you to set some basic options including linking webmaster tools, security settings, and tracking. You can also reset the plugin to default settings from this page.
- Titles & Meta: You can set basic parameters and customise your titles and meta tags from this location.
- Social: This section allows you to associate your website with your social media profiles, enable Open Graph meta data, enable Google+ meta data, Twitter cards and much more.
- XML Sitemaps: XML sitemaps are created to help search engines correctly index your content. All of the options relating to your sitemaps reside here.
- Advanced: This section contains options relating to breadcrumbs, permalink settings and your RSS feed. These options are useful for advanced users and many people don’t modify them.
- Tools: This is another advanced section that contains a bulk editor (for changing meta tags for many posts at once), an import/export tool and a file editor (for editing .htaccess and robots.txt files).
- Search Console: If you have linked your website with Google Search Console, you can read any crawl errors or other page errors on your website here.
- Go Premium: You can learn more about the features of the premium Yoast SEO plugin here.
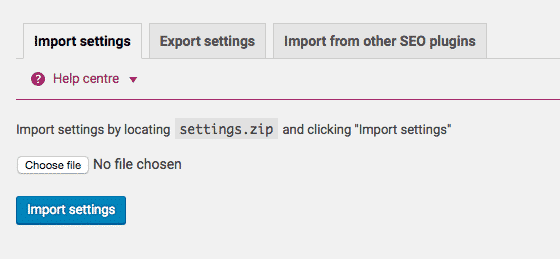
Step 2 – Import SEO settings from other plugins
If you previously had a different SEO plugin installed, you may wish to import that data into the Yoast plugin. Fortunately, Yoast has made the process simple! It can import plugin data from many other SEO plugins including the WooThemes SEO Framework, All-in-one SEO and HeadSpace2.
1. Navigate to the Tools section in the Yoast menu
2. Select Import and Export
3. Select the settings you wish to import and click start

Step 3 – Link webmaster tools to your website
The next step is to link any webmaster tools that you use with your website. Webmaster tools give you more insight into how well your website is performing in search engines. They also provide you with information about the visitors to your website and alert you to any problems with your website. The most popular webmaster tools are Google Search Console, Bing Webmaster Tools, and Yandex Webmaster Tools. Integrating webmaster tools is made easy thanks to Yoast SEO!
1. Visit the webmaster tools you are interested in setting up and add your website.
2. Once you have added the website, you will receive a code to add to your website, which verifies the site is yours. Copy this code.
3. Go to your blog and navigate to the Yoast SEO Dashboard
4. Add your code in the relevant field and click “Save Changes”
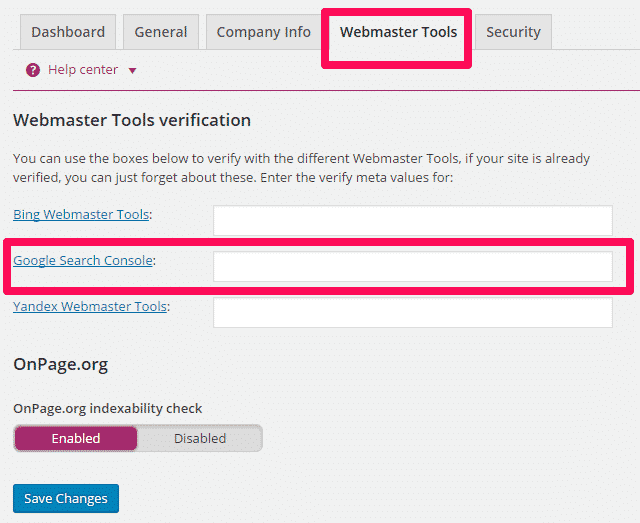
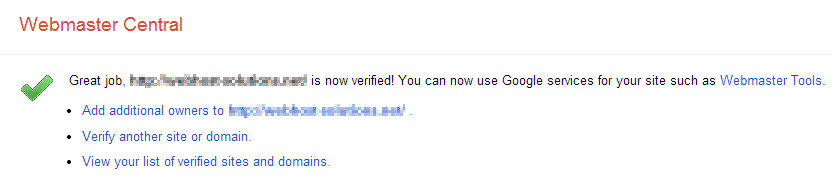
5. Go back to the webmaster tools website and confirm that your website has been linked to your account
Step 4 – Update your site’s titles and metas
One of the best ways to optimise your website is to ensure your pages have relevant titles and tags that are useful for both search engines and users. The Yoast SEO Plugin makes this task simple! Click on the Titles & Metas link on the Yoast SEO menu to get started.
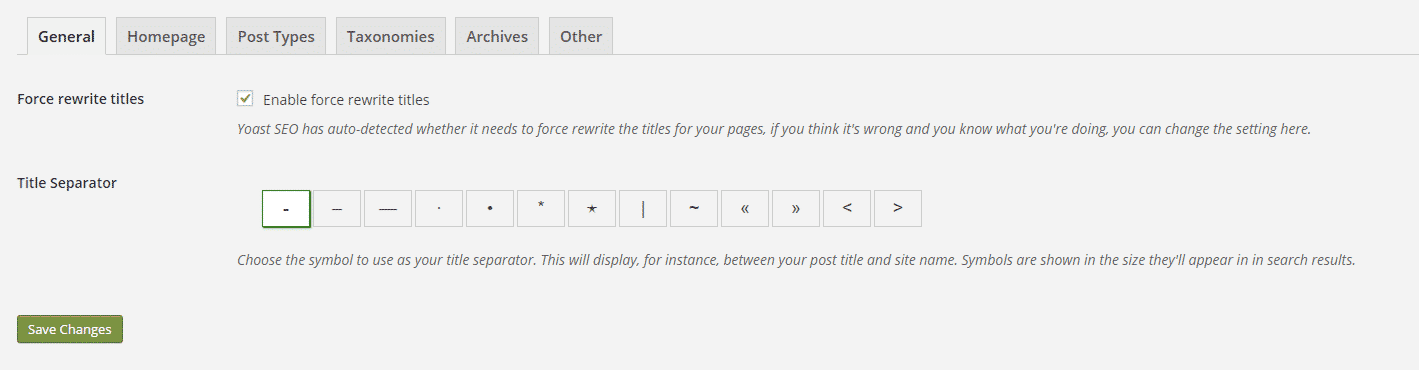
On the general tab, you can define which separator you use for page titles. It is largely aesthetic, but some people believe that certain symbols are more attractive for users browsing search engine results. The “force rewrite titles” is to fix any template that has its own SEO title functionality which interferes with Yoast SEO Plugin.
The homepage tab will let you quickly tweak the titles and metas of the home page of your website. Handy when you want to quickly alter the site’s landing page title.
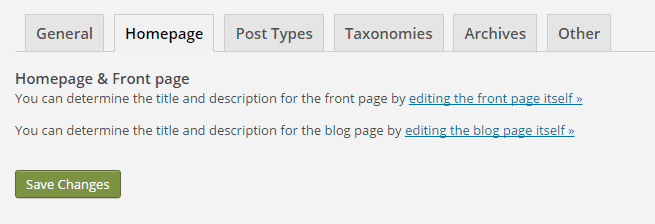
Note: All pages can be optimised on a page-by-page basis – and I’ll show you how to do that later in this guide.
The Post Types tab is where the Yoast SEO Plugin really starts to show you how powerful it is! You can use templates that define what the titles and meta description tags say on each page. These templates are very handy as they allow you to easily create SEO friendly titles and tags for the entire site.
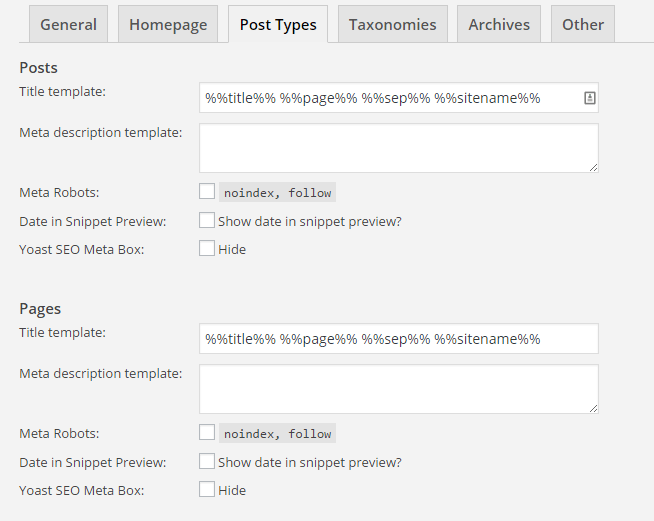
The Yoast SEO Plugin defines a number of template items you can use, including %%title%%, %%page%%, %%sep%% and %%sitename%%. You can read the full list of Yoast SEO variables here. You can add and remove these items to create incredible titles for each page. You can also change other options including meta robots, which allows you to hide certain pages from search engines.
Note: If you wish your posts and pages to be indexed by the search engines, I don’t recommend checking the noindex tag.
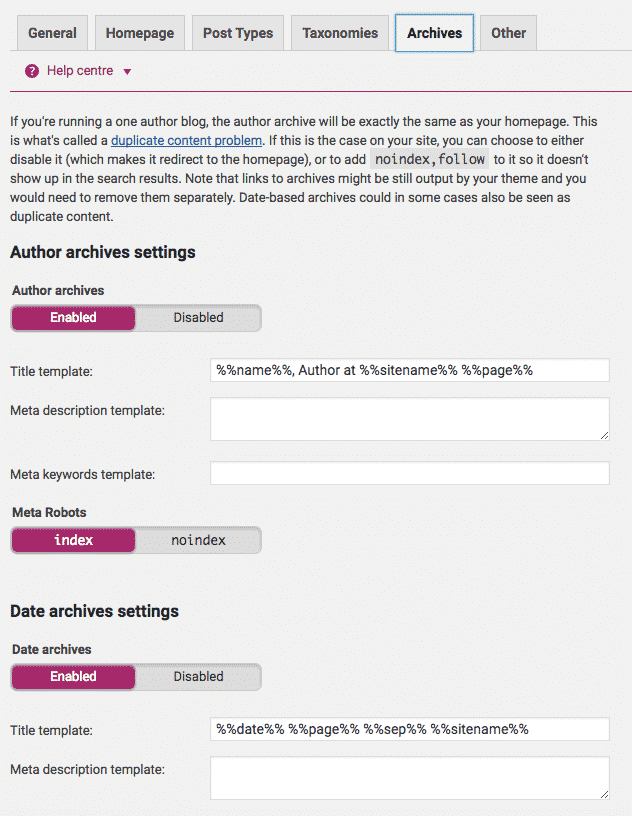
The Taxonomies and Archives pages let you alter the titles and meta description in a similar way.
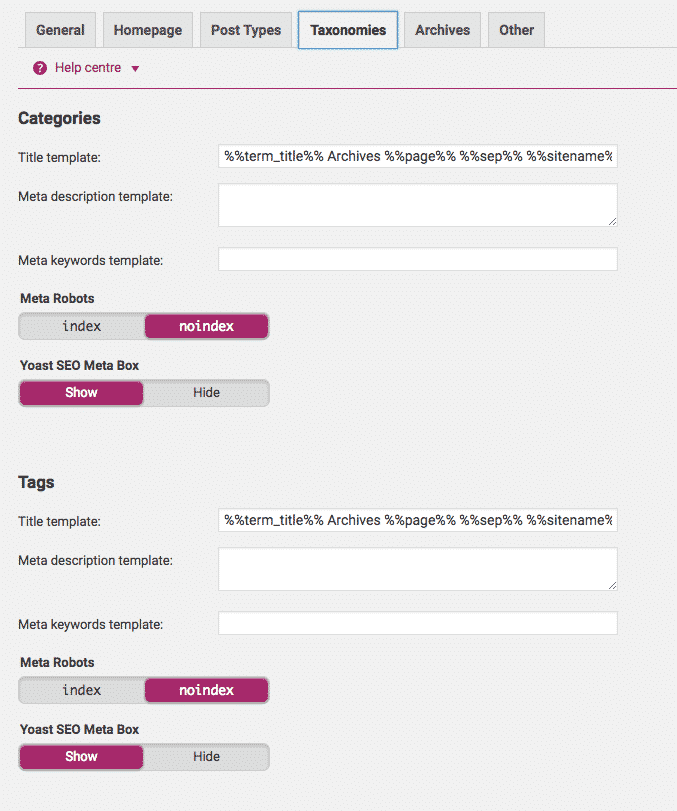
Note: Be careful at what you noindex, as if you noindex certain taxonomies, they will not appear in search results. That said, we’ve used noindex on tags and categories to prevent duplicate content issues.
Step 5 – Complete the social section
Although search engines don’t take social sharing/activity into consideration when it comes to search rankings, associating your website with your social profiles is essential for sharing purposes.
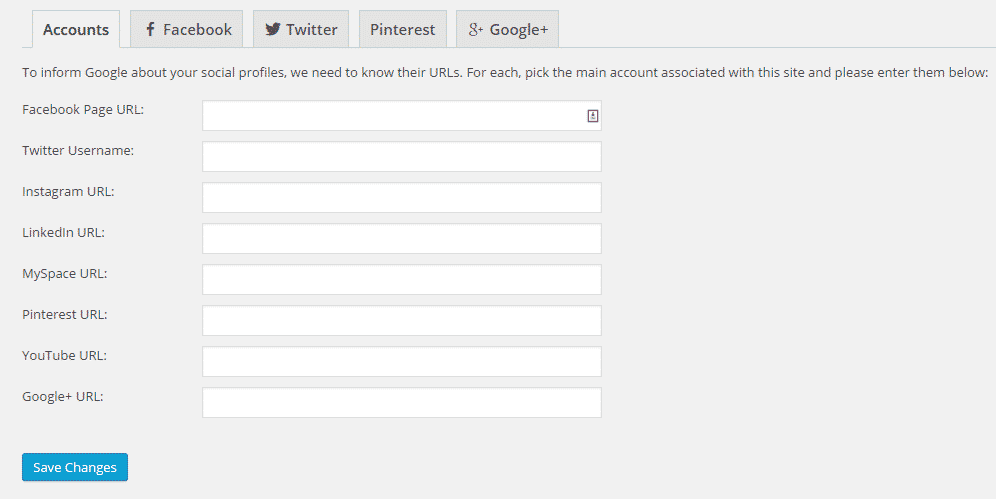
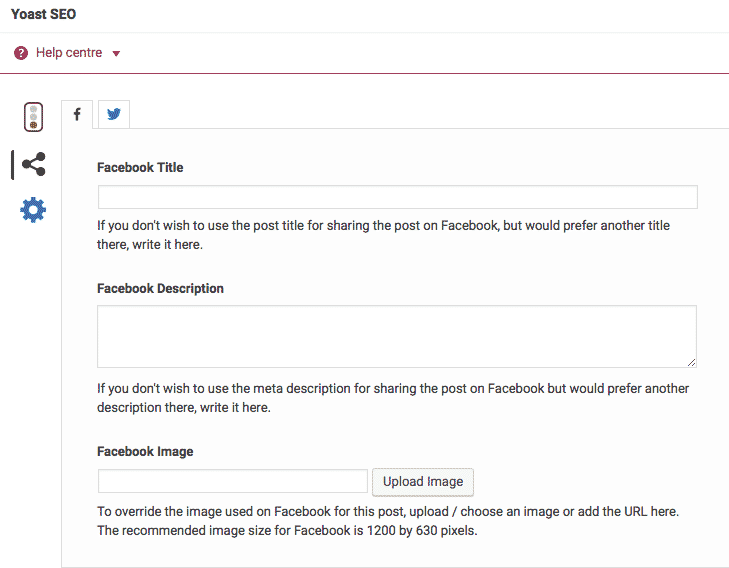
Add any social media accounts that are associated with your website to this section. The Yoast SEO Plugin will then add some information to your website that informs search engines of your relationship with those accounts. You can also add information that helps social media websites use the appropriate information when someone links to your website. For example, on the Facebook tab, you can add Open Graph meta data — telling Facebook which image, title and description to use when someone shares your website from Facebook.
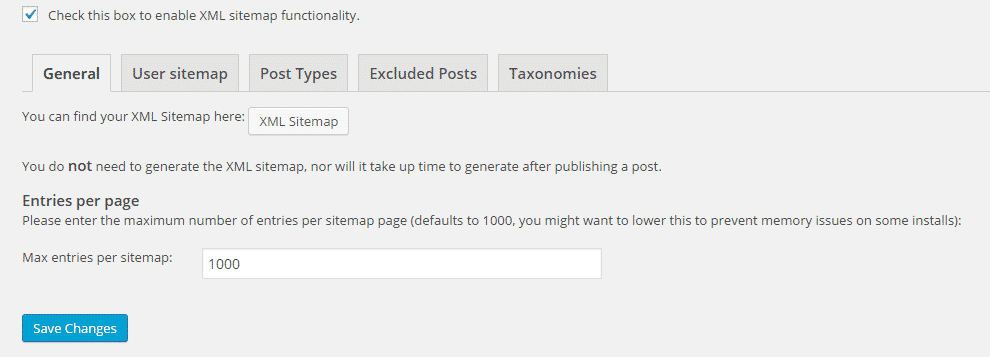
Step 6 – Configure your XML sitemaps
XML sitemaps provide search engine spiders with information about the pages on your website including their URLs. The Yoast SEO Plugin gives you a great deal of control over your sitemaps. It allows you to change the pages that are included in the sitemap, change how many entries there are on each site and much more.
Step 7 – Make any necessary alterations to the Advanced section
The advanced section of Yoast SEO allows you to alter the way breadcrumbs, permalink and your RSS feed are represented. Editing these options is completely optional, but you might find some of these features useful!
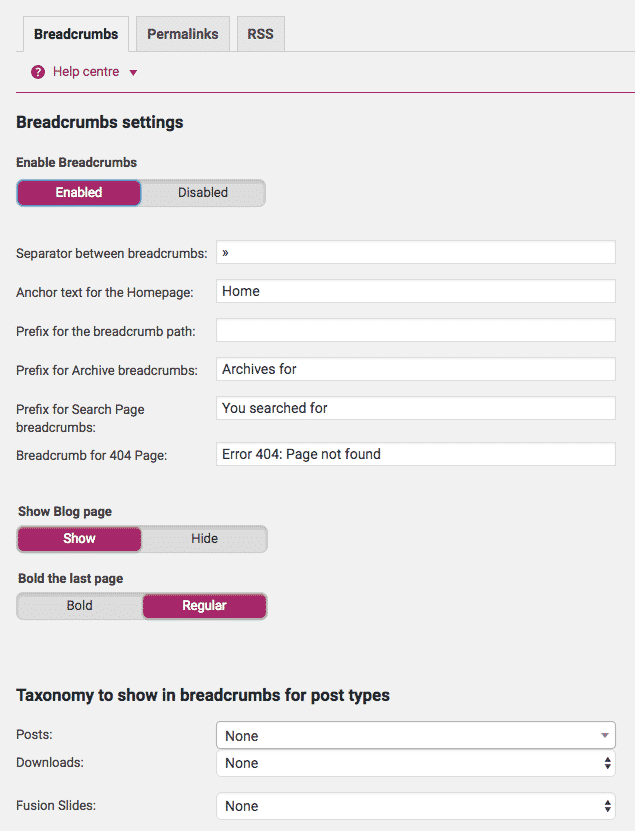
Enabling breadcrumbs adds links to the top of each page that represent the pathway to the page (For example: Site Name > Blog > Post Title). It can also add breadcrumbs to the results pages in search engines, which gives the reader a bit more information about the structure of your site.
The permalinks section allows you to change the structure of your URLs and make them search engine friendly.
The RSS feed section allows you to customise your feeds, adding sections of text before and after each feed entry. This is useful if you want to avoid third parties using your content without attribution. You can insert variables that ensure your page will always be referenced.
Step 8 – Edit robots.txt and .htaccess files (only if needed)
This section is pretty advanced and should be approached with caution.
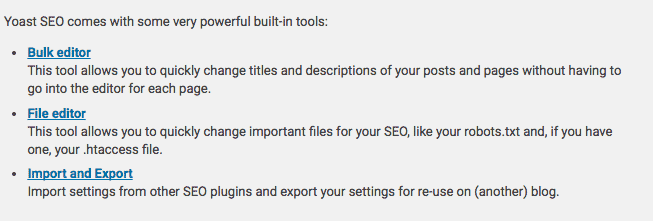
Bulk Editor: This option allows you to bulk edit multiple pages’ meta titles & descriptions.
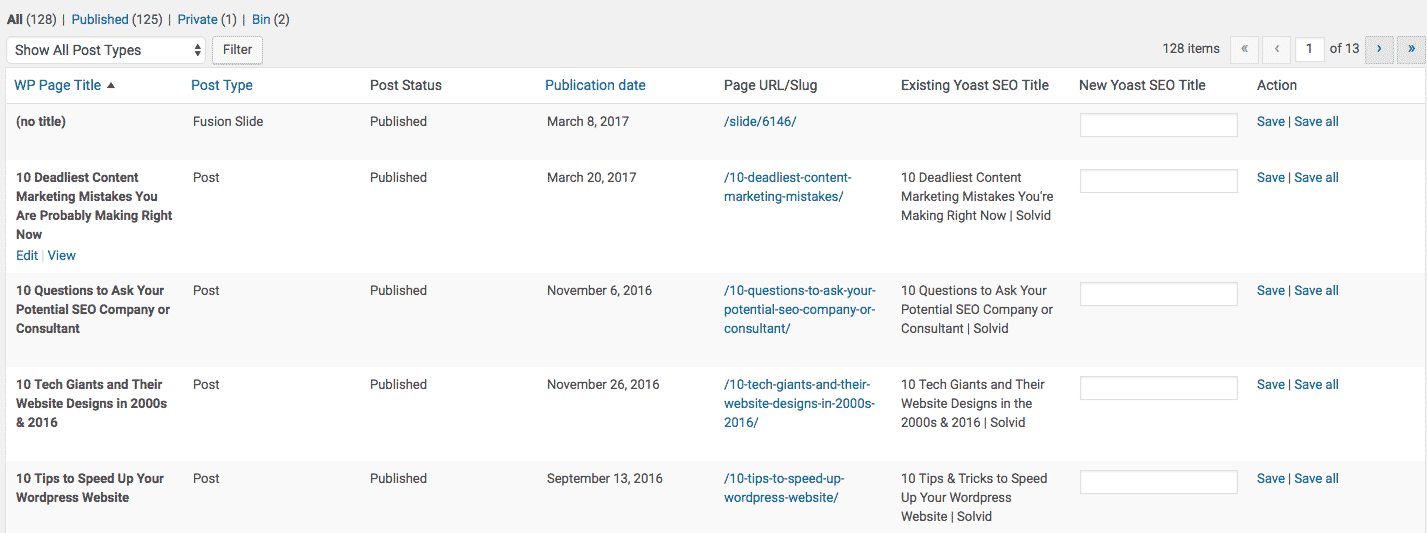
File Editor: Gives you the ability to robots.txt and .htaccess files.
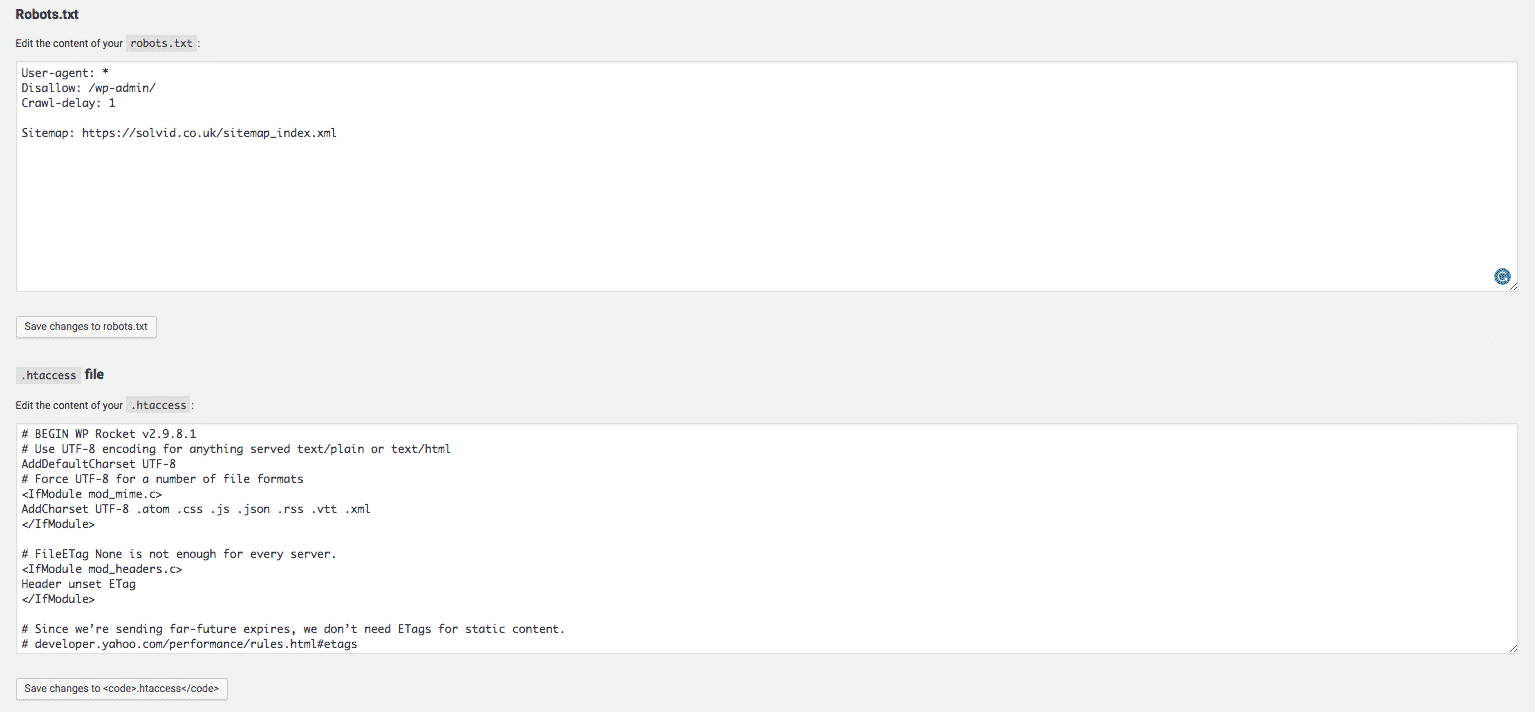
Robots.txt – the file that is used to block or allow certain search engines from viewing and indexing certain pages on your websites. It is the first file search engines visit when attempting to crawl the site. I recommend not messing up with robots.txt unless you’re 100% sure what you’re doing. To learn more about robots.txt, check out our guide.
.htaccess – a configuration file that is primarily used for sitewide redirects like HTTP to HTTPS. Learn more about it here.
Import and Export: An option to import and export SEO settings
Using Yoast SEO Plugin
Finally, you have made it through the configuration section! Don’t worry about completing all of the configuration options immediately, you can always return later on and make a few more tweaks.
Yoast SEO makes some significant changes to the way posts are written and listed. For starters, you will notice that your Posts > All Posts section will look different:
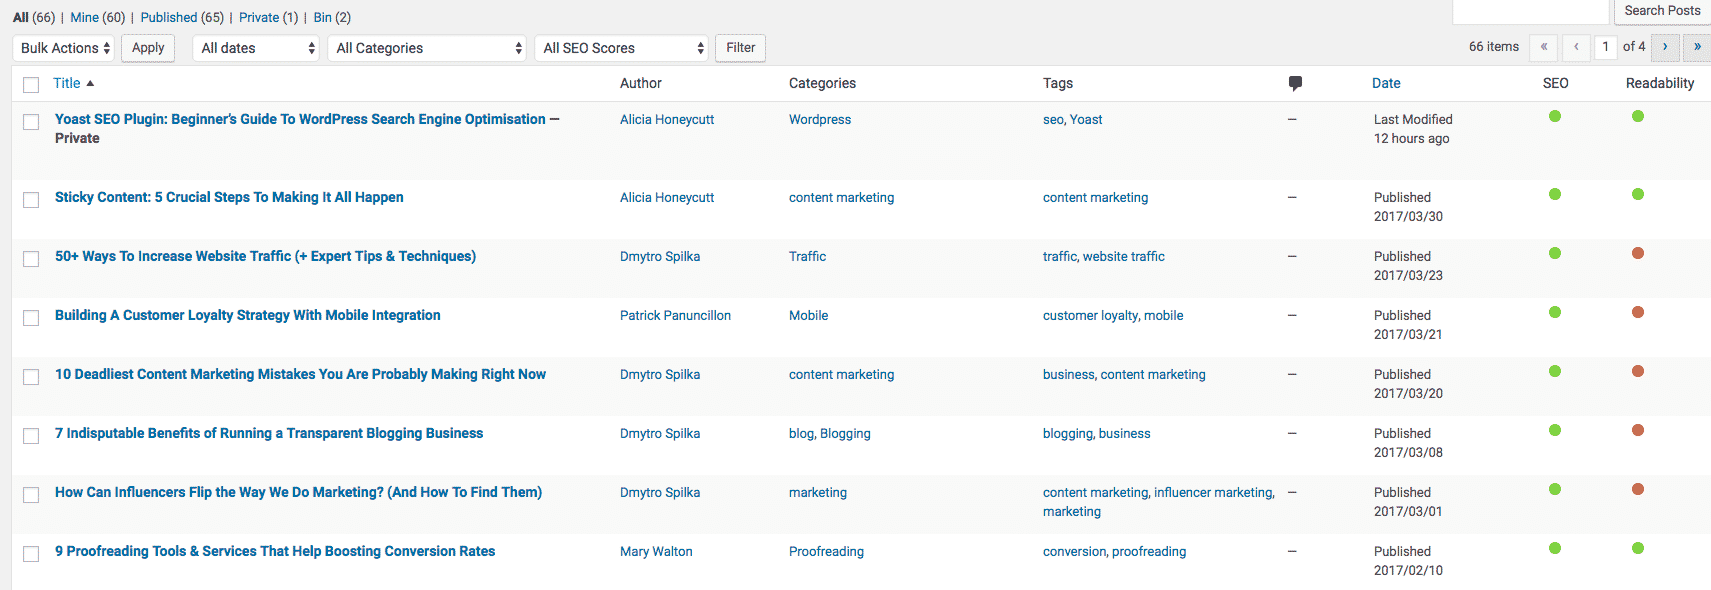
There are new columns for “SEO Title”, Meta Description”, “Focus Keyword” and “Meta Keywords” (if you enabled this option). The grey dot in the SEO column will turn green when you have correctly optimised each post. If it is red it means the page has significant SEO problems and if it is orange/yellow it means there is room for improvement.
The edit post and add new post pages will also have a new section added, called “Yoast SEO”. This new section has five main components:
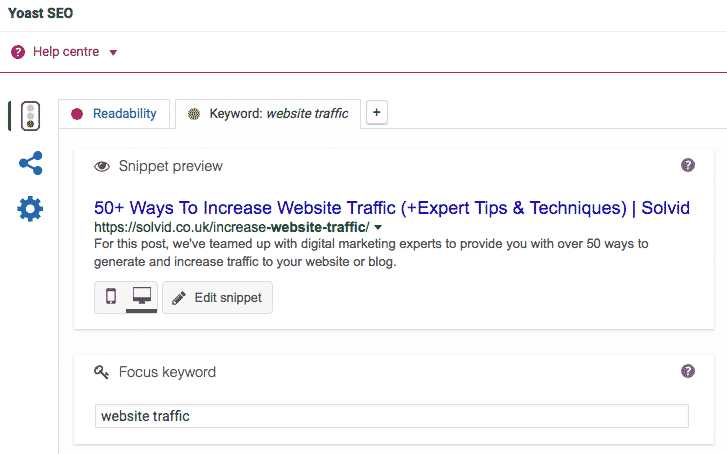
General: This is where you add the focus keyword (the keyword you want to rank for), the page’s title, and its meta description. Once you have added the focus keyword, Yoast will tell you how strong your article, page title, page URL, and meta description are.
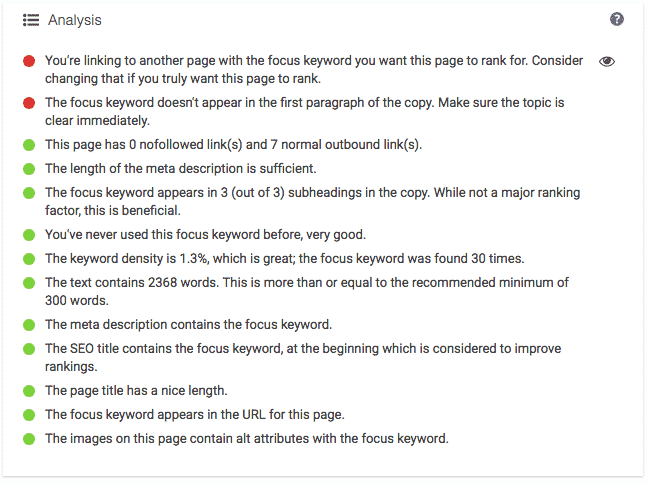
Page Analysis: Once you have added a focus keyword and saved the article, this tab will give you information about how well optimised the page is. It will look at many aspects including keyword density, content length, outbound link count, page title optimisation and much more. It basically walks you through the steps necessary to correctly optimise your page!
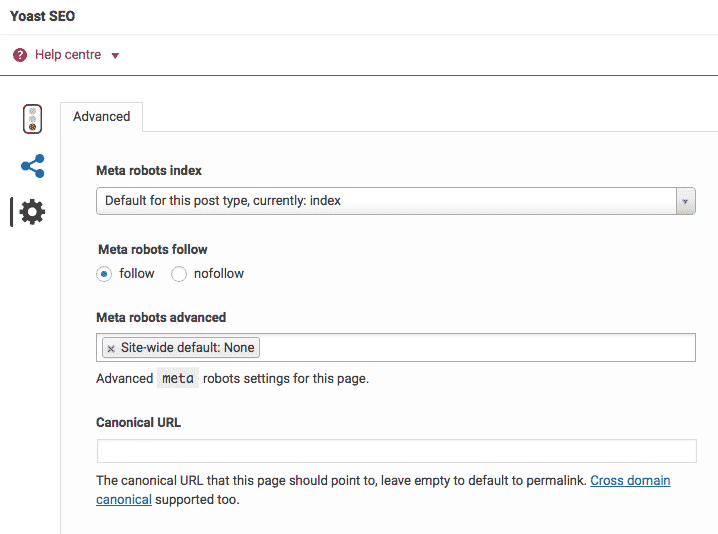
Advanced: This section allows you to change the index/noindex status of the page, the meta robots settings and canonical URL. You should leave these settings in their default position for most posts. By default, all posts and pages are set to index and follow, which means that search engines are able to index and show the page in search results as well as follow the links on your page.
Noindex – Prevents search engines from indexing that particular page
Nofollow – Tells engines not to pass ‘link juice’ through the links on that particular page
Social: The social section allows you to edit how the page appears on Facebook & Twitter when people share it.
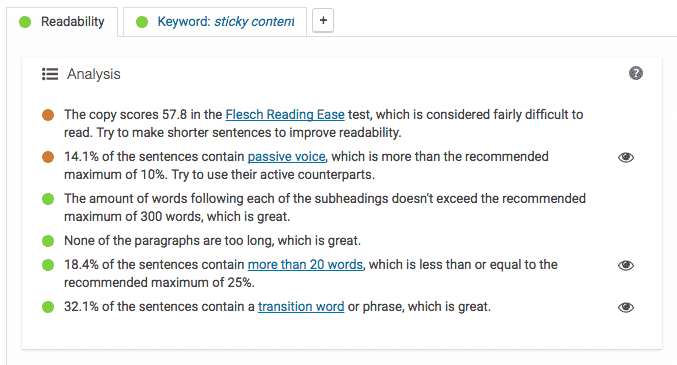
Readability: This section shows the post’s readability score and gives recommendations as to how you should go about improving it.
As you can see — the Yoast SEO Plugin makes SEO easy! It is simple to check if each page you write has good On-Page search engine optimisation before you publish it, and you have some powerful functionality at your fingertips. If you have any questions about Yoast SEO Plugin for WordPress, leave a comment or get in touch via email!
 194 customers signed up in the last 30 days