Having a fast and responsive website is essential if you want to create a successful online business. The speed of your website will affect customer satisfaction levels, search engine rankings, visitor bounce rates and much more.
Optimising your WordPress site is made simple, thanks to the Autoptimize plugin! This plugin will optimise your website’s files, making them smaller and easier for visitors to download. The end result is a faster-loading website that is more stable and performs better when there is a burst of traffic.
This guide will explain the importance of having an optimised website and highlight the features of the Autoptimize plugin. Then, we’ll show you how to install and configure Autoptimize. Let’s check it out!
Table of Contents
- The Importance Of Optimising WordPress
- What is Autoptimize?
- Installing Autoptimize
- Configuring Autoptimize
The Importance Of Optimising WordPress
Website owners spend a lot of time creating content, developing marketing strategies, and working on their website’s design. Unfortunately, they often forget to focus on the technical aspects like the speed of their website. Here are a few reasons why page loading speed is important:
Fast Websites Have Better Search Engine Rankings
Most search engines now use page load speed as an important ranking factor. If your pages load very quickly, you will receive a boost to your search engine rankings. If your pages load slowly, you may drop a few places in search engine results. If you can improve the speed of your website, your rank will improve and your website’s traffic could dramatically increase.
Visitors Prefer Fast Websites
People have become very demanding when it comes to the performance of the websites they visit. They expect websites to load quickly and to be responsive to their requests.
If your page takes more than 3 seconds to load, you may be losing up to 40% of your visitors. This leads to your website have a very high bounce rate, which refers to the number of visitors who navigate away from a site after viewing one page.
Visitors are also less likely to trust a slow-loading site because they often believe it indicates a lack of professionalism. If you are selling a product or service, this can lead to a drop in conversions — and profits!
Finally, if you are providing a service via your website, speed is crucial for maintaining the quality of that service. If visitors have to wait 10 seconds for each page to load, they will quickly become frustrated.
What is Autoptimize?
Autoptimize is designed to simplify the process of optimising a WordPress site. Its capabilities include:
- Aggregation of files: Downloading one file tends to be faster than downloading 10 or 20 files. Aggregation combines your CSS and Javascript files, so the user’s browser has fewer files to download.
- Minification of files: Minification removes unnecessary content and white space from files. This results in files that are much smaller in size and quicker to download. Autoptimize can minify HTML, CSS, and JS files.
- Caching of files: Autoptimize can cache HTML files, scripts and CSS files, so completed files are ready to be served to visitors. This reduces server load and increases speed. Autoptimize also works well with other more-advanced caching plugins like WP Super Cache, Comet Cache and HyperCache.
- Defers scripts to the footer: To speed up the loading of your website, the plugin defers some scripts to the footer of the page. That allows the user to begin using the rendered page while some scripts continue loading in the background.
- Content Delivery Network (CDN) integration: A CDN is a third party service that stores some of your content. Autoptimize makes it easy to integrate CDN files.
How to install Autoptimize
Installing Autoptimize is simple!
1. Log into the WordPress administration section
2. Use the left-hand navigation to select Plugins > Add New.
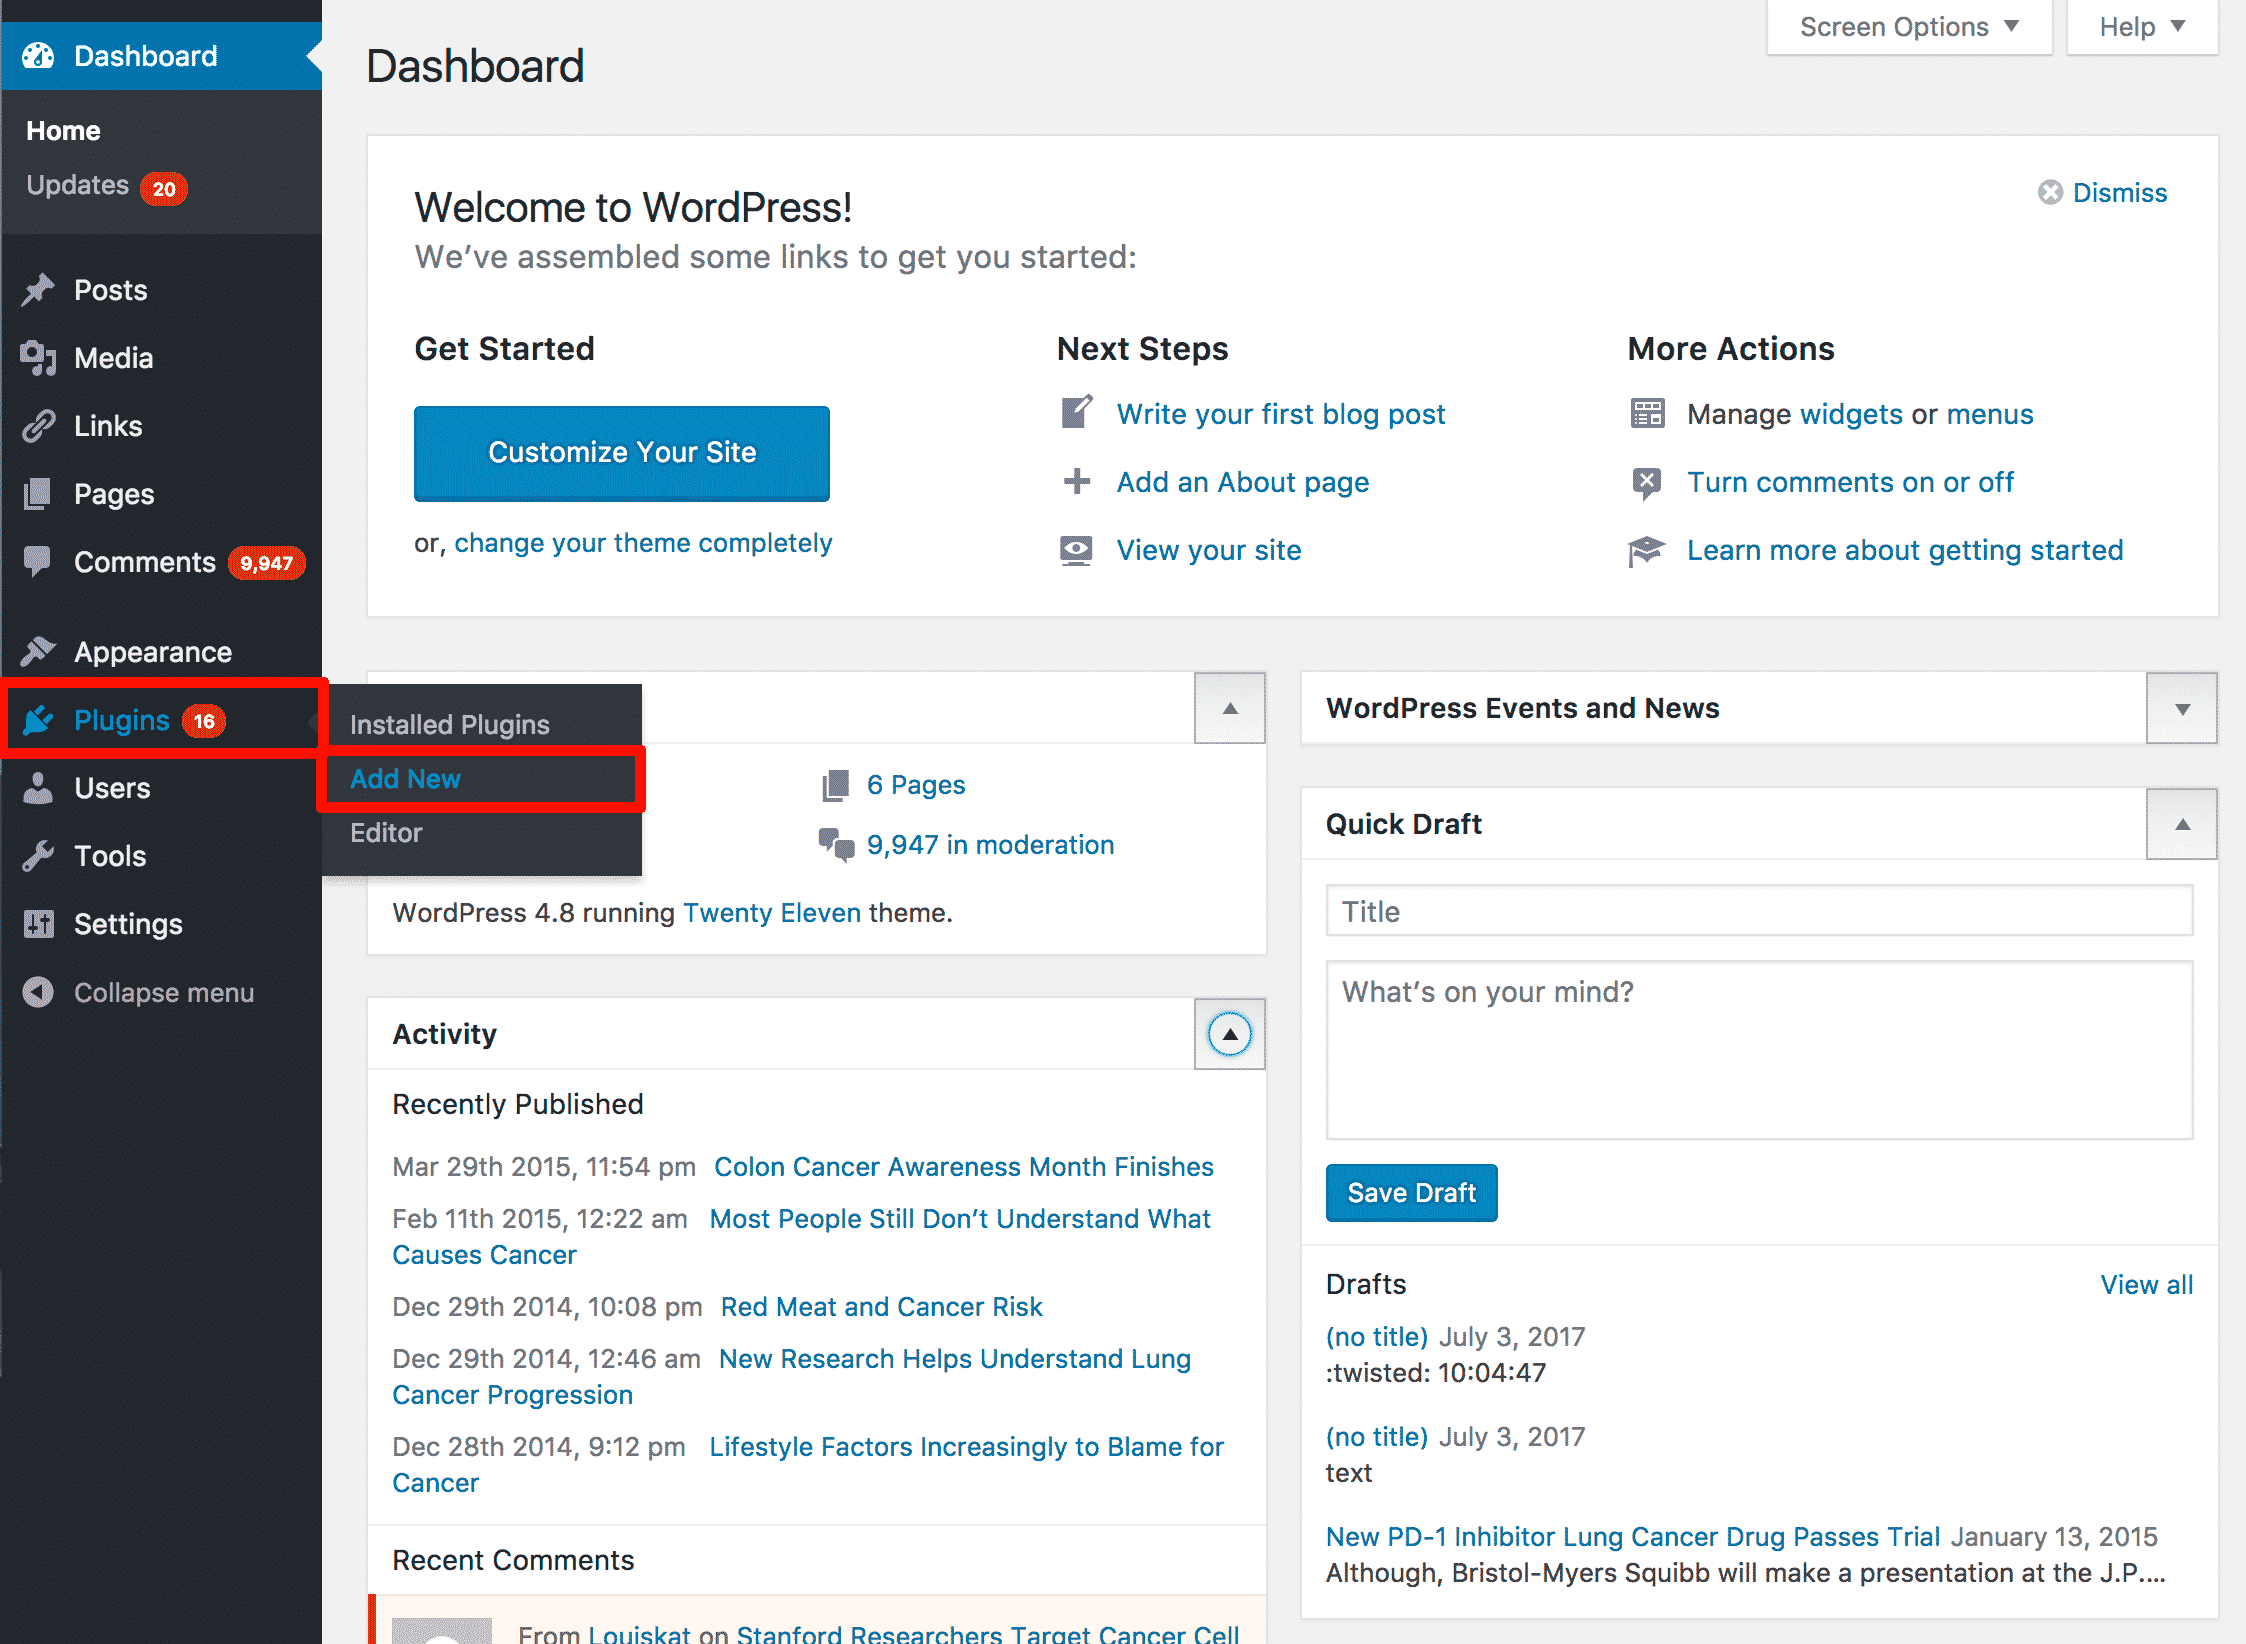
3. In the Search field on the upper right corner, type “autoptimize”. Autoptimze will be the first result listed. Click on the Install Now button.

4. Once the plugin has finished installing, click the Activate button.

Configuring Autoptimize
Once you have activated the plugin, you will notice a couple of additions to WordPress. There will be a new Autoptimize menu item on the top of the screen. You can click on the title of the menu to go to the Autoptimize settings page. You can also get to the Autoptimize settings page by using the Settings > Autoptimize menu item.

Once you reach the Autoptimize settings page, you will probably be shocked by how simple it looks! There are two ways to use it:
- Basic settings mode: You simply tick the box of the options you want to use. You can ask it to optimise your site’s HTML, Javascript and CSS. You can also add details of your content delivery network.
- Advanced settings mode: You will also be shown additional settings for each option.
Let’s click Show Advanced Settings and jump into the deep end!

You will now see more options for each section. Let’s walk through them.
HTML Options

This HTML options section only has two items to choose from:
- Optimise HTML: Check the box to optimise HTML. It will minify the HTML, removing white space and unnecessary characters.
- Keep HTML comments?: You can opt to keep comments in place.
Javascript Options

The javascript options are slightly more complex:
- Optimise javascript code?: Enable or disable Autoptimize for javascript.
- Force Javascript in?: If you have some issues with javascript components failing to work correctly, try this option. It will load the javascript early on, which can resolve common problems with page rendering.
- Also aggregate inline JS?: Some WordPress themes have inline Javascript which is located throughout HTML files. You can pull this javascript out and combine it into a single file, which improves page speed. Use this option with caution, because it can cause the Autoptimize cache to become large very quickly.
- Exclude scripts from Autoptimize?: You may encounter a script that does not work correctly after Autoptimize has minified or aggregated it. If you have a malfunctioning script exclude it from Autoptimize here.
- Add try-catch wrapping?: If a JS error is preventing your pages from working correctly, check this option. It will “catch” any errors before they can stop the page rendering.
CSS Options
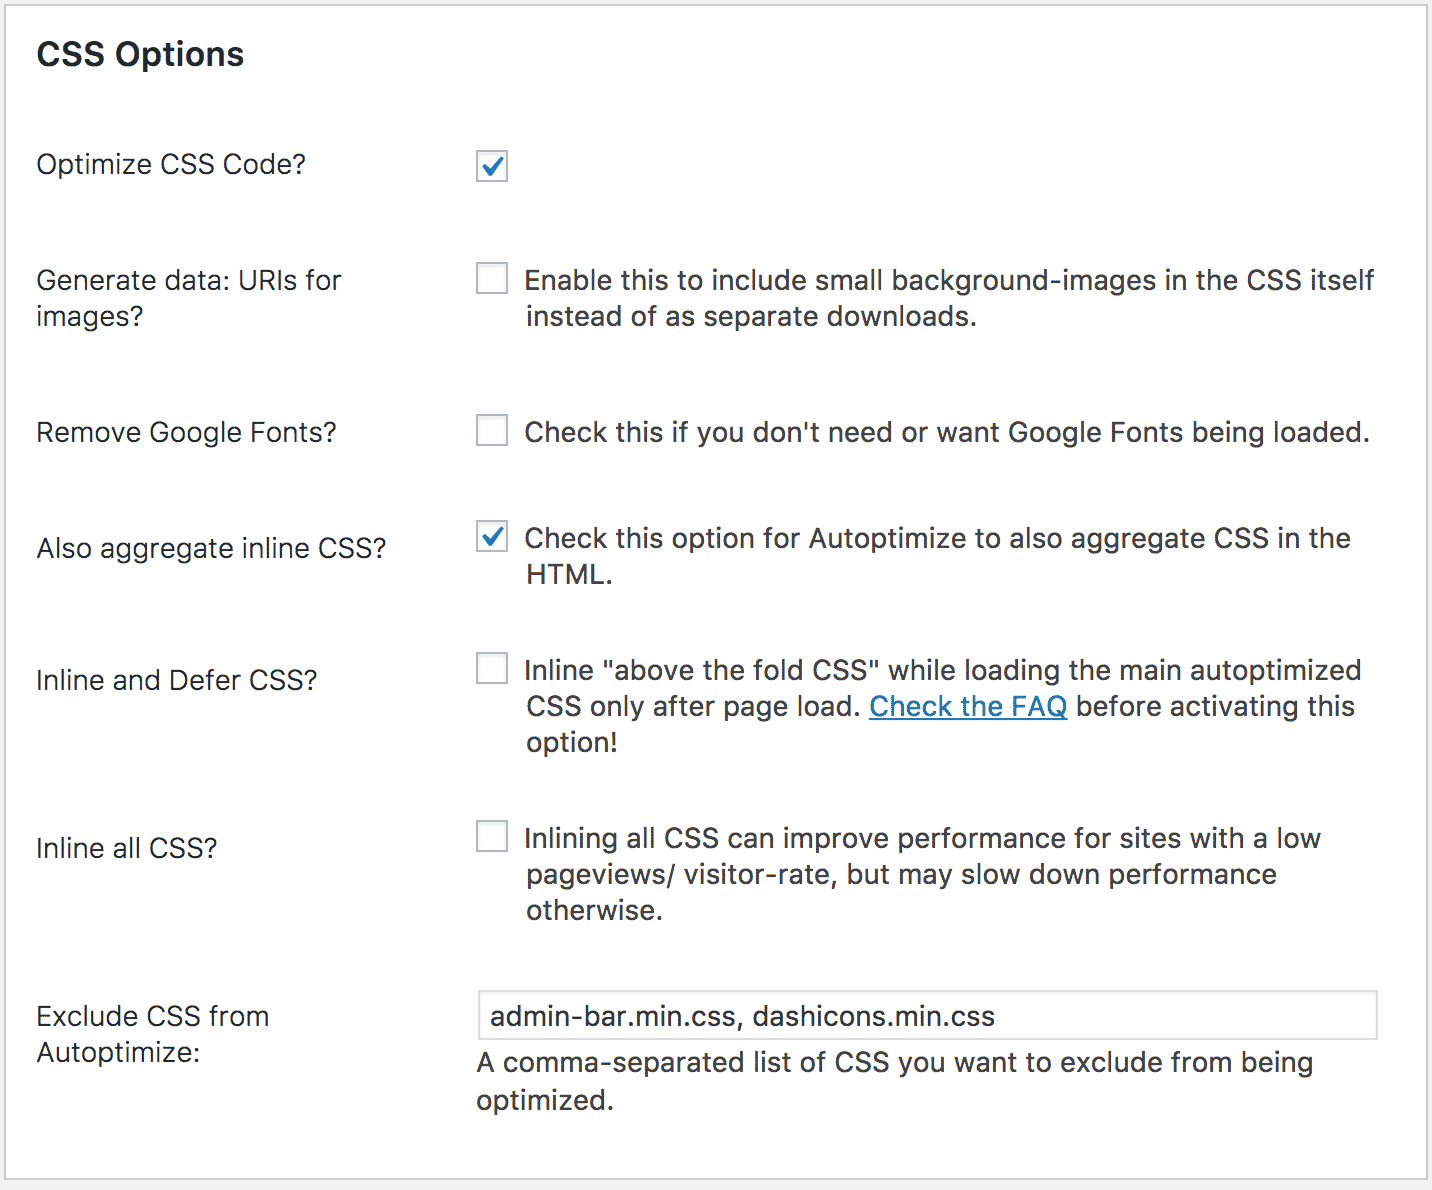
There are quite a few CSS options:
- Optimise CSS Code?: Enable or disable Autoptimize for CSS.
- Generate data: URIs for images?: This option lets you encode small images into your CSS files instead of having more server calls to download individual images.
- Remove Google fonts?: If you don’t use Google fonts in your theme, uncheck this box.
- Also aggregate inline CSS?: The option removes CSS from your HTML and aggregates it. Useful if your theme has CSS throughout many pages.
- Inline and Defer CSS?: This option allows you to put some CSS in the HTML file if it is required to load the page. Other CSS is deferred and loaded afterwards.
- Inline all CSS?: This option can work well for low traffic websites.
- Exclude CSS from Autoptimize: A list of CSS files Autoptimize shouldn’t touch.
CDN Options

If you are using a Content Delivery Network for some files, add its details here.
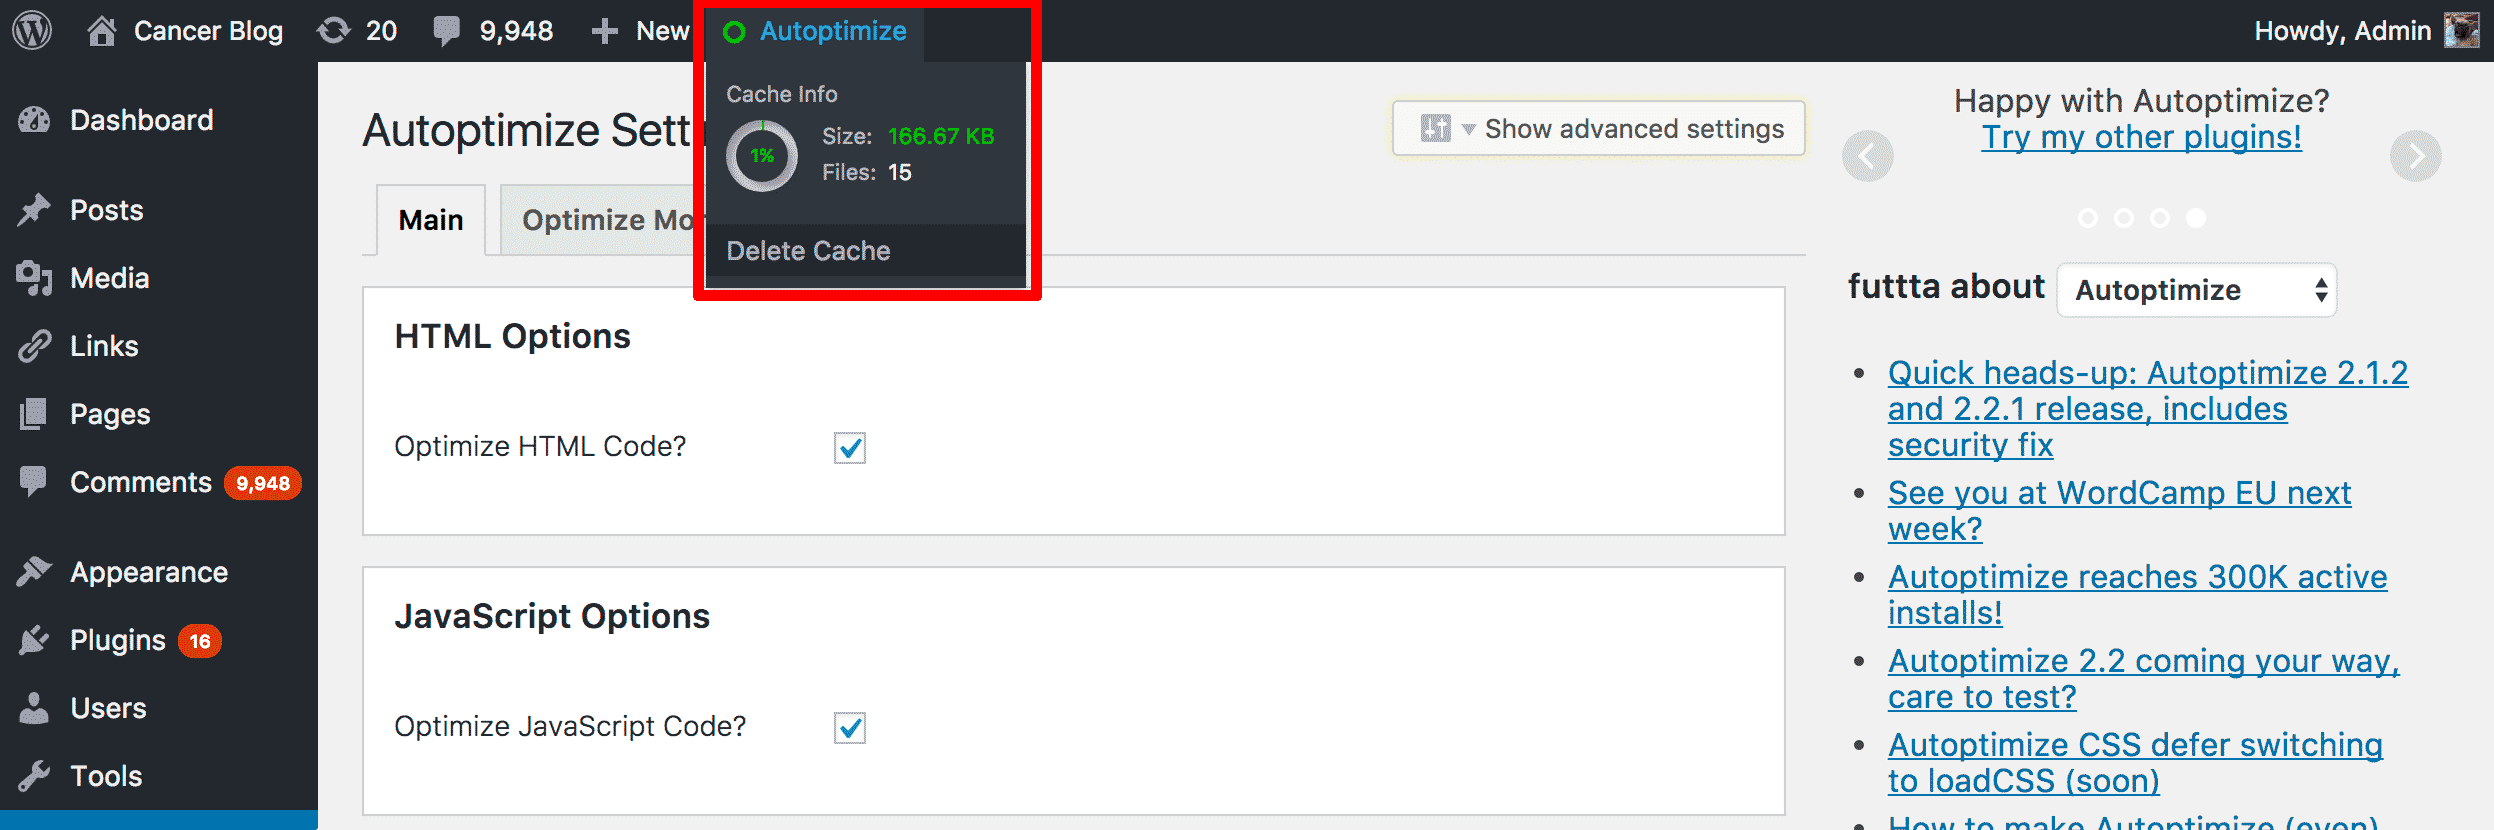
Cache Info
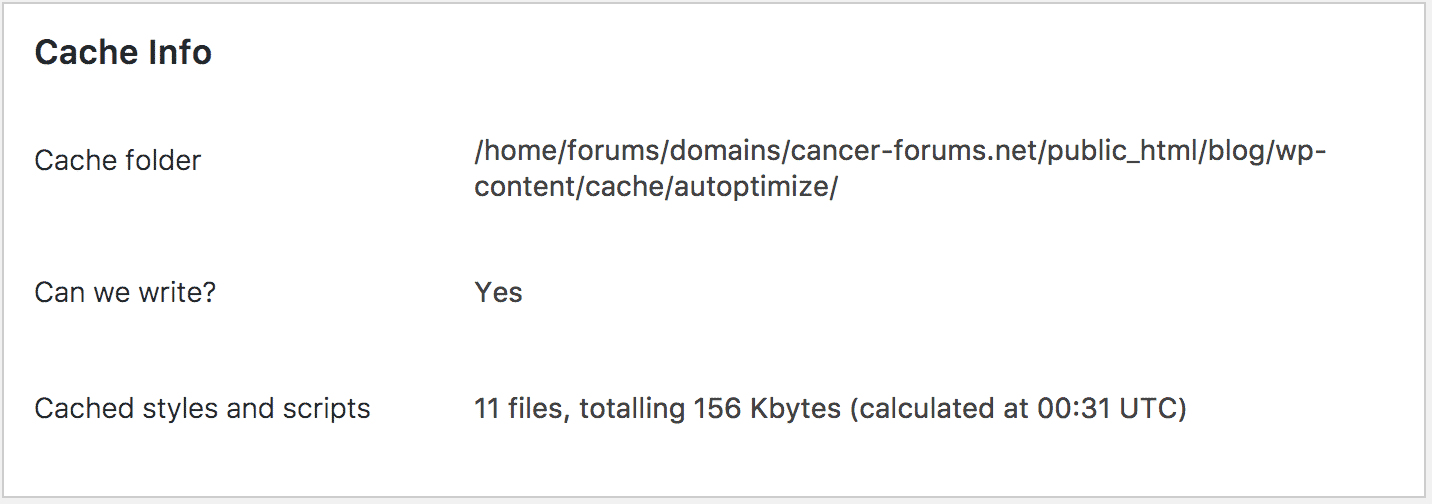
This section gives you some information on your cache.
Misc Options
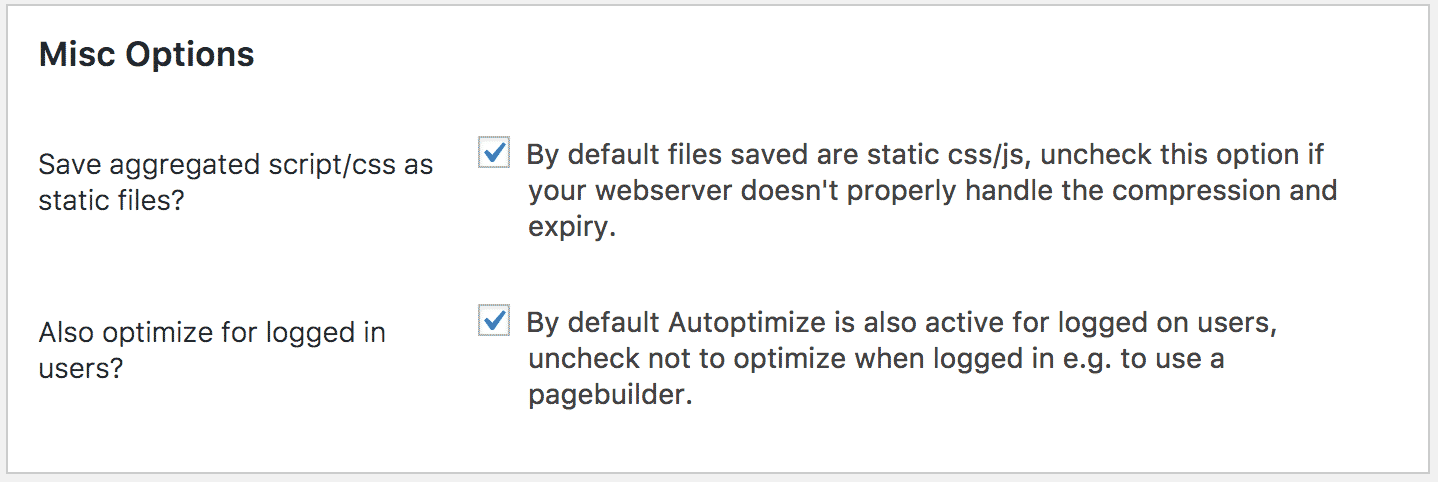
This section has an option for changing how aggregated files are handled by the web server (leave this by default unless your server cannot compress files). It also has an option for disabling Autoptimize for users who are authenticated.
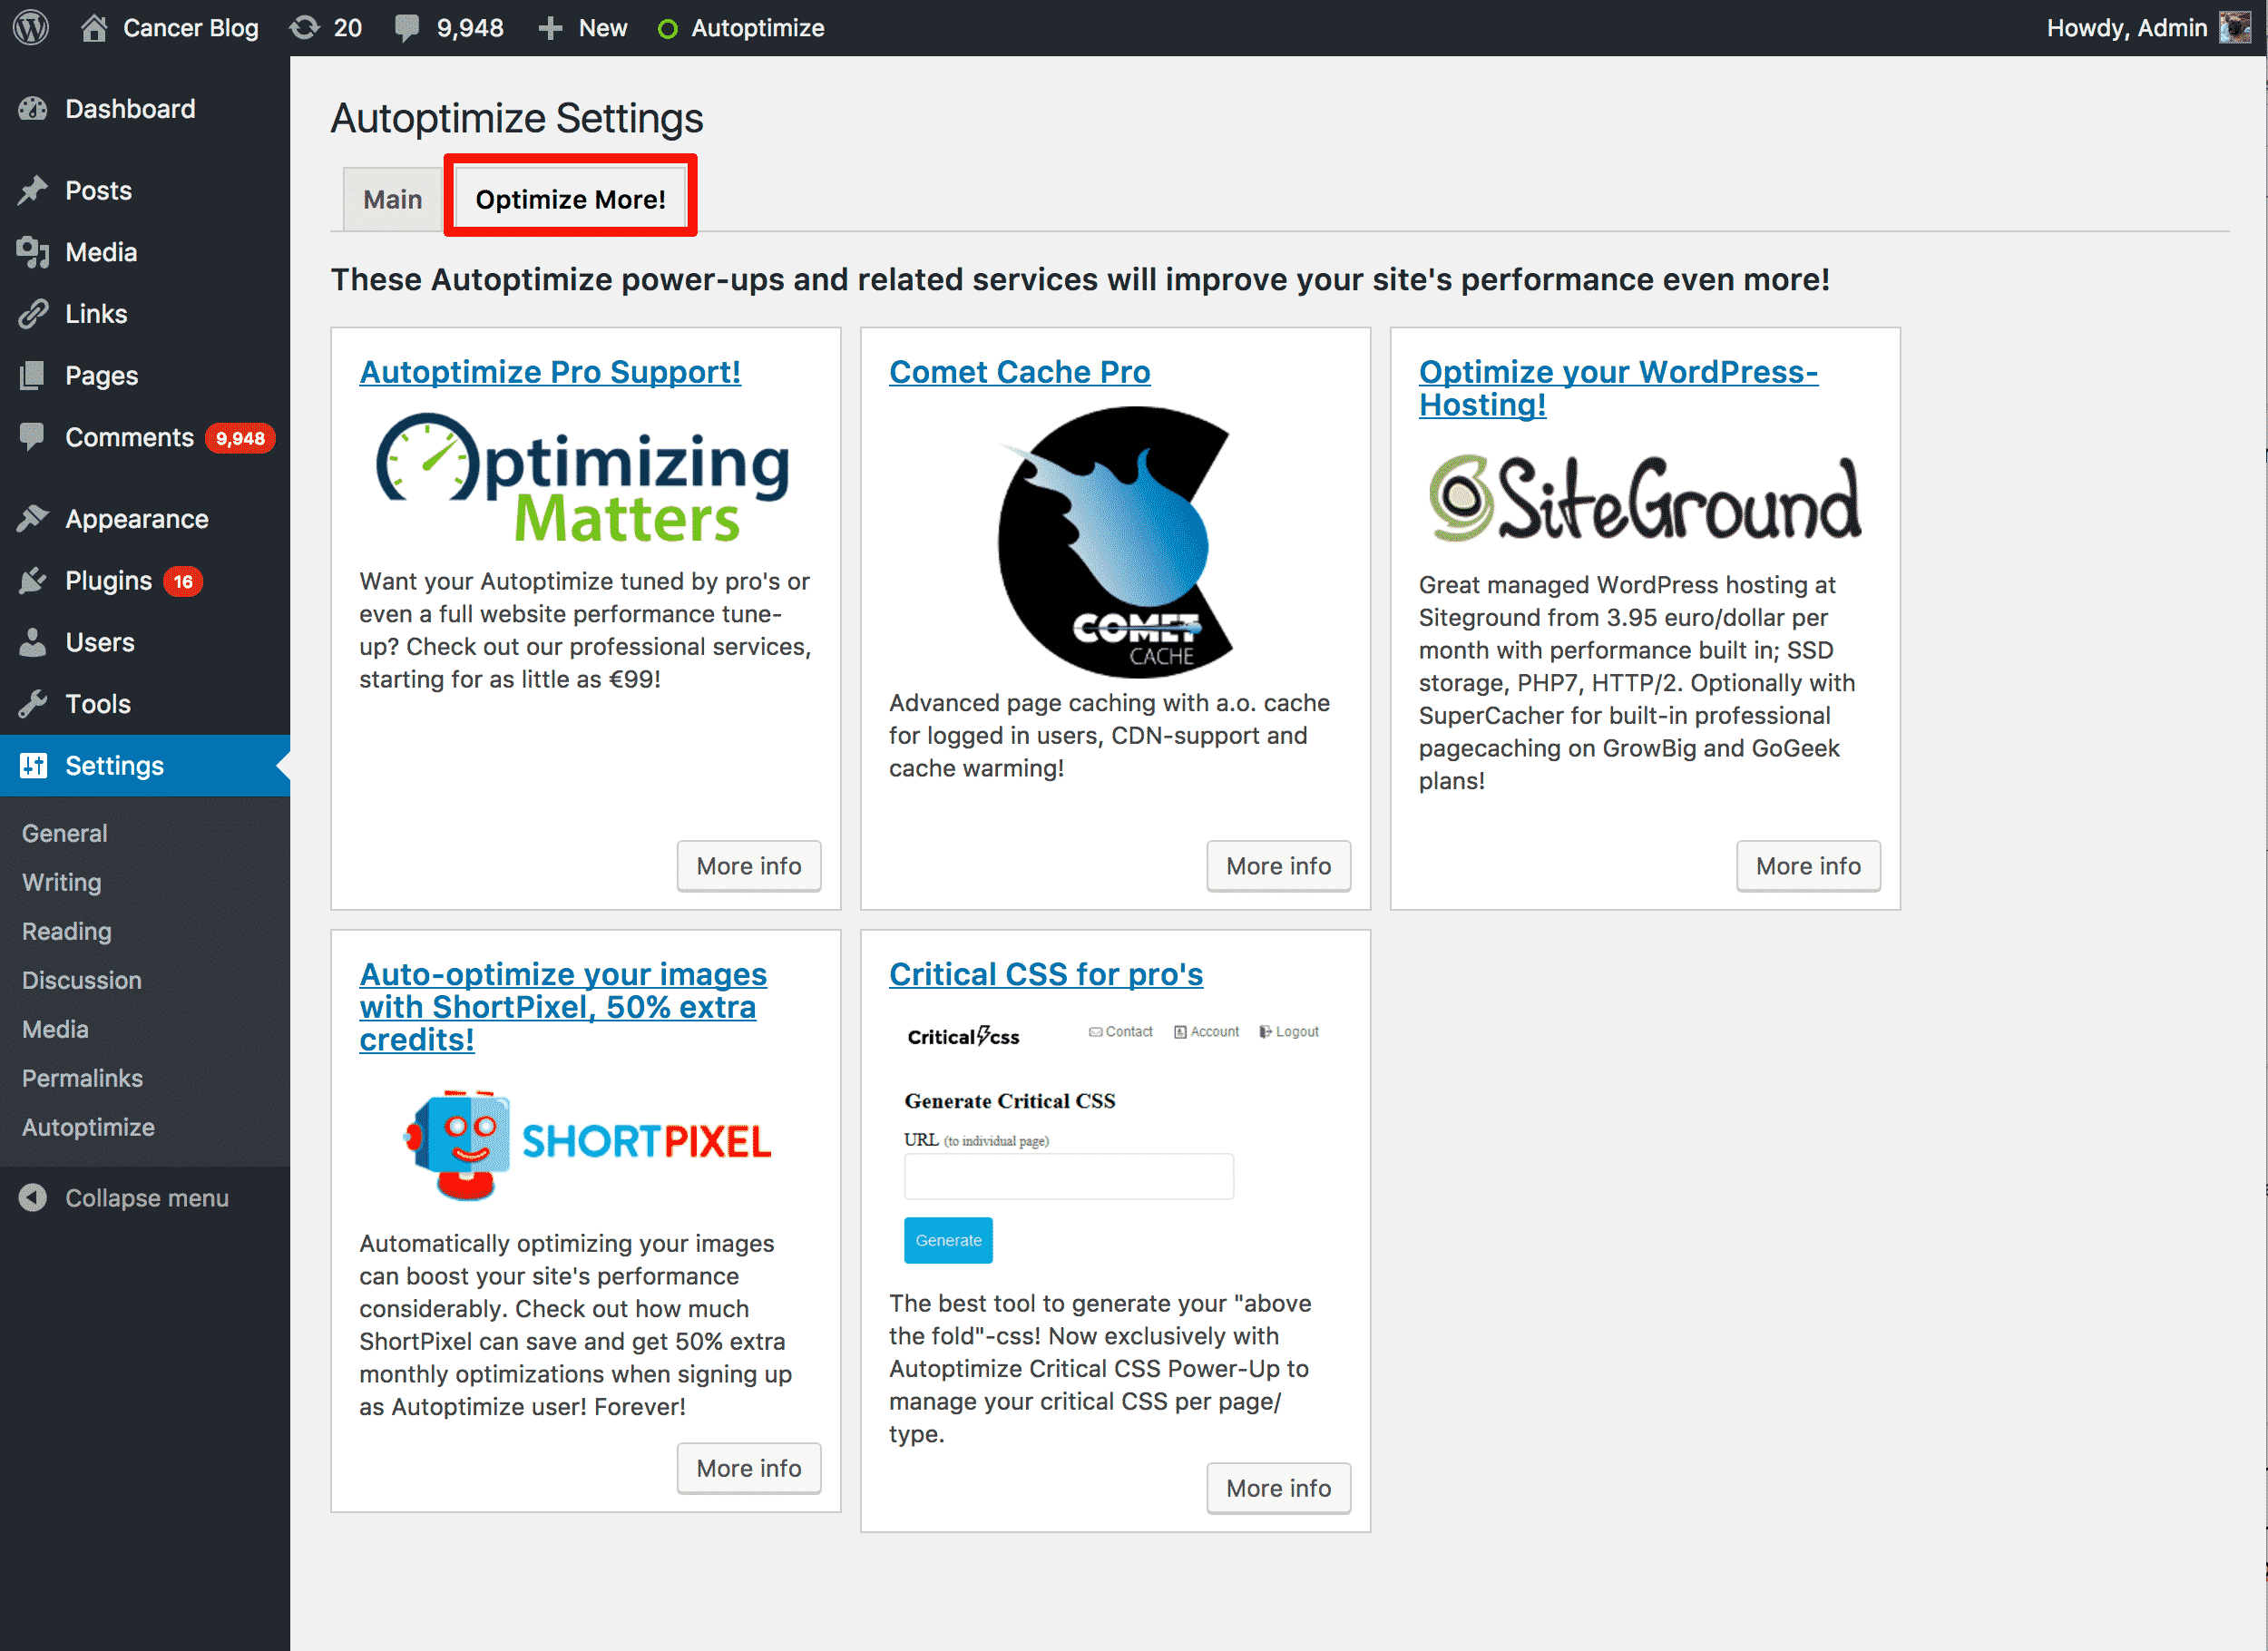
Optimise More!
The Optimise More tab at the top of the Autoptimize settings page lists other useful and complementary plugins.
Clearing Your Cache
The Autoptimize cache is a very simple file cache. By default, files that are combined and minified are stored in the /wp-content/cache/autoptimize folder. You can empty this cache whenever you please by clicking the Delete Cache button highlighted in the image below.
Thanks for reading Autoptimize Plugin: Improve Your WordPress Performance & Speed in 5 Minutes! Subscribe to the blog for more WordPress plugin reviews and useful tips!
 194 customers signed up in the last 30 days