Cookies can be very useful additions to a website. They’re used to store bits of information in a browser, such as user preferences, login information or shopping cart items. However, they can also be used to track page views, traffic statistics and other information that many people consider private.
For this reason, the European Union passed the Cookie Law in 2011. This law mandates that any website operated within the EU, or directed toward an EU audience, must notify all visitors of the use of cookies on the website.
Table of Contents
Cookie Consent makes notification easy
Cookie Consent is a very simple plugin designed to implement a notification and consent box on your website. It does not disable cookies or prevent further exploration of your pages. It simply installs a notification box on your website. This ensures your website is in compliance with the Cookie Law and makes your visitors aware of the use of cookies on your site.
As soon as the plugin is installed and activated, a default notification box is automatically added to your website. Not only is the notification automatically generated, but a new page is also added to your website that contains a pre-written cookie policy. The link to that new page, where the visitor can “Find Out More”, is also added to the notification box.
This is an entirely self-contained notification with the added cookie policy page. No coding or complicated steps. Just install and activate the plugin. However, you may want to take advantage of the additional, user-friendly configuration settings that will allow you to adjust the style to better fit your website. We will further explore the style settings once the plugin is installed.
Installing the plugin
1. Begin by logging into your WordPress website.

2. Once logged in, hover your cursor over the Plugins tab on the left-hand side of the screen. Click the Add New option in the submenu.

3. On the Add Plugins screen, use the search bar to search for the Cookie Consent plugin.
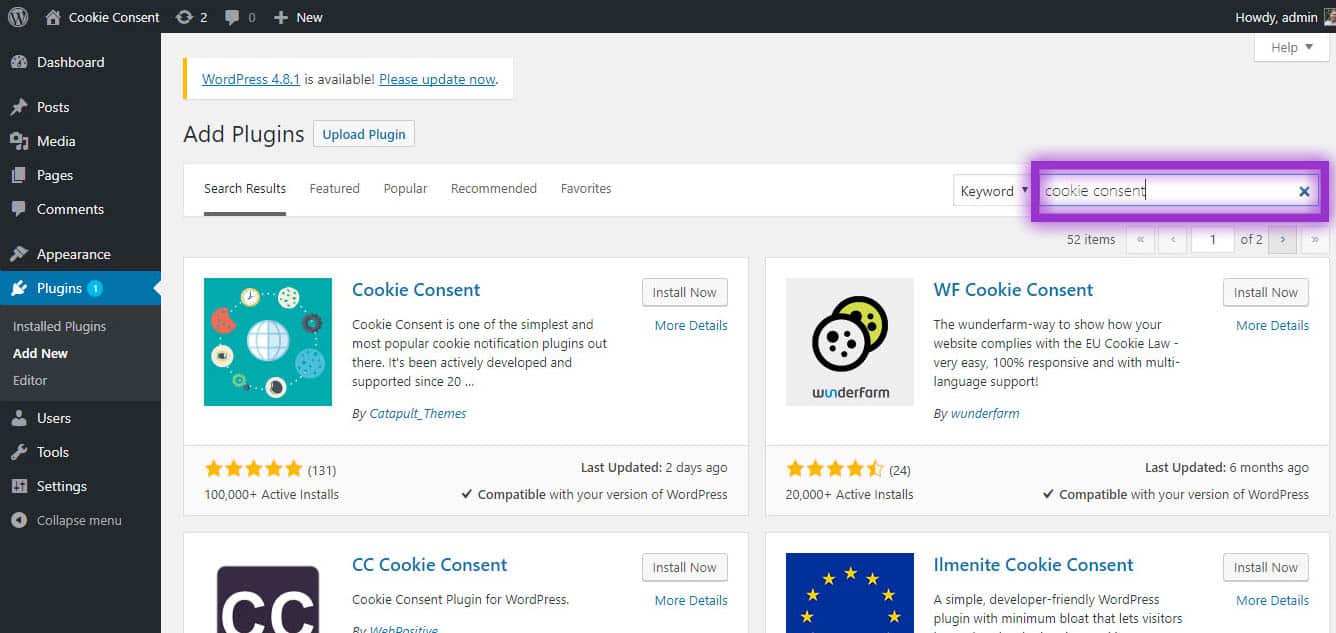
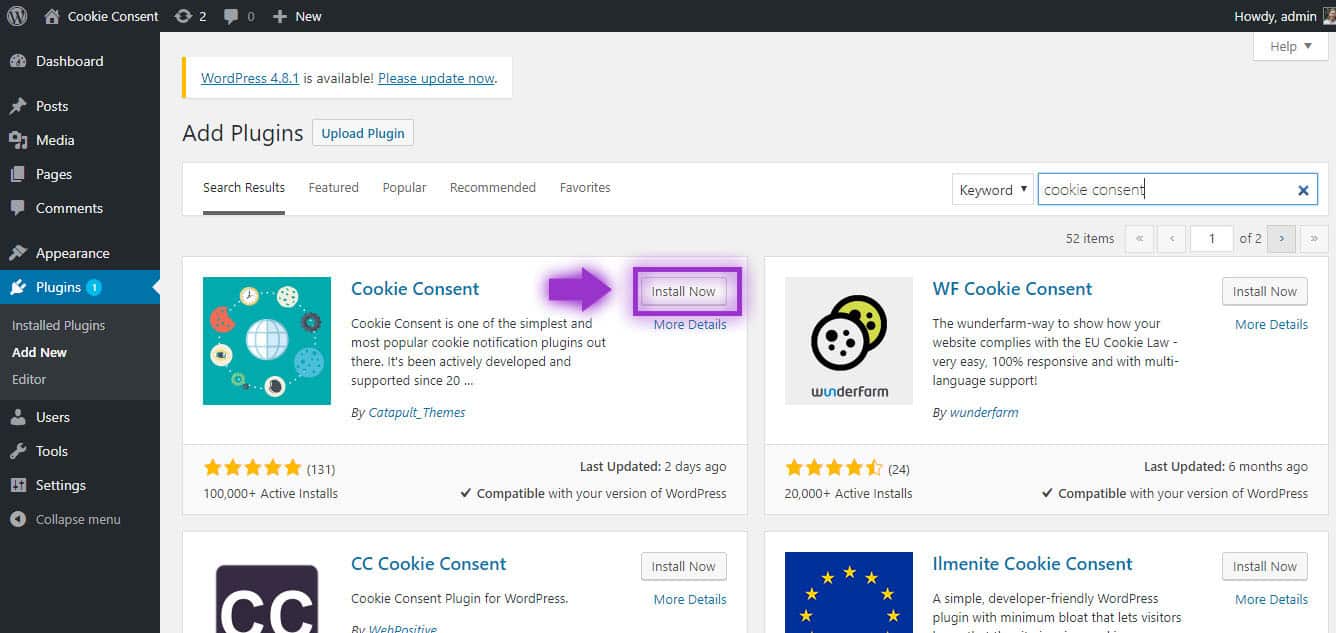
4. Once the search is finished, the first result should be the Cookie Consent plugin. Click Install Now.
5. Once the plugin has finished installing, click the Activate button that appears in the same place as the install button.
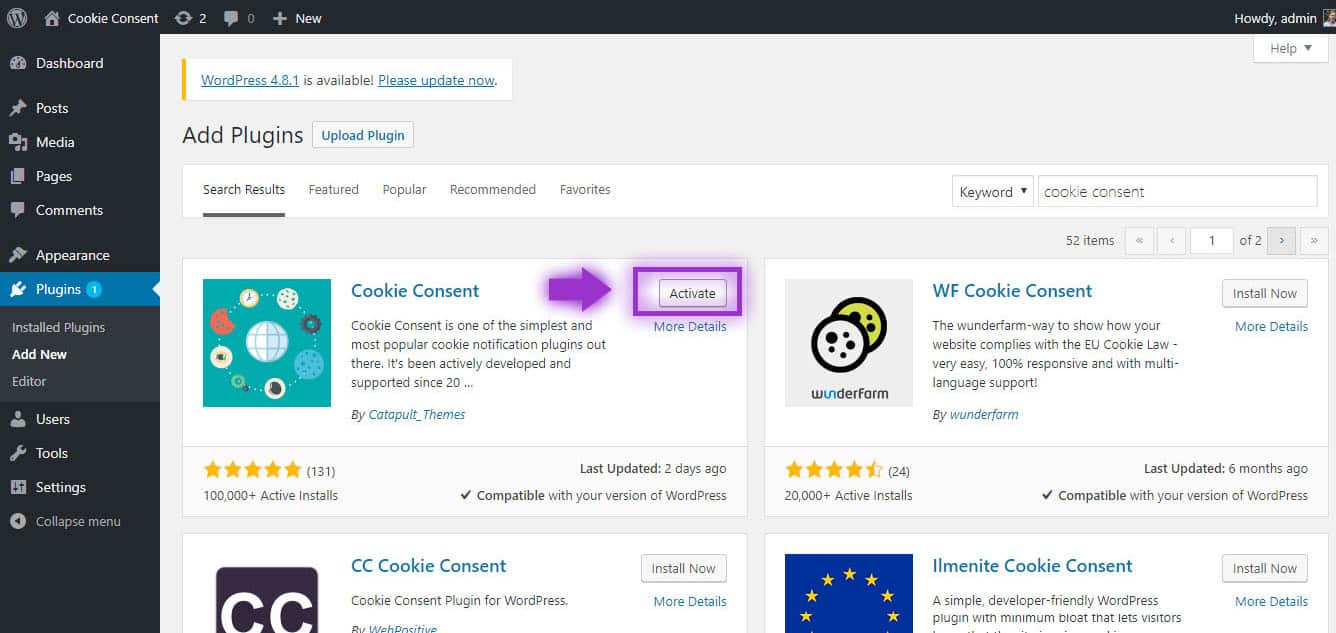
6. Once the plugin is activated, you will be redirected to the Installed Plugins screen.
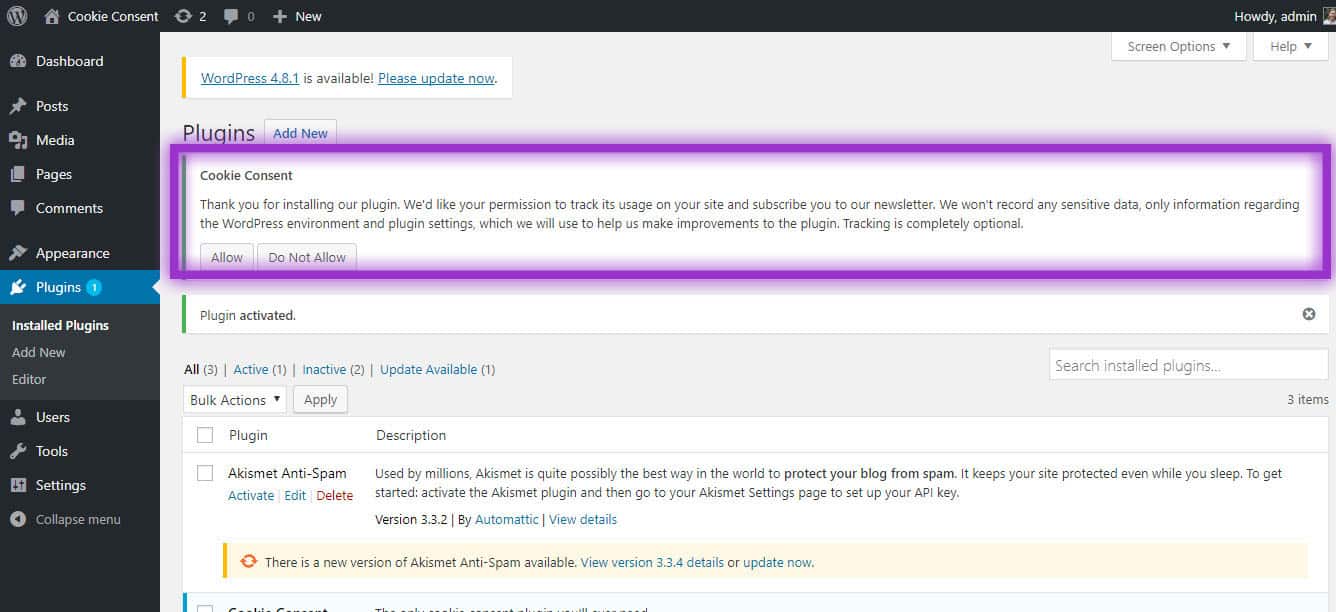
7. Notice the Cookie Consent dialog box that appears at the top of the page. This allows you to choose whether or not you will allow Cookie Consent to track how the plugin is used on your site. It also subscribes you to their newsletter. You may choose Allow or Do Not Allow.
Congratulations, your new plugin is installed and activated!
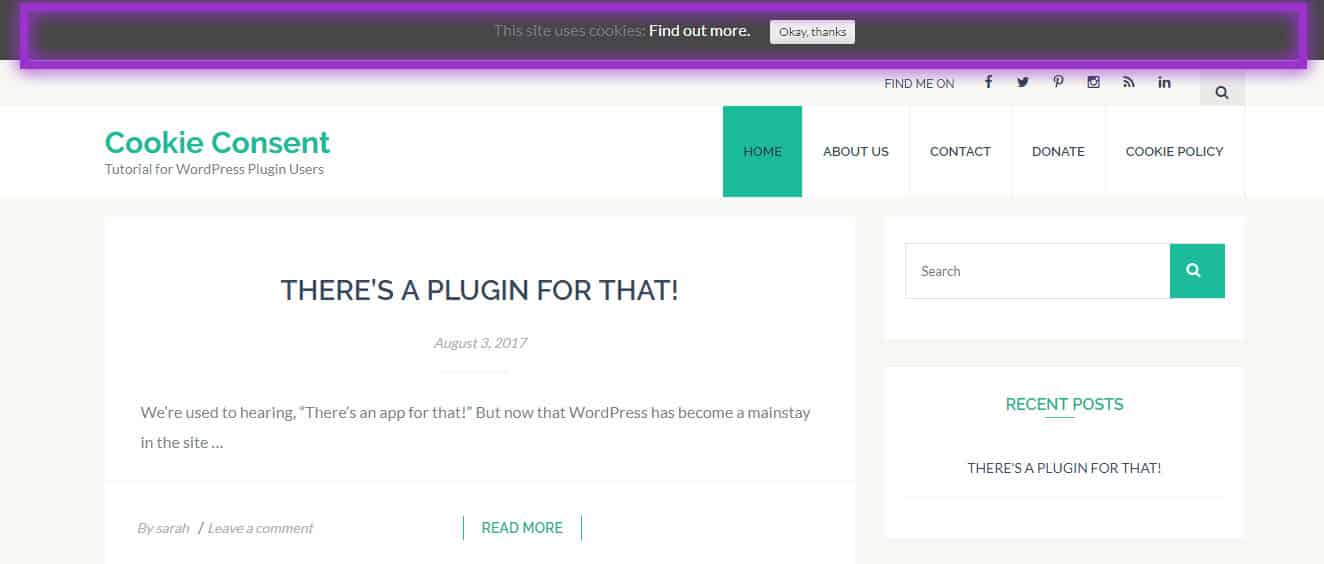
Check out the cookie notification box that is now installed on your WordPress website. The default location is at the top of the page.
Next, we will learn how to configure the settings and customise the message and design.
Configuring Cookie Consent
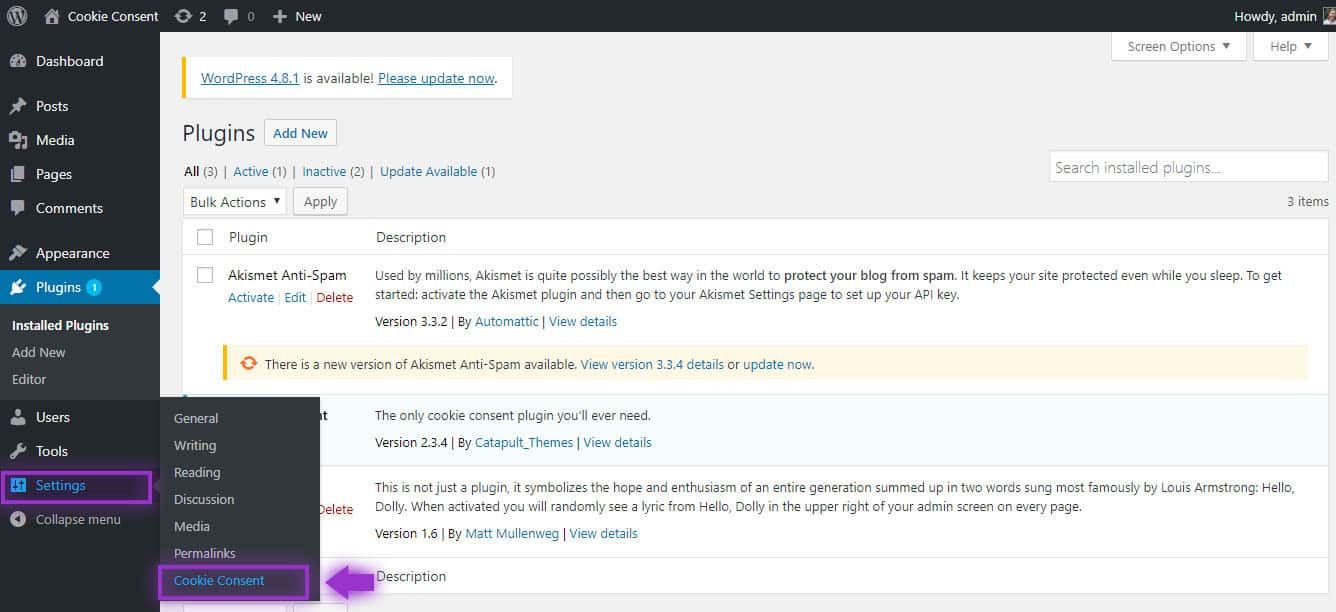
1. Hover over the Settings tab on the WordPress panel, then click on Cookie Consent from the submenu.
2. This brings us to the Settings page for the plugin. Here we can modify and configure the different options for text and design. The configuration is organised under 3 categories: General, Content and Styles.

Let’s look at the features under each tab to make sure you’re able to customise the plugin to suit the needs of your website.
General Settings
1. Under the General Settings tab, the first choice is the option of how the visitor will close the notification box.

On click will close the box when the visitor clicks on it. On Scroll will close it when the visitor starts scrolling down the screen, or the Timed option will eventually close on its own.
2. The First Page Only option means it will only show on the first page user visits, and will not appear again during that session.
3. Also included are the options to Selectively Exclude Pages from showing this notification box or even certain zones around the world. Other zones may not require the notification of the use of cookies and therefore would not need this plugin enabled for those countries.
4. Next is the Notification Duration, which is the amount of time before the notification box will close itself.
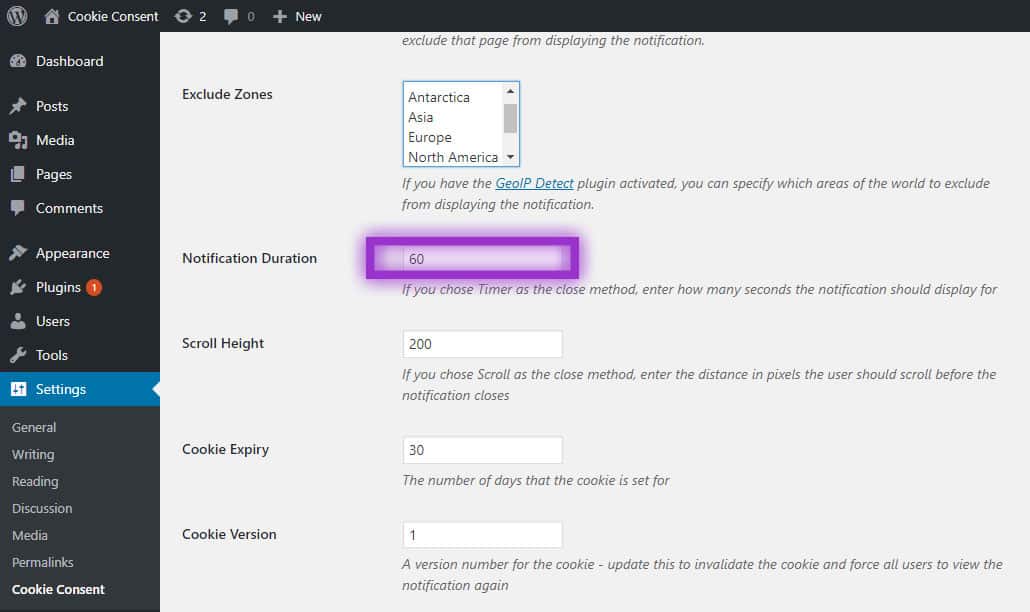
5. Scroll Height signifies the amount of scrolling a viewer must do before the box closes on its own.
6. Cookie Expiry is an option for the length of time the cookie is set for.
7. Cookie Version allows you to change the version number of the cookie, if you would like it to reappear after someone has closed the box.
8. Opt out of tracking allows you to cancel your own agreement to allowing Cookie Consent to track the use of the notifications through your website.
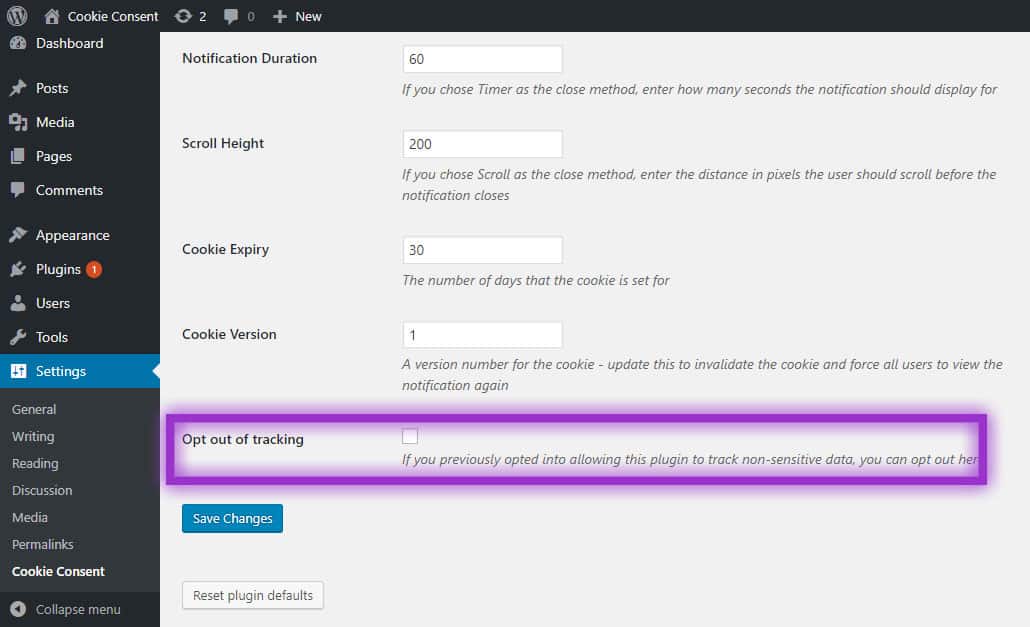
9. Remember to Save Changes. You can also Reset plugin default if you want to revert back to the original settings that were present in the newly installed plugin.
Content Configuration
1. Under the next tab at the top of the screen, we find the Content Settings, where we will customise the text and links that appear in the box.
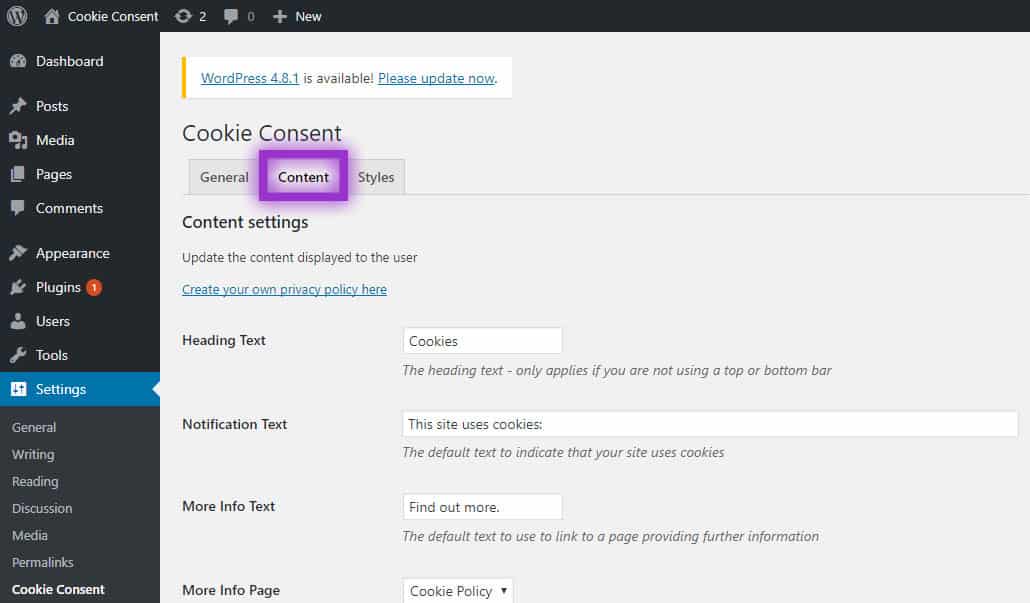
2. The Create your own privacy policy option link takes you to an external website where you can create a new privacy policy for your website (optional).

3. Next, you will see the Heading Text option which allows you to type in custom text.

4. The following two fields Notification Text and More Info Text allow you to further customise the notification text displayed in the box and the link where visitors can find more info.
5. The More Info Page option allows you to choose the page that visitors will go to when they click the link for more info. This provides you with the option of choosing the default Cookie Policy page that is automatically generated when the plugin is installed. Another option is to set a specific More Info URL, which would allow you to link to any URL, even one outside of your own website if you choose to do so.
6. More Info Target allows you to choose whether the More Info page link will open in a new tab or the same tab.
7. The Accept Text allows you to change the text in the button the user will push to close the notification box.
8. Remember to Save Changes when finished with these choices, or Reset plugin defaults if you want to get the original settings back.
Style Settings
1. Moving on to the Styles tab, we will be refining the look of the notification box.
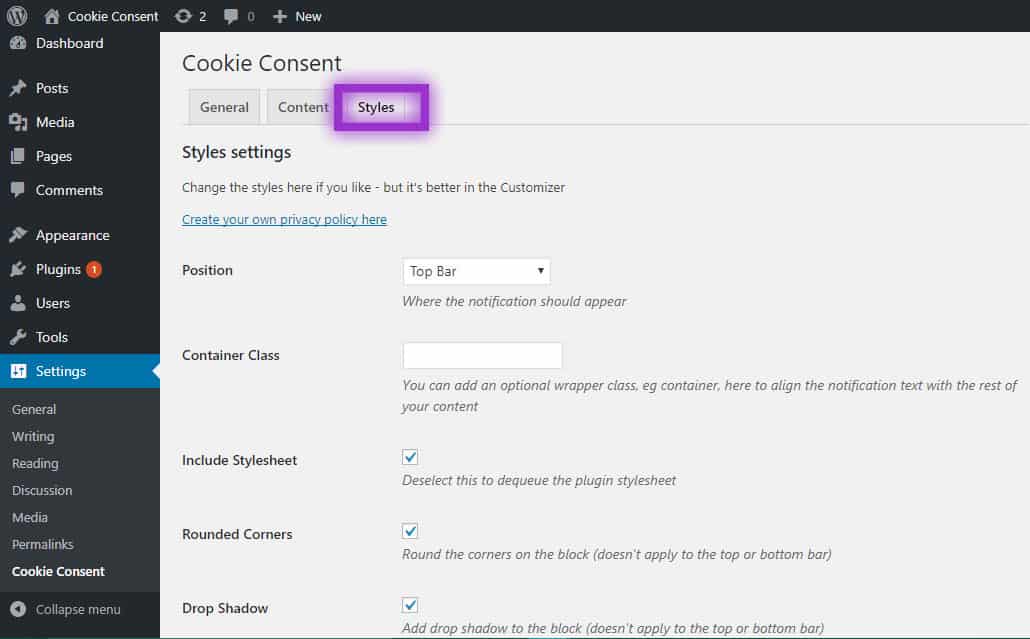
2. Here you can choose the Position option to place the notification in a certain location on the page, such as the default Top Bar position.
3. You can add a Container Class if there is a specific wrapper class you want to use.
4. Include Stylesheet will allow or disallow the use of the stylesheet that is installed with the plugin.
5. Rounded Corners allows a softer-cornered version of the box.
6. The Drop Shadow adds a professional look if you choose to use it.
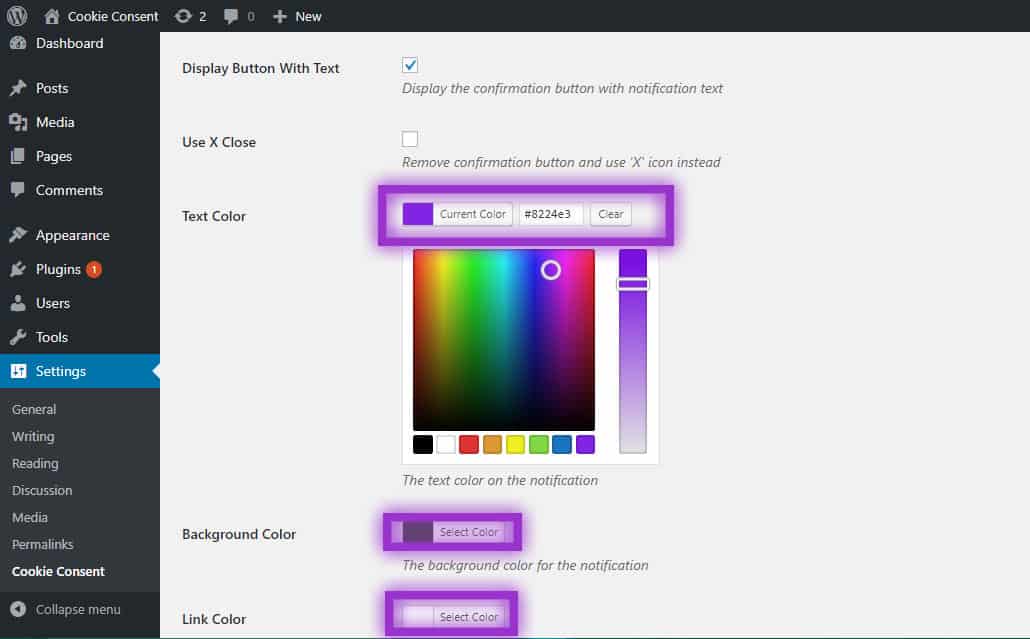
7. Display Button with Text allows you to toggle on or off the confirmation button in the notification box.
8. If you would rather not have a text button for user confirmation, use the following feature: Use X Close. This removes the confirmation button and instead provides an X button for the user to click on to close the text box.
9. Also use the Select Colour options to customise the look of the text, background, link, button text and button background. This will help you better match the look and feel of your website and provide a clean, unobtrusive user experience.
10. The last option, Flat Button, allows you to change the look of the confirmation button by removing the border and making it appear flattered.
11. Again, please don’t forget to Save Changes before closing your settings page or moving to a different section of your website. Your updates will not appear on your website until you have saved your changes in the settings page and refreshed the web page in which you’re trying to see the changes to the notification box.
12. If you don’t like your changes, you can always Reset plugin defaults at the bottom of any of the three settings tabs for this plugin.
Note: If you are trying to view the changes to your notification box, but have already closed the box on your web page, you may change the Cookie Version in the settings panel to make the notification box reappear.
Great work on setting up your Cookie Consent plugin!
Thank you for reading Cookie Consent Plugin: How To Add & Customise Cookie Notification In WordPress! For more great WordPress tips and tutorials, subscribe to the Solvid blog or follow on social media.
 234 customers signed up in the last 30 days