Installing WordPress is a very simple process that takes a few minutes. Unfortunately, you might encounter unexpected issues shortly after installation. The most common problems include errors when uploading large files or running large scripts.
Fortunately, these issues are easy to fix! File upload issues can usually be addressed by increasing the maximum upload size and post max size settings. Errors that occur when running large scripts or plugins can usually be fixed by increasing the PHP memory limit or max execution time settings.
This guide will provide you with all of the information you take care of these common problems. Let’s get started!
Table of Contents
- Increasing the maximum upload limit
- Increasing PHP memory limit
- Fixing maximum execution time limits
Increasing the maximum upload limit
The maximum upload limit is a server setting that dictates how large uploaded files can be. If you try to upload a file that is larger than this limit, you will receive the frustrating error message “filename exceeds the maximum upload size for this site”. Other error messages you might receive include “The uploaded file exceeds the upload_max_filesize directive in php.ini” or “exceeds the maximum upload size for this site“.
The size of your maximum upload limit will depend on what your web host has determined is a reasonable default limit. The default setting on most servers is between 2 to 8 megabytes.
One of the quickest ways to determine your current maximum upload limit is to log into the WordPress administration section, then visit the Media > Add New page. You will see the maximum upload file size listed on the screen (highlighted by the red box).
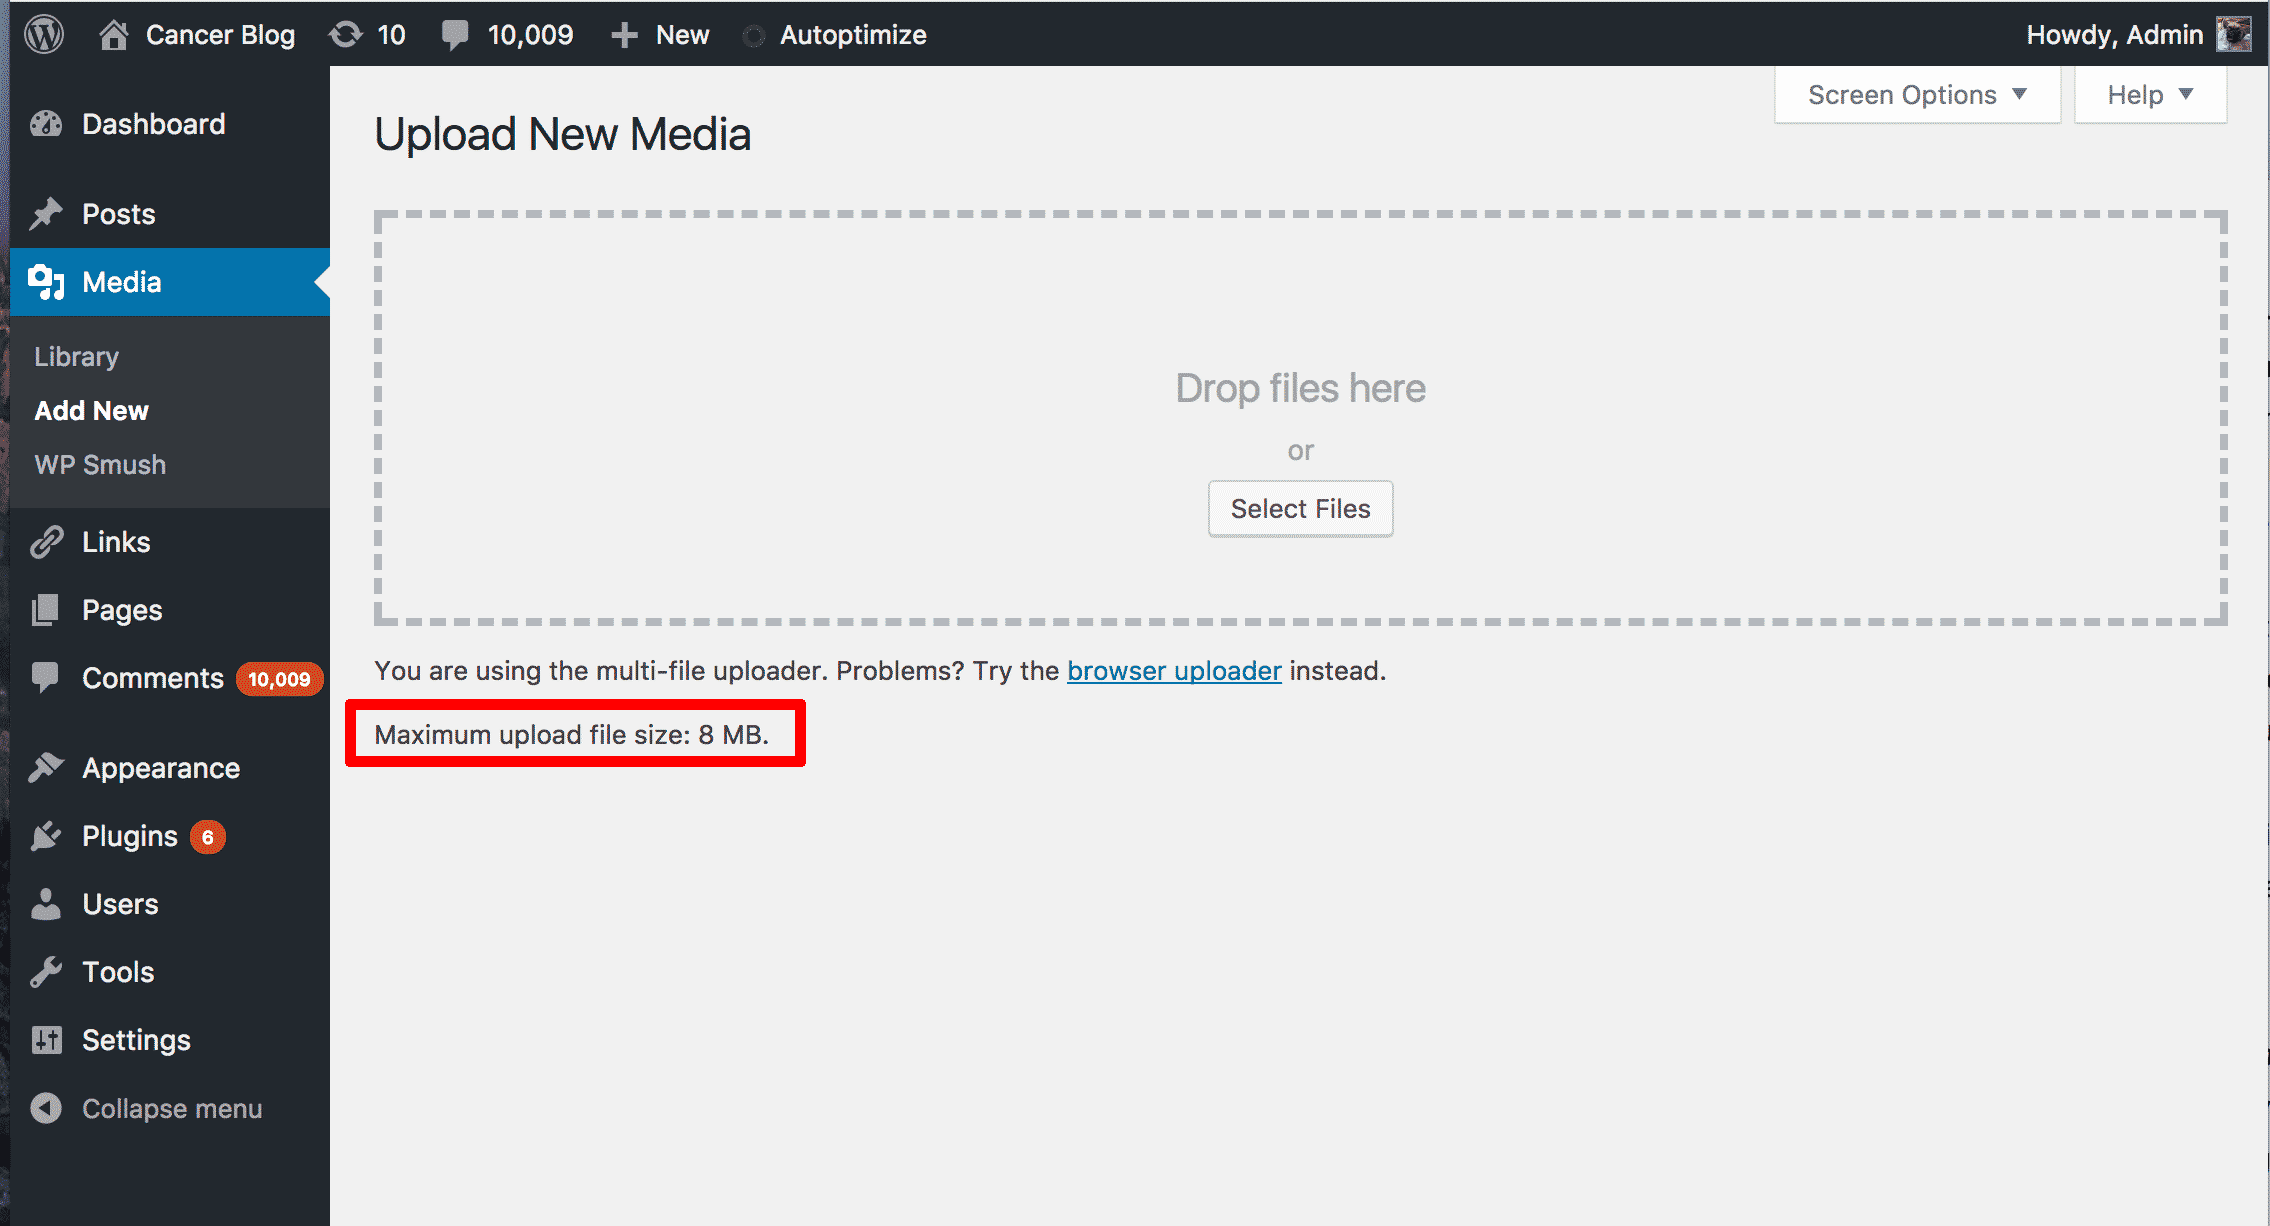
In our case, we have a max upload file size of 8 megabytes. Increasing the max upload size can sometimes be a little tricky because it can be accomplished in so many ways. The method that eventually works will depend on your server and WordPress configuration. Try the methods listed below until you find one that works.
#1 — Update your php.ini file
WordPress is built on a programming language called PHP. Each server with PHP installed has its own PHP configuration files. The configuration files control how PHP handles files, allocates memory to scripts, and much more.
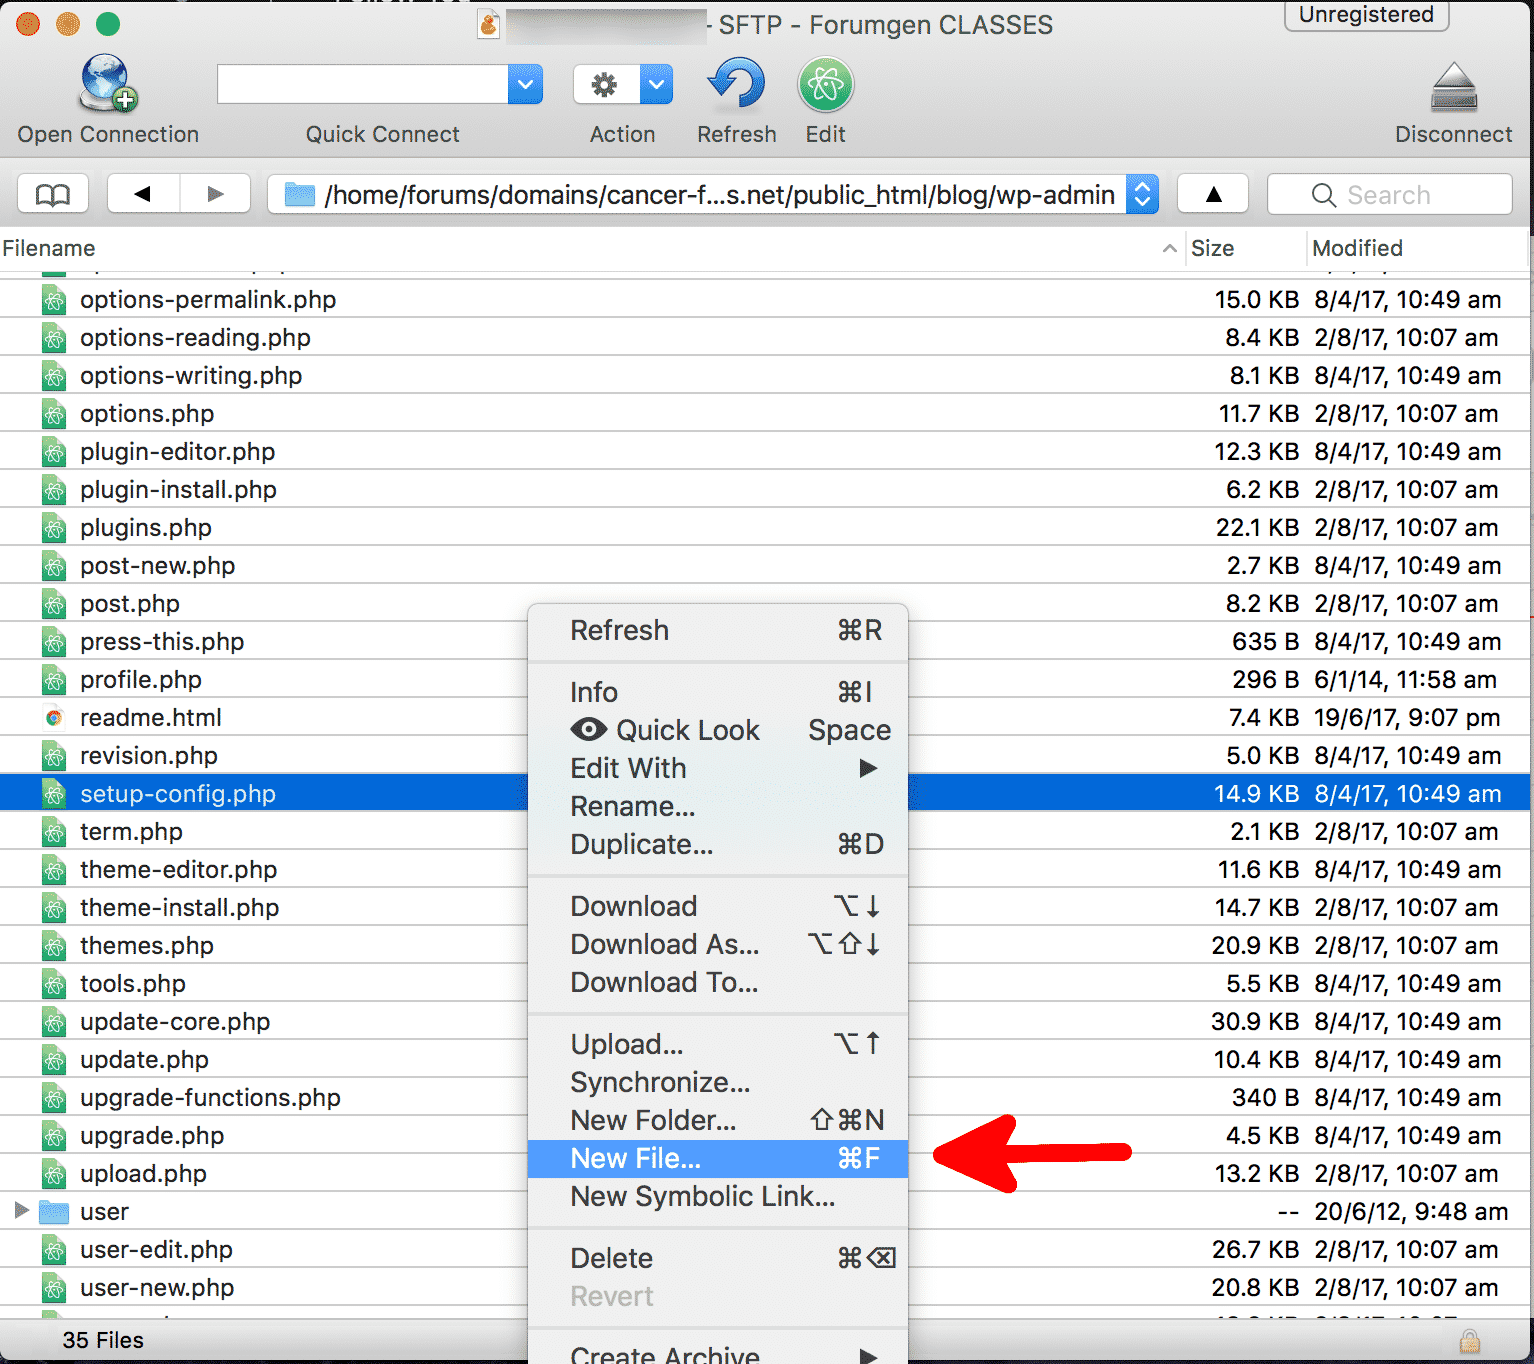
Most servers allow users to tweak certain aspects of the PHP configuration. This can be done by editing or creating a php.ini file in the wp-admin directory.
Start by logging into the CPanel file manager or your favourite FTP client. We’ll be using Cyberduck. Navigate to your WordPress installation directory, then into the wp-admin folder. You will require the server’s IP address, your FTP username and your FTP username. These details can be obtained from your web host. If you are using cPanel’s file manager, make sure you have “show hidden files” checked.
If you have a php.ini file already present in the directory, you can edit it. If not, you will have to create it.
Add the following lines to the file and save:
upload_max_filesize = 1000M
post_max_size = 2000M
memory_limit = 3000M
file_uploads = On
The M means megabytes, so these settings will allow us to upload files that are up to 1,000 megabytes in size. We also updated the post_max_size and memory_limit to ensure PHP saves enough resources to handle your large upload. Once you have saved your php.ini file, clear your browser cache and try uploading the file again to see if it works.
If this change does not fix your upload issue, you can try renaming the file to php5.ini as some server configurations look for configuration files with this name. If it still does not work, the server may be ignoring these configuration files or they are being overridden elsewhere.
If you own the entire server, you will have access to the main php.ini file, which is usually found in /etc/php.ini. Just be aware that changing this file will change max upload settings for all users of the server.
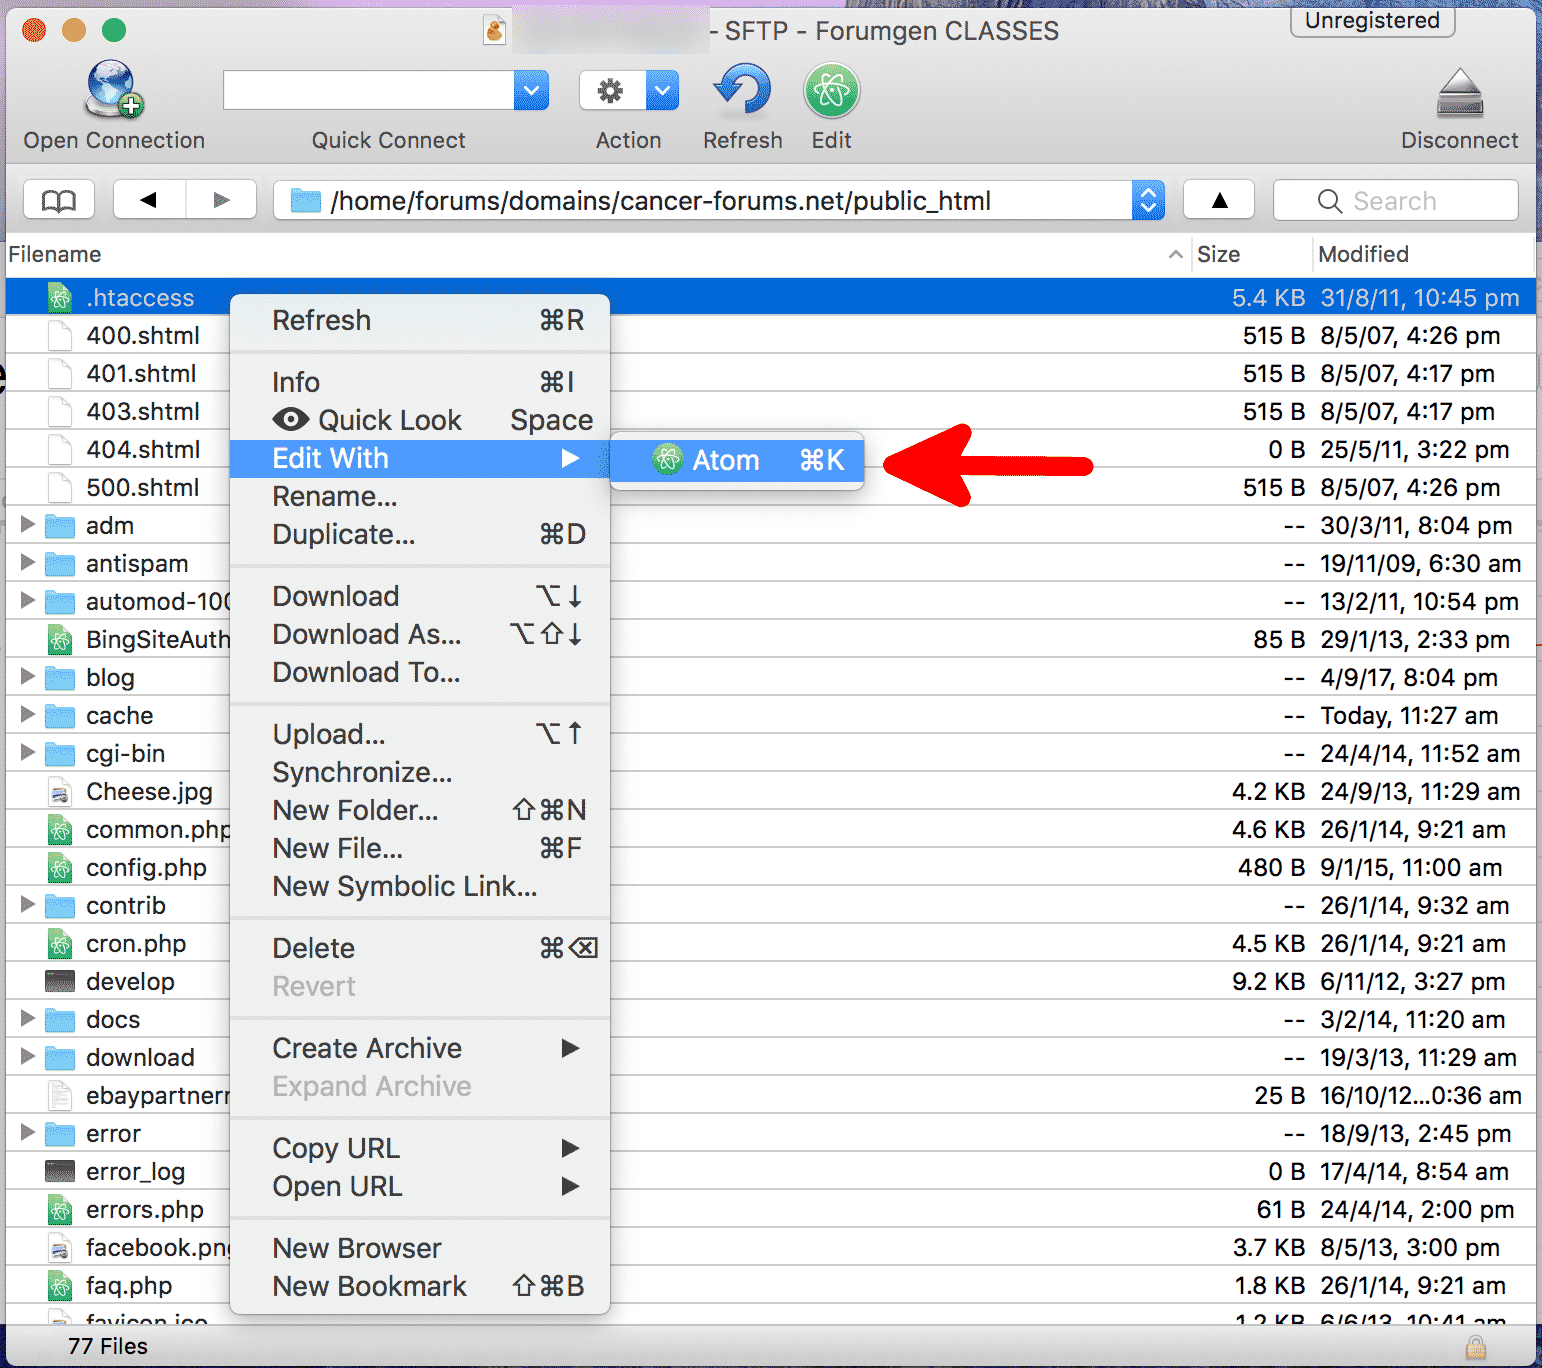
#2 — Change your .htaccess file
The next option involves changing the .htaccess file that is located in the root directory of your WordPress installation. Using a text editor, add the following lines to the bottom of the .htaccess file:
php_value upload_max_filesize 1000M
php_value post_max_size 2000M
php_value memory_limit 3000M
php_value max_input_time 180
This solution should work if your server is looking for PHP settings inside of .htaccess files. Remember to clear your cache before testing if this solution has worked. This is the solution that usually works on our servers!
#3 — Changing the limits on your web host software
If you have a dedicated web server or a virtual private server, you should have access to a server control panel. This control panel will let you update certain settings, including the max upload size, max post size, and max execution time.
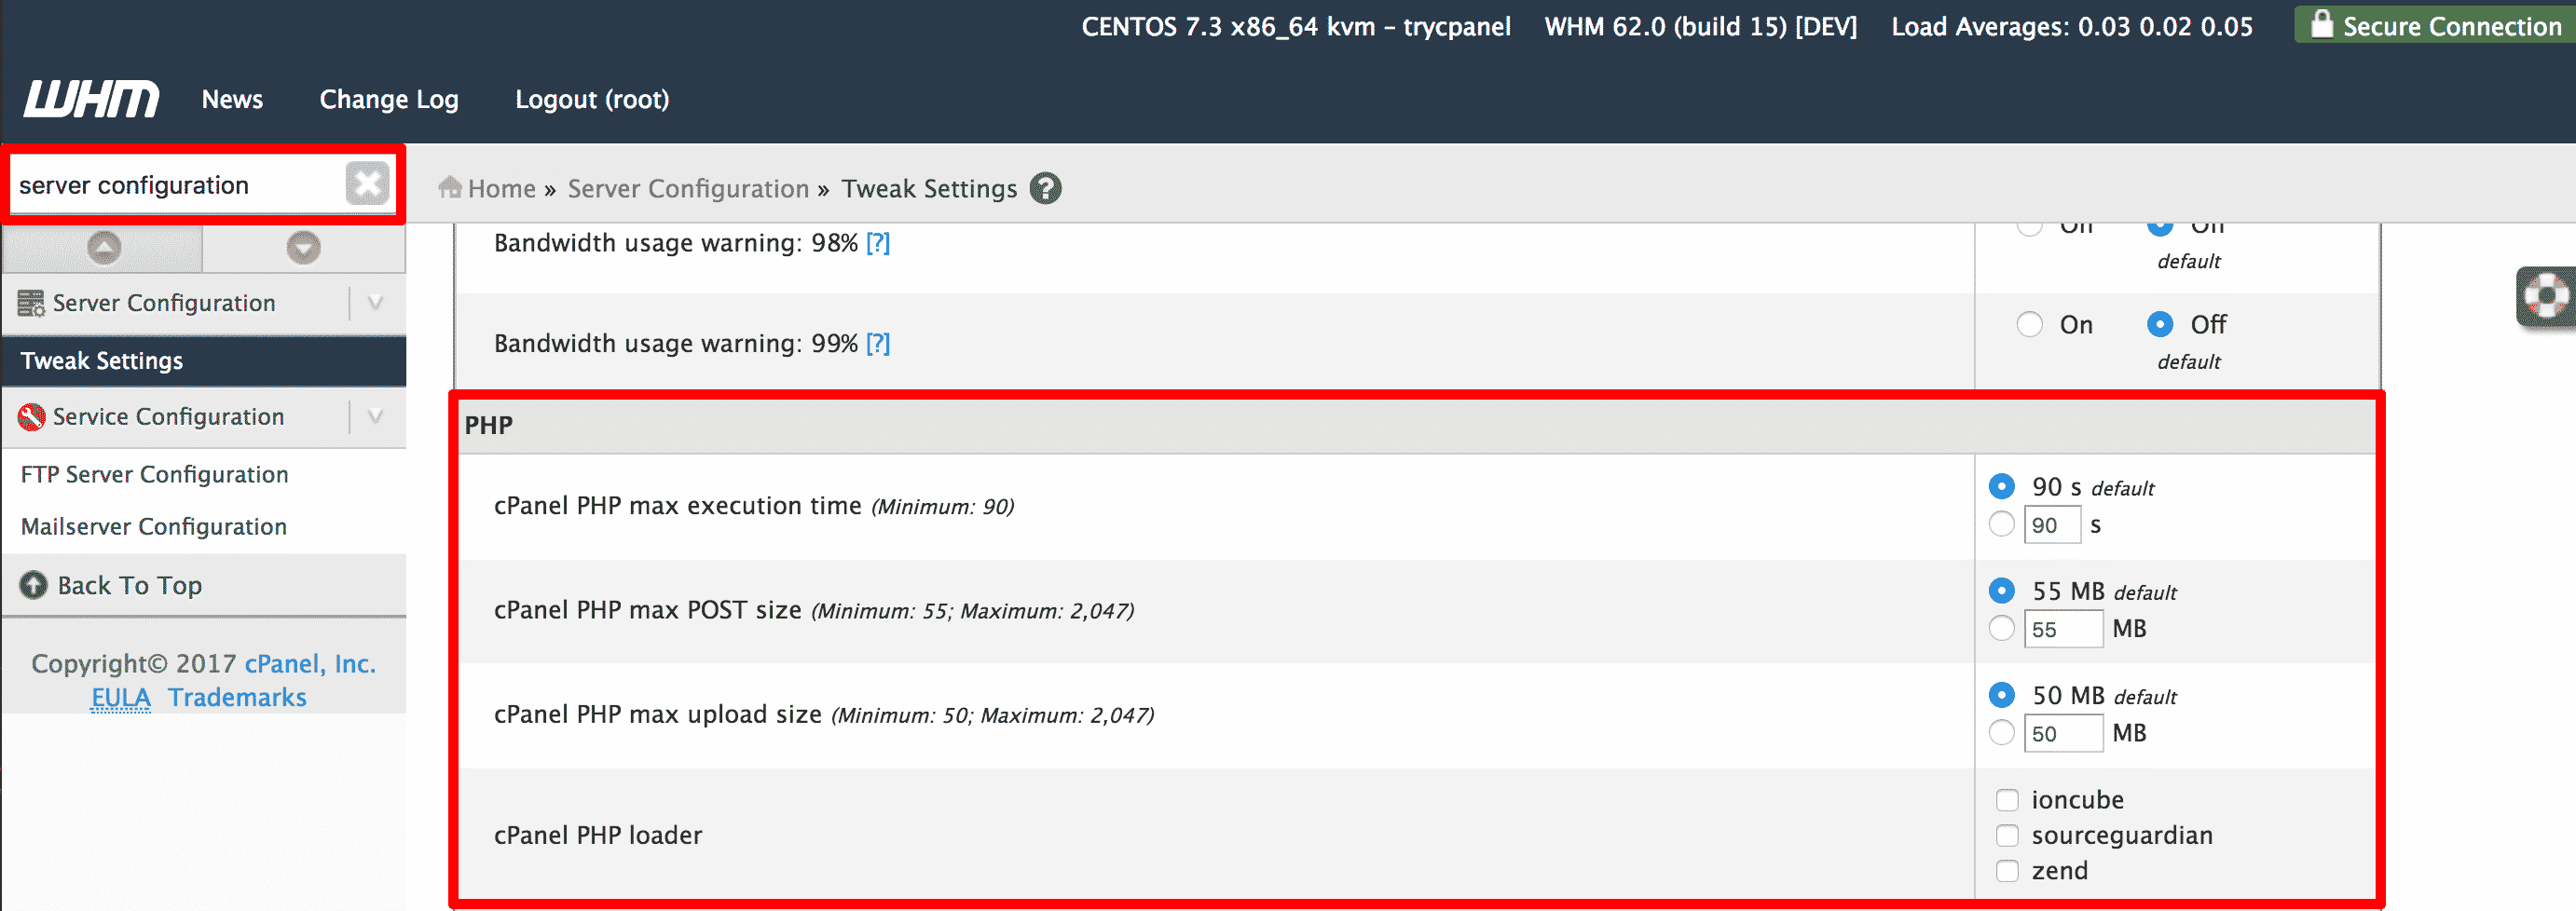
If you are using WHM, login and type server configuration in the top left-hand box. Click on Tweak Settings. Either click the PHP tab or scroll down until you reach the PHP section. You can alter the server’s max upload size, max post size and max execution time here.
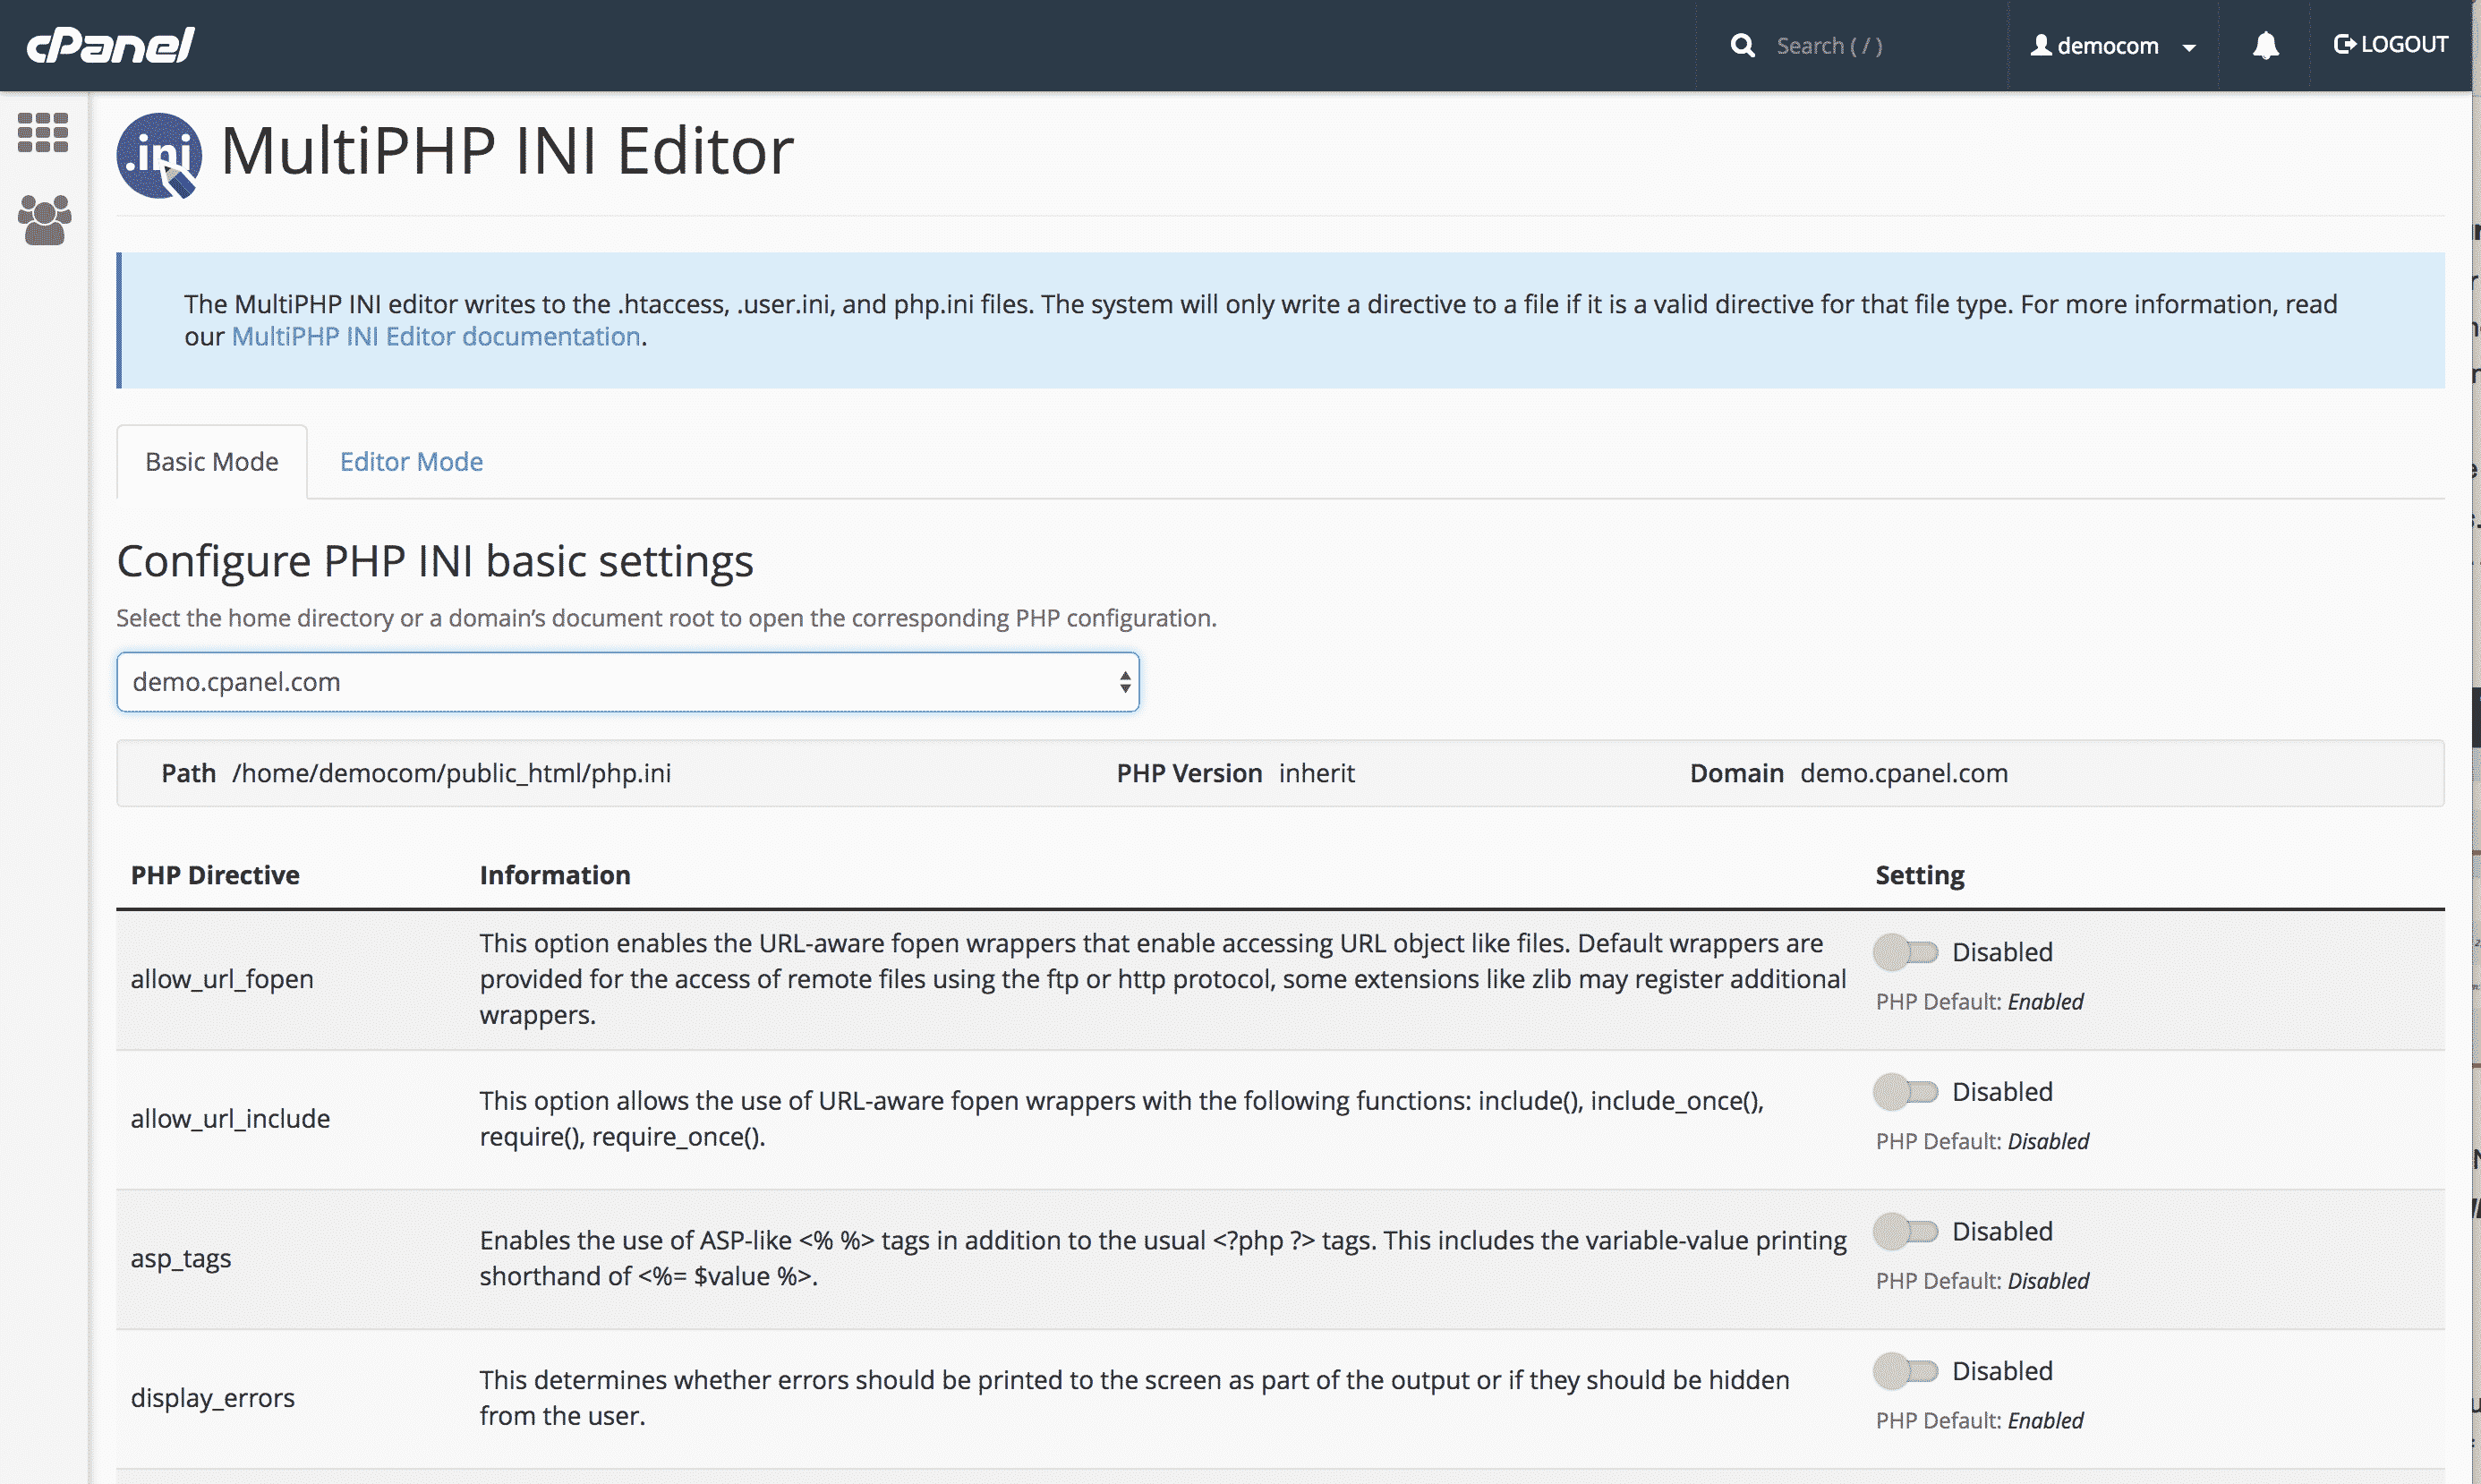
You can also use CPanel’s MultiPHP INI Editor to edit your php.ini file more efficiently. Log into cPanel and click on MultiPHP INI Editor. Scroll down and alter the max upload size, max post size and max execution time.
#4 — Upload your files via FTP
If you are still struggling to upload your files, you may be dealing with a very restrictive web host that has lowered the size of uploads via WordPress. You could try uploading the file via FTP instead. Simply log into your server using a program like FileZilla or Cyberduck to upload your file.
#5 — Ask your web hosting provider for help!
If the techniques listed above have failed, your web server may have an unusual configuration. Contact your web hosting provider and ask them to increase the upload max file size for you!
Increasing the memory limit of PHP
If you receive errors when running large, memory intensive scripts or plugins, you may be exceeding the memory limit of PHP. If this has occurred, you will see an error that looks something like this:
Fatal error: Allowed memory size of 36574342 bytes exhausted (tried to allocate 123456 bytes) in /home/username/public_html/wp-includes/plugin.php on line xxx
Essentially, that means the plugin tried to obtain more memory to perform an action but failed. PHP uses these memory limits so individual scripts do not take up too many resources and slow the performance of the entire server. To increase the amount of memory that your PHP scripts can use, we need to change PHP’s memory_limit setting. This can be achieved using the following methods:
#1 — Update your php.ini file
You can update your php.ini file using the techniques described above. Simply increase the value assigned to your memory_limit. The below setting will increase the available memory to 3,000 megabytes:
memory_limit = 3000M
#2 — Change your .htaccess file
Edit the .htaccess file found in the WordPress root directory. Add the following line at the bottom of the file:
php_value memory_limit 3000M
#3 — Making changes to your wp-config.php file
If the first two methods have failed, you can try editing the wp-config.php file. The file is located in the WordPress installation directory. Simply open the file in a text editor and add the line:
define('WP_MEMORY_LIMIT', '3000M');
Add it just before the line that says:
/* That’s all, stop editing! Happy blogging. */
Save your file and clear your web browser’s cache to see if it has worked!
#4 — Make changes in cPanel or WHM
You can also use alter the memory limit in cPanel and WHM. If you are using WHM, login and type “server configuration” in the top left-hand box. Click on Tweak Settings. Either click the PHP tab or scroll down until you reach the PHP section. You can alter the memory_limit setting here.
Fixing maximum execution time errors
You may also encounter a maximum execution time error, which will look something like this:
Fatal Error: Maximum execution time of 5 seconds exceeded in /home/username/public_html/wp-includes/plugin.php on line xxx
This occurs when the server takes too long to handle a script, so decides to cancel its execution. Fortunately, this issue is easy to solve also! You can use the same approaches that you used for increasing the maximum file upload and memory limit. This time, we will be adding or altering the max_execution_time setting.
#1 — Update your php.ini file
Create or edit the php.ini file in wp-admin folder. Increase the value assigned to your max_execution_time. The below setting will increase the max execution time to 180 seconds:
max_execution_time = 180
#2 — Change your .htaccess file
Edit the .htaccess file found in the WordPress root directory. Add the following line at the bottom of the file:
php_value max_execution_time 180
#3 — Make changes in cPanel or WHM
You can also use alter the memory limit in cPanel and WHM. If you are using WHM, login and type “server configuration” in the top left-hand box. Click on Tweak Settings. Either click the PHP tab or scroll down until you reach the PHP section. You can alter the max_execution_time setting here. You can also use cPanel’s MultiPHP INI Editor to change the php.ini setting.
Thanks for reading How To Increase Maximum Upload & PHP Memory Limit in WordPress! For more WordPress hints and tips, subscribe to our blog!
 234 customers signed up in the last 30 days