")
Many of the plugins available for WordPress are designed to improve its core functionality. The TinyMCE Advanced plugin falls into this category. It transforms the WordPress rich text editor into a fully-featured WYSIWYG editor.
TinyMCE makes it easy to add tables to a WordPress post as well as creating complex layouts. It also gives the user easy access to fonts, advanced lists, date and time functions, CSS styles, visual characters, and much more. It supercharges the WordPress text editor and turns it into the kind of editor found in fully featured applications like Microsoft Word or OS X Pages.
This post will explain how to install the TinyMCE plugin in WordPress discuss some of its most powerful features.
Table of Contents
What is a WYSIWYG Editor?
WYSIWYG (pronounced “wiz-ee-wig”) is an abbreviation of What You See Is What You Get. It is an editor that allows you to see the end result of your document while you are making edits to it. It is a very useful type of editor for making web pages and blog posts because it gives you more creative control over the page, avoiding you jumping off the page to see the end result. You will immediately see how your changes affect the finished page. Using a WYSIWYG editor can also make editing a page faster because you don’t have to continually preview the page to see the end result.
Installing TinyMCE Advanced
Installing the TinyMCE Advanced plugin is simple!
1. Log into your WordPress installation
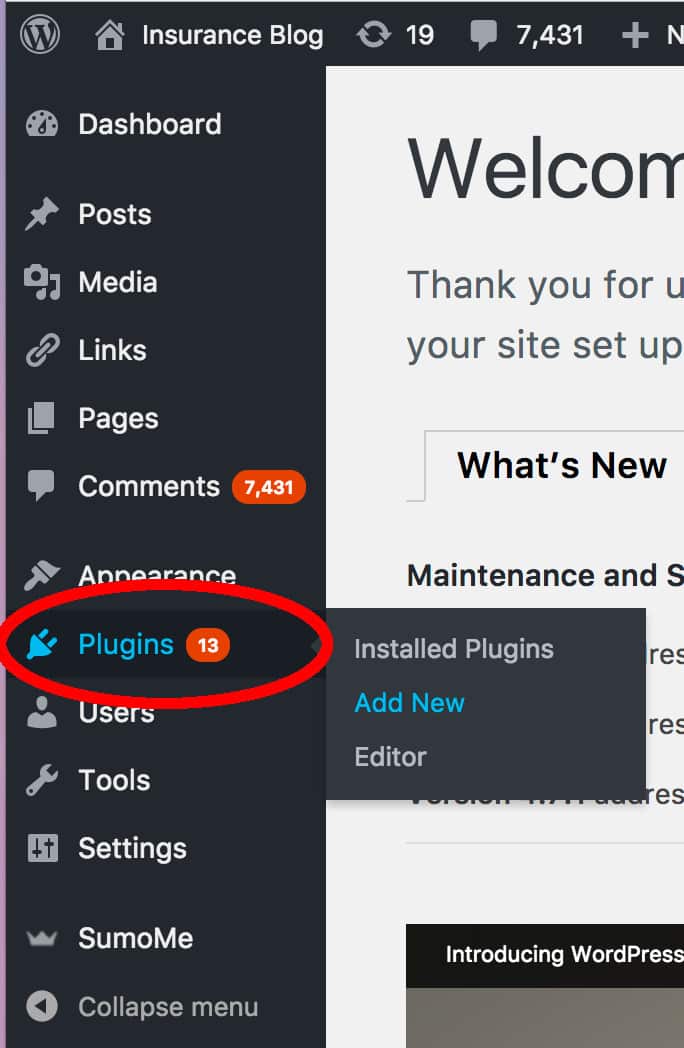
2. Hover over the “Plugins” menu item on the left-hand menu and click “Add new”
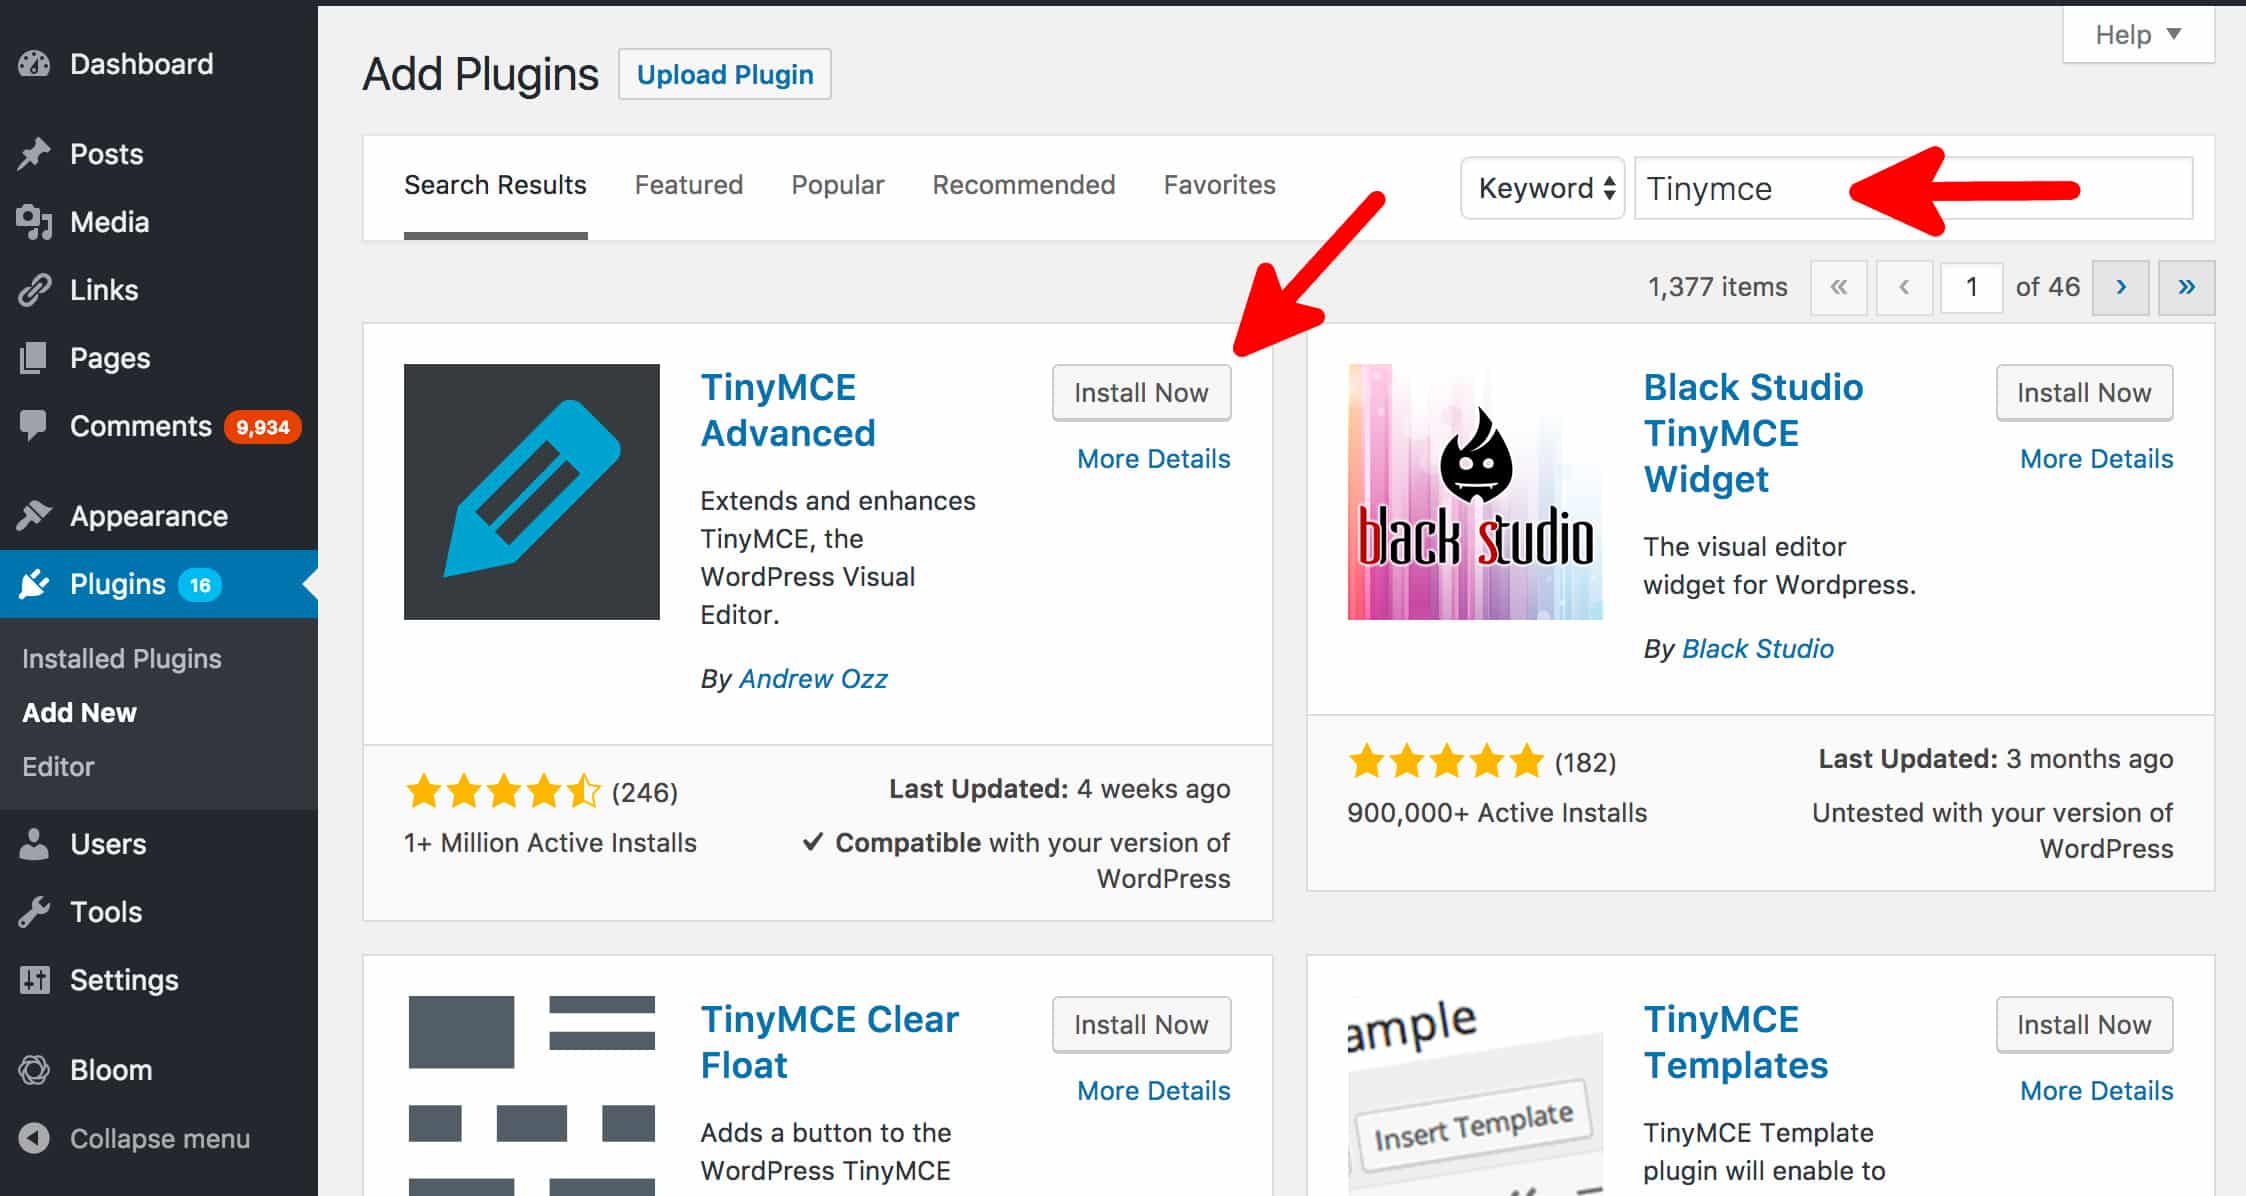
3. Search for the TinyMCE Advanced plugin by typing “TinyMCE” in the right-hand search box. In a couple of seconds, the search results will appear. When they do, click the Install Now button indicated.
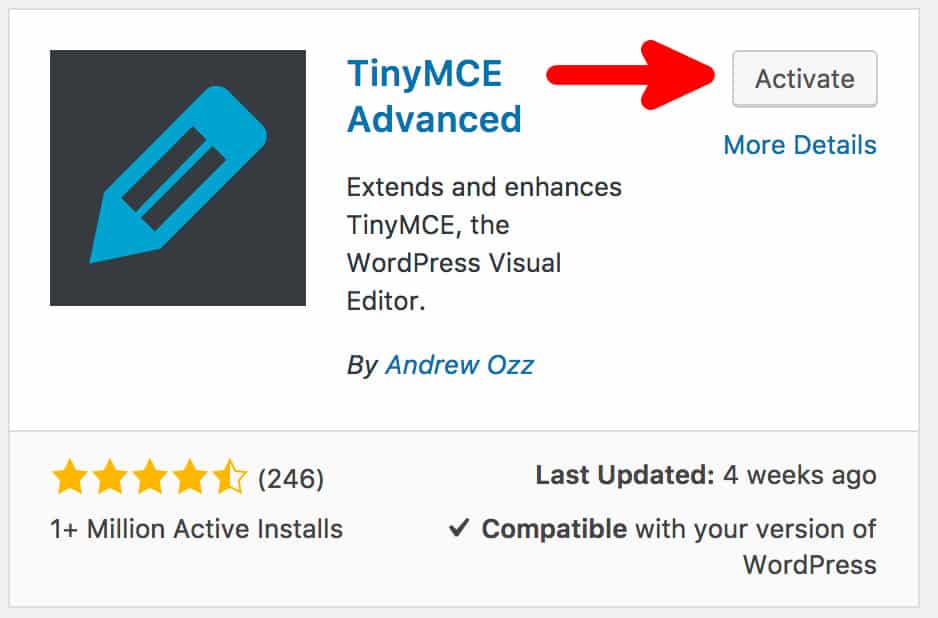
4. Once it is installed, click on the Activate button.
Configuring TinyMCE Advanced
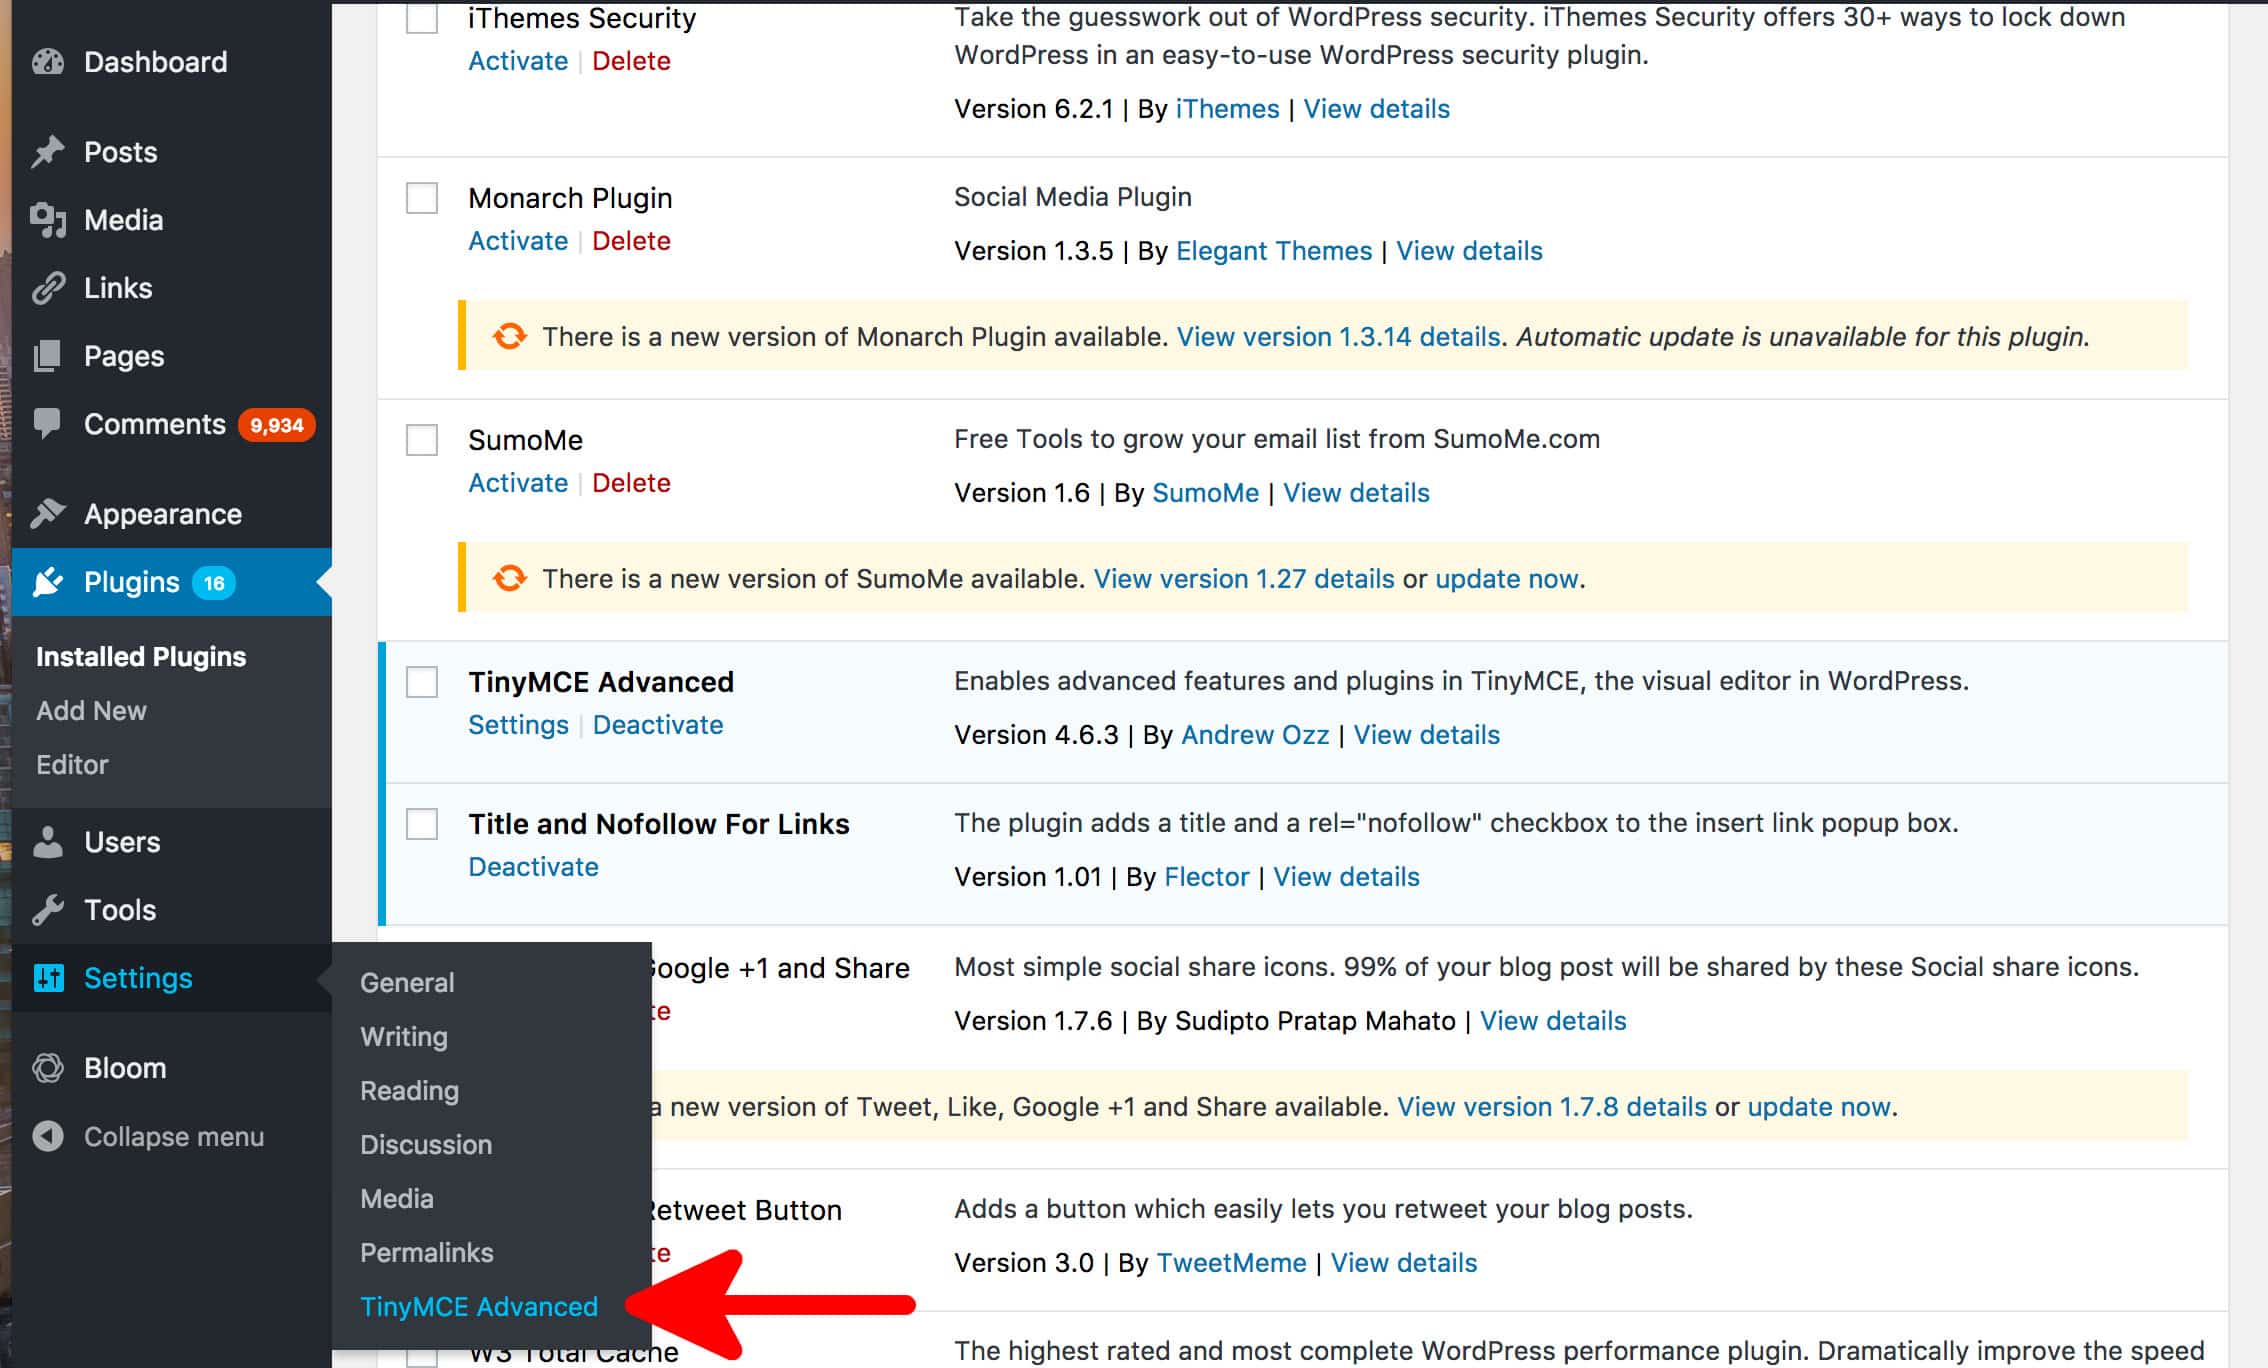
Before we start using TinyMCE to create a post, let’s check out the configuration options. Click on Settings > TinyMCE Advanced.
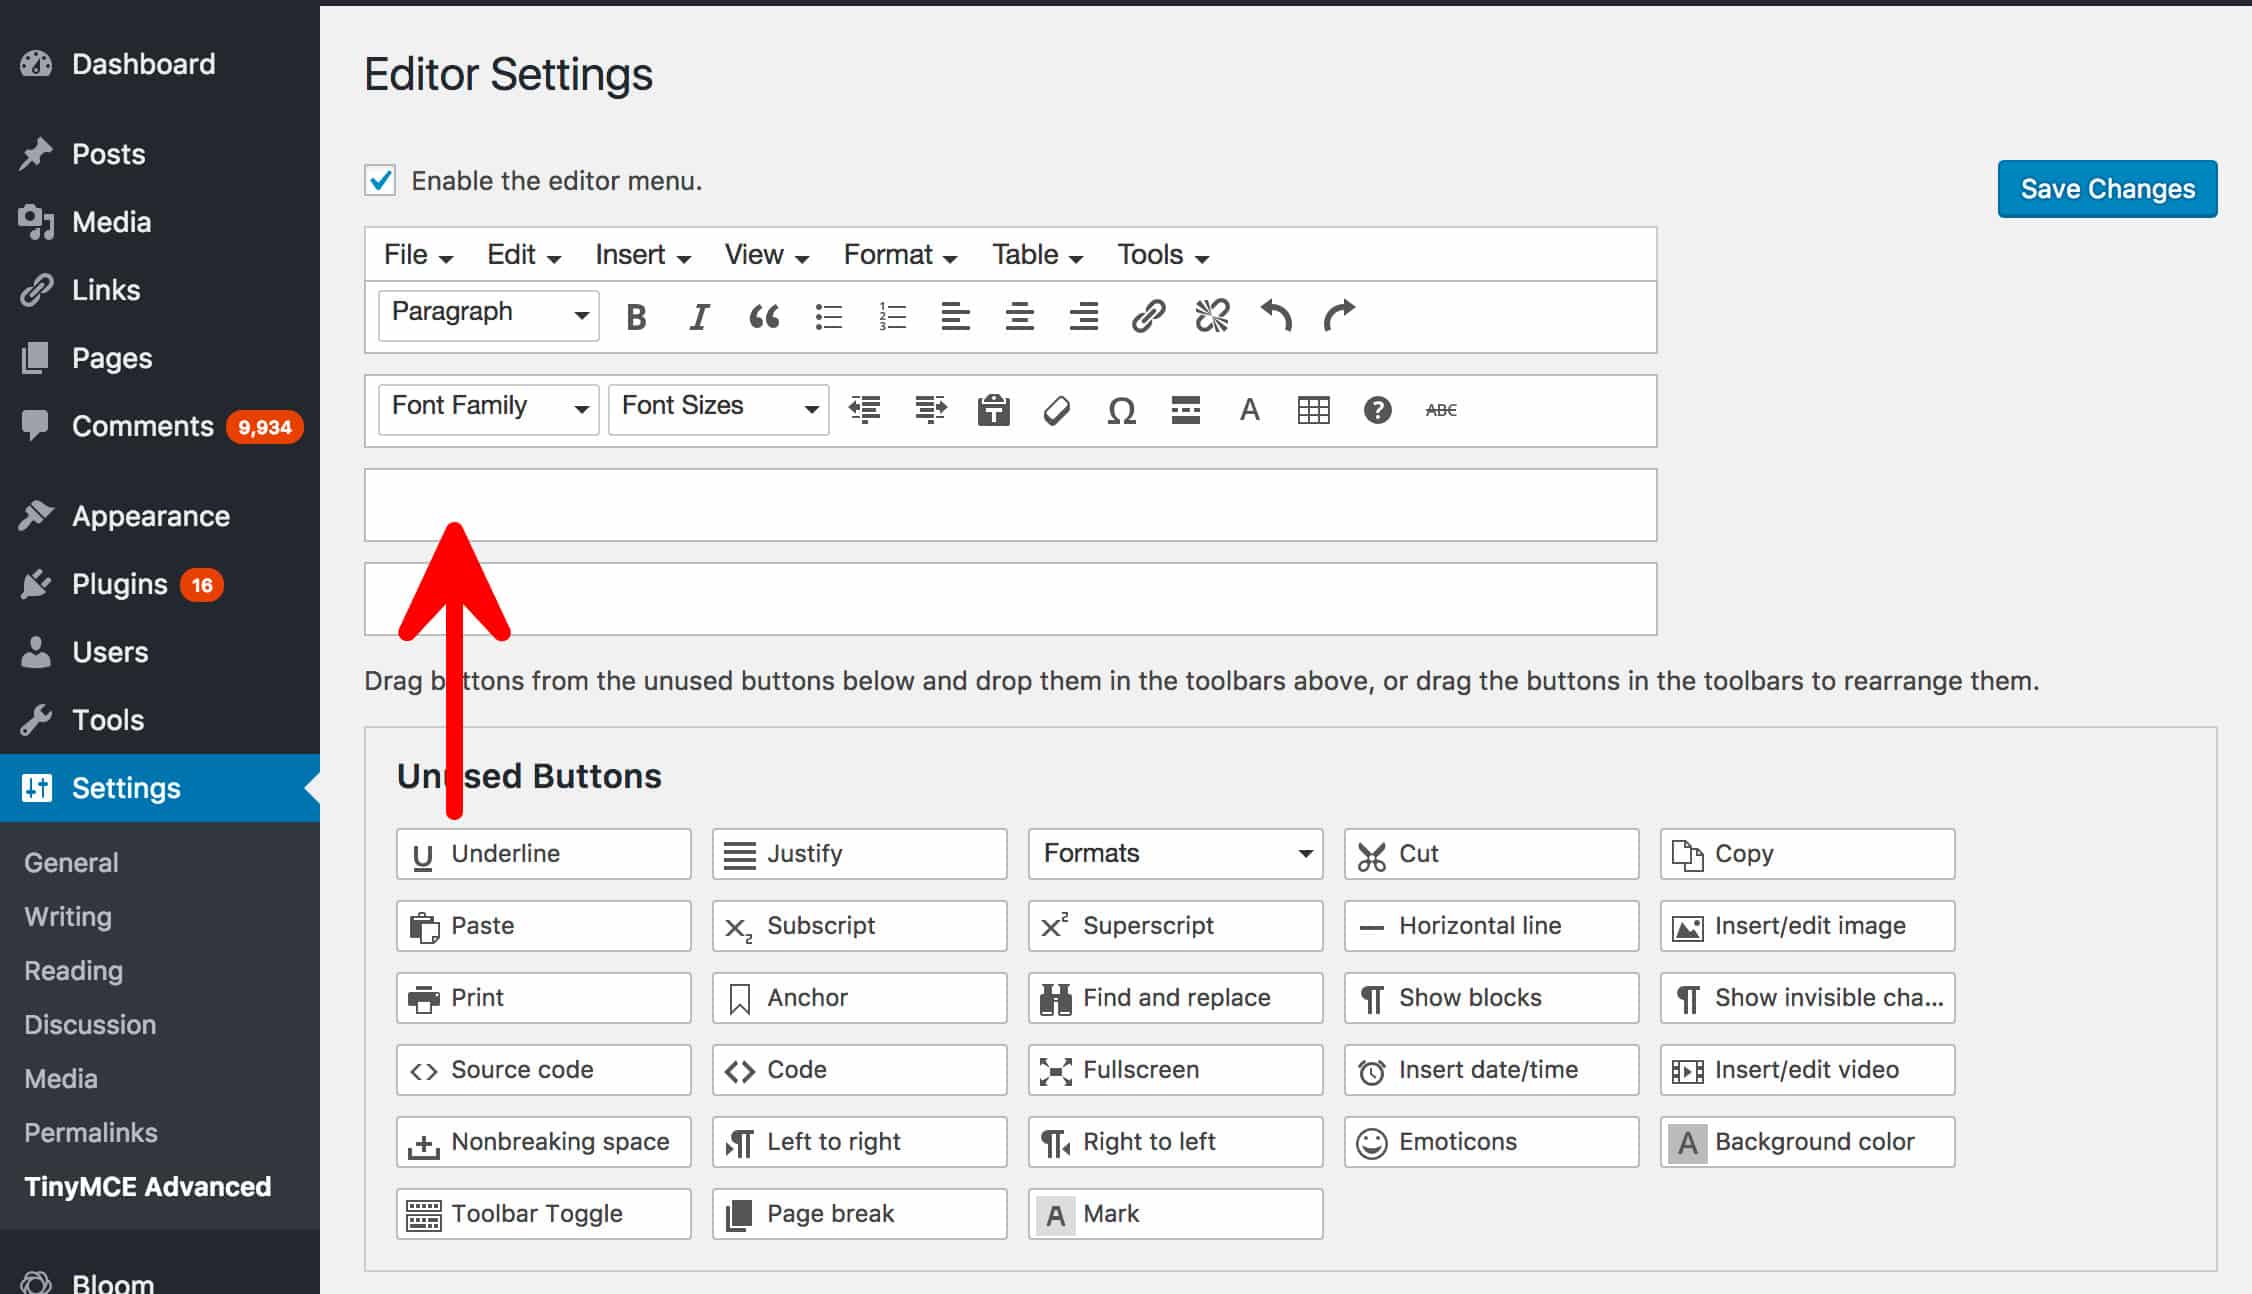
There are four sections in the TinyMCE Advanced configuration section:
Unused Buttons
The buttons that are included in the TinyMCE editor are completely customisable. You can change which buttons are displayed on the editor by simply dragging and dropping them on this screen. Drag a button from unused buttons to one of the empty rows on the example editor at the top of the screen. Try dragging a few buttons up. You can also remove existing buttons from the editor. Don’t forget to click Save Changes after making your modifications.
Options
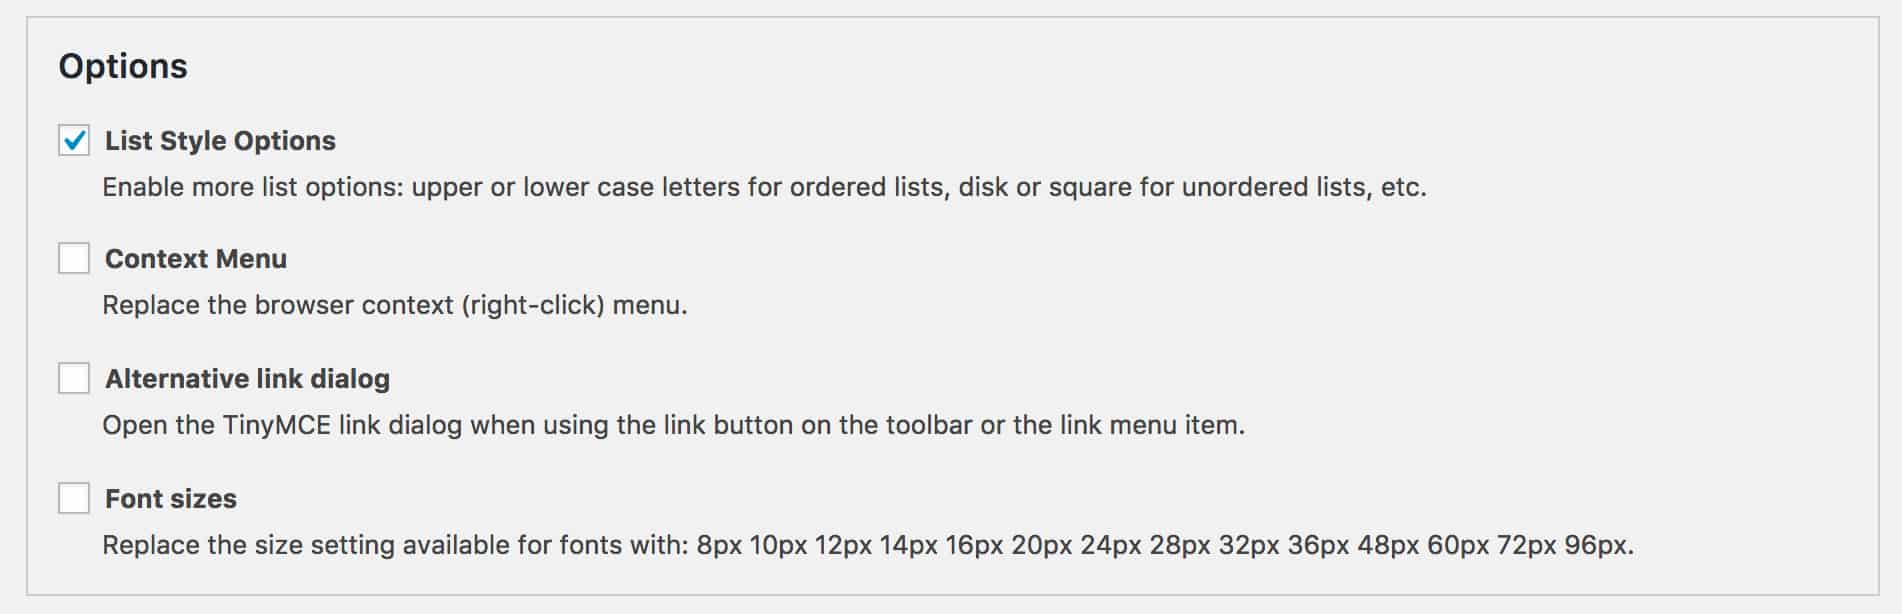
The options for TinyMCE are fairly self-explanatory and include:
- List Style Options: Add more features to the drop-down lists in the editor
- Context menu: Make it so right click brings up more text editor options
- Alternative link dialogue: Checking this will give you a different popup when adding a link to the text. This popup will have options.
- Font sizes: Change the font sizes displayed in drop-down boxes
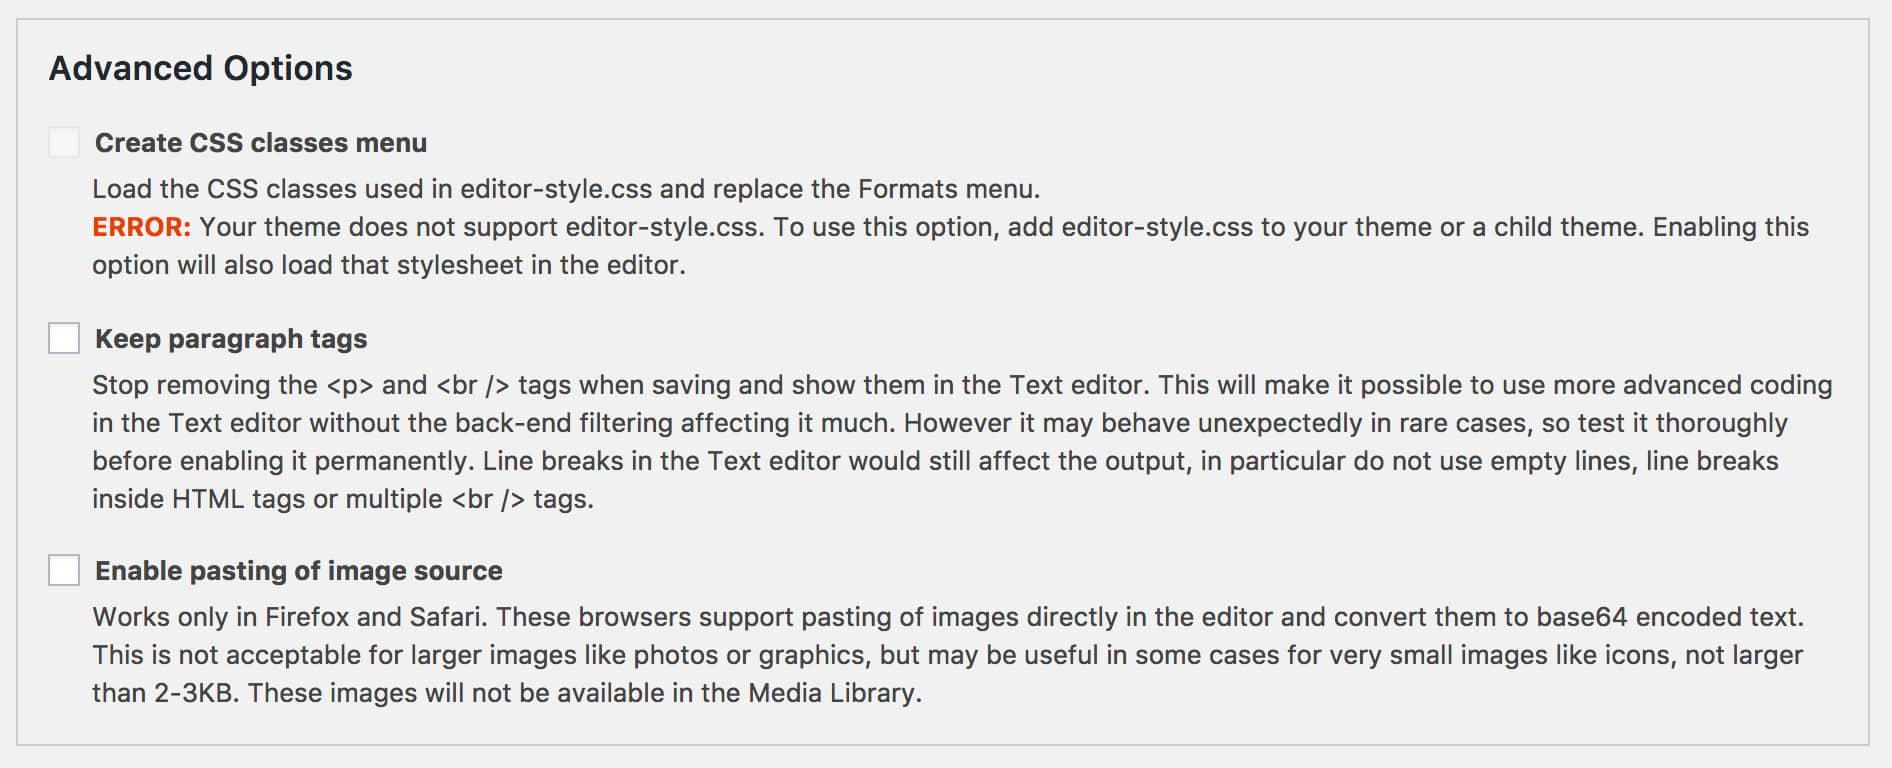
Advanced Options: This section gives you setting for adding more CSS classes to your drop-down menus, keeping paragraph and line break tags in place, and enabling drag-in images for posts.
Administration
This section allows you to export or import your TinyMCE Advanced settings. You can also select which editor you wish to replace with TinyMCE Advanced.
Using TinyMCE Advanced
Head over to Posts > Add New to see the TinyMCE editor in all of its glory! If you were previously using the default WordPress editor in Text mode, click on the Visual tab.
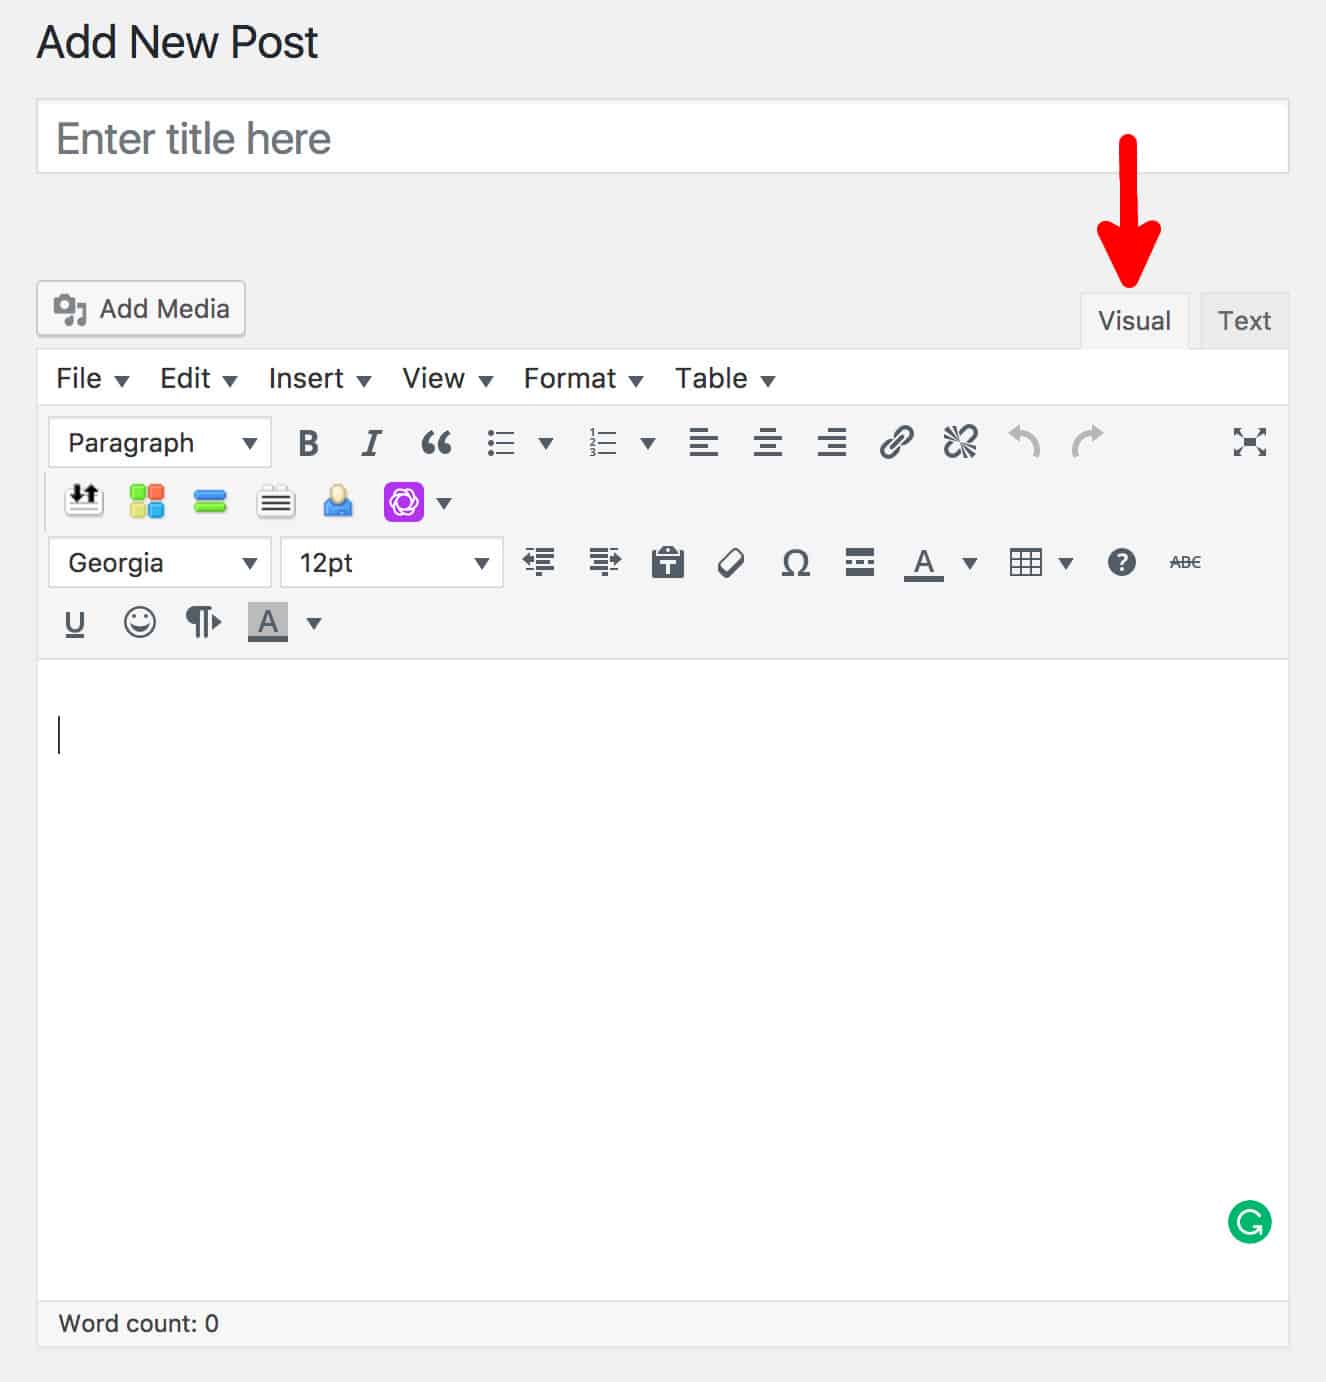
The WordPress editor now resembles a powerful and feature-rich text editor. If you have used TextEdit or MS Word before, the layout should be fairly familiar.
The top menu items include:
- File Menu: Allows you start a new document.
- Edit Menu: Common word editor functions like undo, redo, cut, copy, paste. You can also use “paste as text” which inserts any text you have copied as plain text without styles.
- Insert Menu: Lets you insert media, page breaks, horizontal lines and read more tags.
- View Menu: Allows you to turn off or turn on visual aids that help you edit the document. You can also toggle full-screen mode here.
- Format Menu: Contains formatting styles you normally see in a text editor, including bold, italic, underline, strikethrough, superscript, and subscript. It also contains the Clear Formatting button, which is very useful for removing any unwanted formatting from your text.
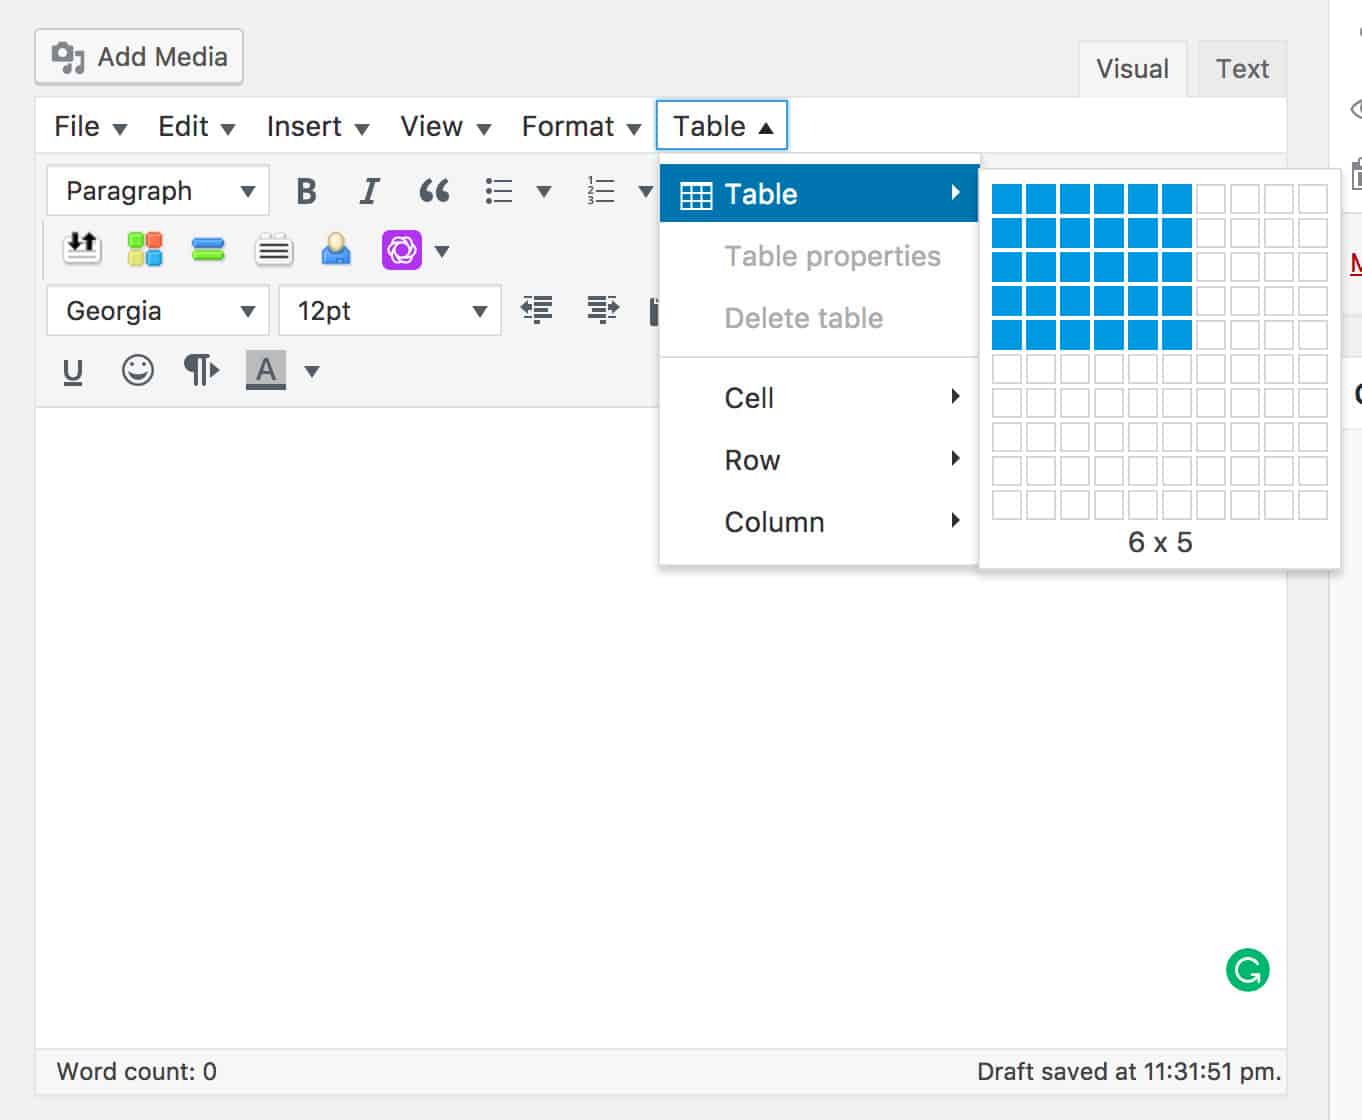
- Table Menu: TinyMCE Advanced makes it simple to insert tables into your WordPress posts. It uses a very intuitive diagram that lets you quickly specify the size of your table. The Cell, Row, and Column menu items allow you to reshape your table, expanding cells and changing the overall size of the table. It is perhaps TinyMCE’s most powerful feature.
Some of the many powerful features available in the editor include:
- Insert HR: Let’s you insert a horizontal ruler across your page
- Insert Images: Insert images and edit image metadata. TinyMCE also lets you resize images in the post.
- Insert Link: Insert links to text and images. Similar to the default functionality in WordPress
- Emoticons: This button lets you insert emoticons (smiley faces) directly into the page
- Date and Time: Insert the current date and time into the post
- Insert/Edit Media: For inserting other types of media files
- Nonbreaking: Adds a non-breaking space to the page.
- Search and Replace: Lets you search and replace words in your post.
- Style: Lets to import CSS classes from the style sheet used by your theme.
- Table: Extremely powerful table management.
TinyMCE Premium Plugin
TinyMCE also offers some premium plugins that can be purchased directly from TinyMCE website. Premium plugins currently cost $0.40 per monthly active user each month. There is also a bundle that includes the most popular premium plugins. Some of the plugins available include:
- Spell Checker Pro: Adds a powerful spell checker to TinyMCE.
- Accessibility Checker: Ensures that your pages are readable by people with visual impairments.
- Link Checker: Ensures the links you add to each page are working.
- Powerpaste: More advanced copy and paste functionality.
These plugins can really supercharge your TinyMCE installation and are particularly useful for power users.
We hope you enjoyed reading TinyMCE Advanced: The Most Powerful WYSIWYG Editor For WordPress! For more WordPress plugin guides, subscribe to the blog or follow us on social media.
 194 customers signed up in the last 30 days